Blog
All Blog Posts | Next Post | Previous Post

 Extend TMS WEB Core with JS Libraries with Andrew:
HexaGongs Part 4 of 5: Options (Image and Audio)
Thursday, June 15, 2023

Welcome to Part 4 of our miniseries on developing our TMS
WEB Core project - HexaGongs. In our last outing, we set out to create an Options dialog with an emphasis on using hexagons in the styling of
all of our components. We managed to cover quite a few - edits, memos, buttons, range sliders, and even a
hexagonal color picker. This time out, we're going to use many of those again in finishing up our Options dialog
with a page for handling images and one for audio.
Contents
- Image Sources.
- Icons.
- XData.
- Icons Incorporated.
- Missing Gradients.
- Uploading Images.
- Linking Images.
- Image Adjustments.
- Panning and Zooming.
- Audio Data.
- Audio Clips.
- Web Audio API.
- Master Volume.
- Audio Uploads.
- Audio URLs.
- Recording.
- Audio Preview.
- Audio Adjustments.
- Next Time.
Image Sources.
When it comes time to select an image to represent a particular HexaGong, we want to provide as many options as possible. Icons are a natural choice, and we've recently explored how to get access to enormous icon libraries in this blog post. Allowing for links to images also makes some sense - something that can easily be copied and pasted into our app. And loading images directly from the local filesystem rounds out our options here.
The first thing we'll need is the option to choose between these three scenarios. We already created the equivalent of radio buttons in the last post, which were used to select background styles, so we can do the same here for our three options. We'll also need a TWebEdit component to either enter the URL or show the icon or filename that has been selected. This element will also serve as the trigger for showing the icon and file selectors.
For icons, we're going to use the XData approach to hosting icons as was covered in that blog post. This gives us access to the most icons with the least impact on the client. There are trade-offs with this approach. There is a need to communicate with the server to search for icons, but once we've got them, that isn't required. There's also the need to have an XData server in the first place, but as that has always been the plan, that's not a new requirement just for access to the icons. And by taking this approach, we'll end up ultimately with an SVG icon that we can use.
For URLs, we're just presenting a text field for someone to paste a URL into. We're going to use that URL by
assigning it to an <img> src attribute, the simplest and most direct approach.
For Uploads, we'll just be asking the user to supply an image. This will be retrieved and stored as Base64-encoded data that we can then apply to our image as a Data URI (aka a Data URL) and use without having to do much of anything else. The
trickiest part here is to just get the image in the first place, but even that is not too difficult.
Icons.
In our blog post about icons, we covered various approaches for including user-selected icons in our projects. We're going with the XData approach here, so the main thing we need in our app is a place to present the search interface. We created such an interface previously, so we'll just plunk down a hexagonal variant of that here.
Given how our Options dialog is arranged, we'll put all the controls that we need at the top and then let our SimpleBar scrollbar take care of the results when more icons are returned than fit in the window. Generally speaking, one of the design objectives here (entirely arbitrary) is to never display a page with more than one scrollbar, and certainly, not more than one scrollbar that could scroll the same part of the page (no nesting, in other words).
We'll
also leave out the part about selecting icon sets as this isn't as likely to be used in this setting, and we'll
also leave out the range slider used for sizing as we'll have another opportunity to deal with the icon sizes
later. And adjusting the sizes in this view is also not likely to be quite as much of a concern.
We're left then with the search, ok, and cancel buttons as well as the edit input field. We'll still need a
place to report information, like the number of search results, and the license information for the icons, plus a space for the icons themselves. This can be configured with what we've already covered previously. The buttons here use a variant of the main page selection buttons, and the rest of the fields are just
variations of the same title and TWebEdit components we've seen already.
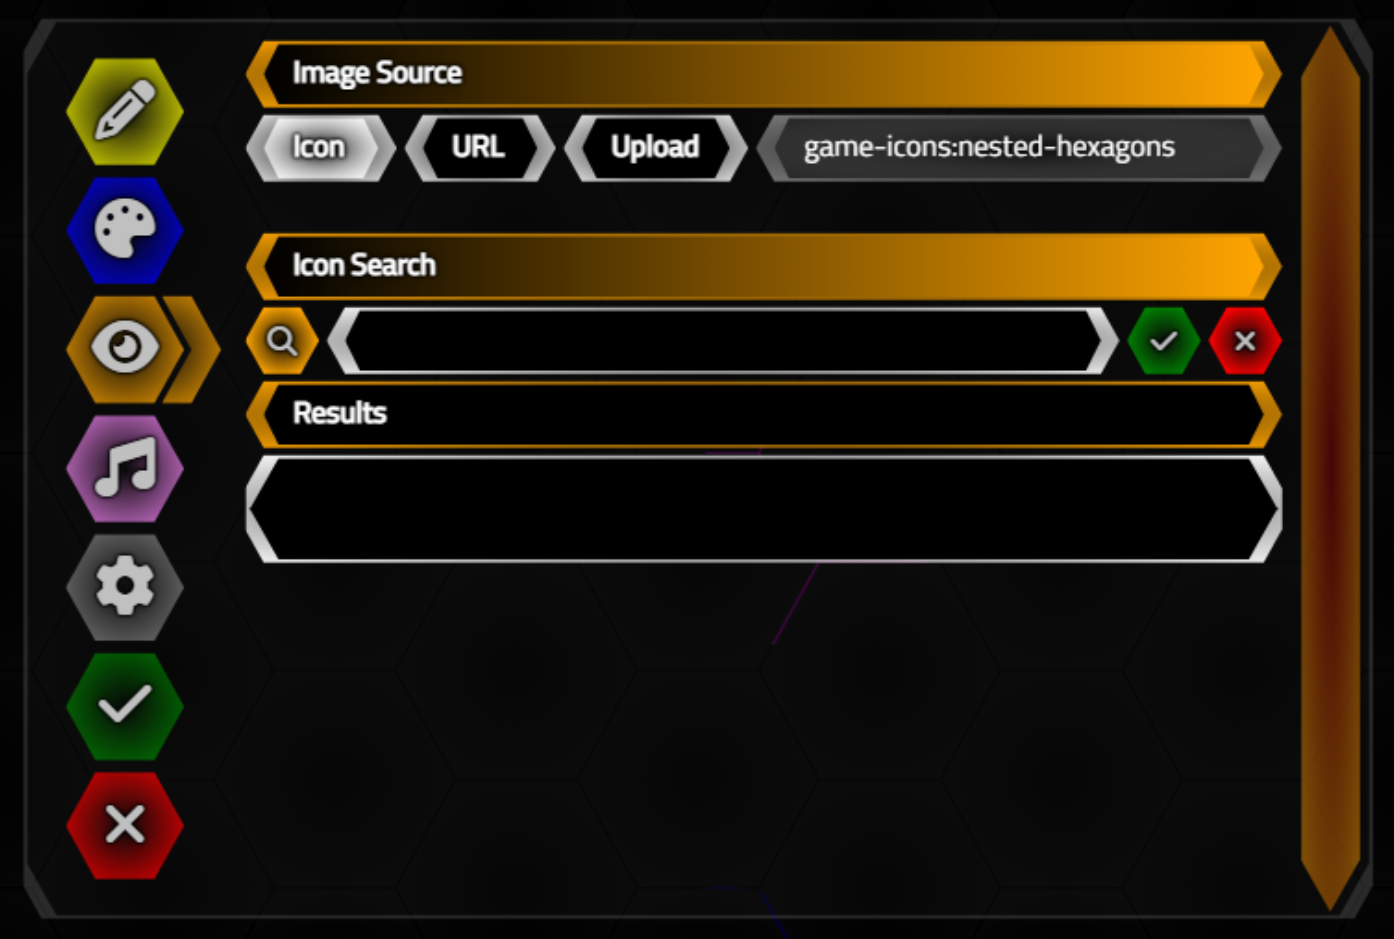
Icon Search Interface.
The results will be shown in a section, much like a TWebMemo component, so it will grow based on the results - with no
scrollbar of its own. This was chosen more to be consistent with the UI (only one scrollbar is ever present on a page) but
isn't particularly ideal as with lots of results the UI at the top will be scrolled off the page. But better
than having more scrollbars. Just an opinion, of course! Always more than one solution to this kind of
problem. Perhaps a future revision will have the top portion of this page set as "sticky", fixing them in place and allowing the rest of the page to scroll separately.
XData.
With that out of the way, we can't really do anything with the UI until we have some icons available. And as
we're using XData to provide the icons (and other functions a bit later), we'll need to get that set up. We've
used XData in a few of our projects now, so hopefully this won't present any kind of hurdle. We're essentially
just copying what we did in the Icons
blog post, using the same configuration with XData as we used there. This is also very similar to what we
covered in the Template
project.
Let's create a new XData project with its own GitHub repository, HexaGongsX, with the usual SwaggerUI configured, along with its own button. No need for JWT middleware, but we will enable both CORS and Compress middleware. And we'll pick a unique port for it to run on, say 65432. Doesn't really matter too much, as long as it is between 1024 and 65535. Be sure to use the TMS HTTP Config Tool to reserve whatever number is used here.
We can get a solid head start by just copying over Unit2.pas into our project from the XData Template Project, and
remove the database initialization code. It will complain about database objects, but just remove those as they
won't be needed either. There are other bits we don't need (like Chat support!) but there isn't much in the
startup sequence that has any impact on the project, and it saves quite a bit of time to start from there. That is the point of the Template project, after all!
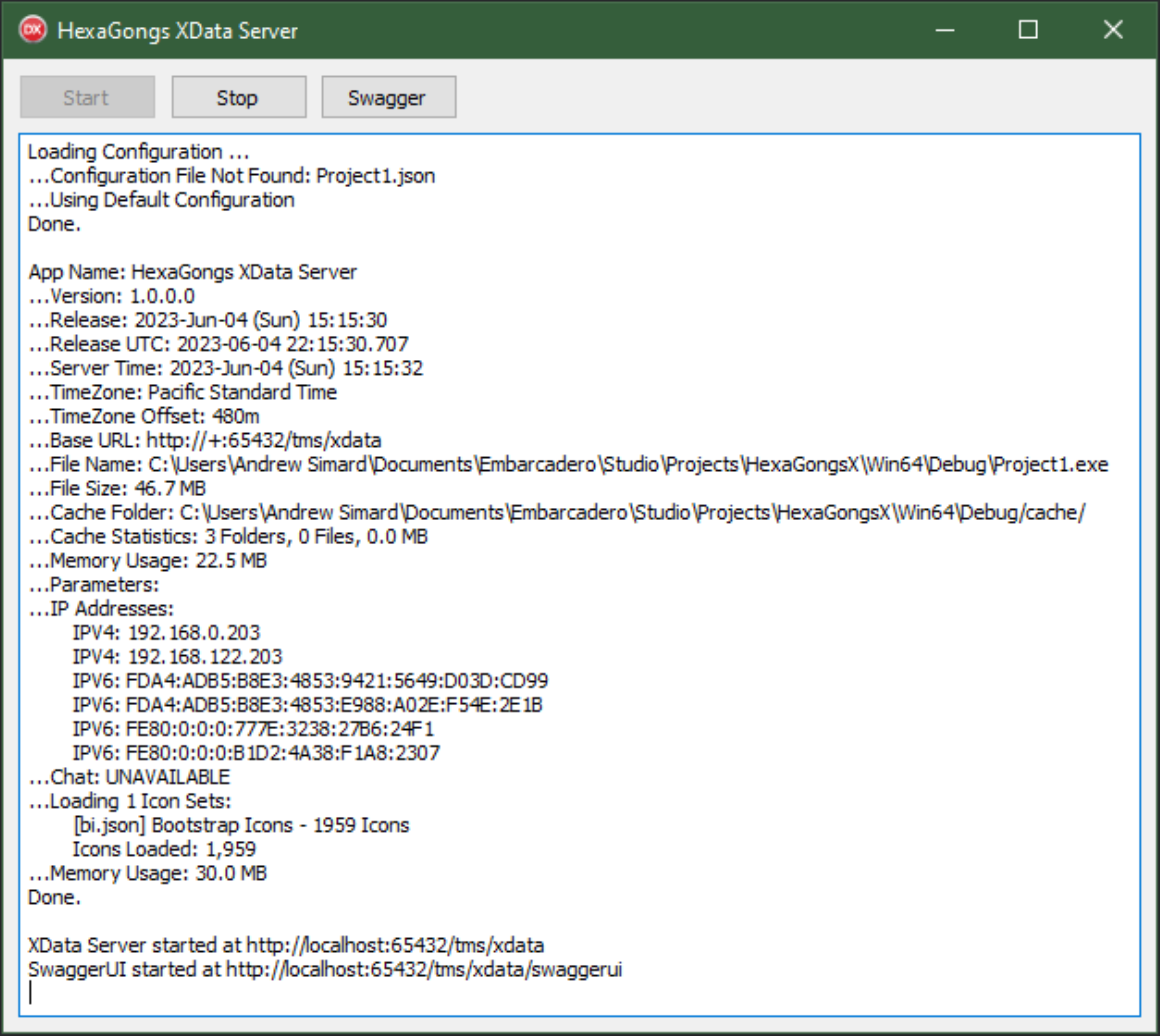
Initial Setup of HexaGongs XData Server.
As with the icons post, we'll need to configure XData to load up any icon libraries we make available to it. And
then create an endpoint that can report that number when asked. We'll start with just the Bootstrap Icon
library for testing, a thousand or so icons rather than 180,000+ icons make things a little easier to get
started. We'll need a new HexaGongs service to hold our endpoints and let's start it off with an
AvailableIconSets endpoint as well as a SearchIcons endpoint. Here's our interface for these two endpoints.
unit HexaGongsService;

interface

uses
  System.Classes,
  XData.Service.Common;

type
  [ServiceContract]
  IHexaGongsService = interface(IInvokable)
    ['{1756CAAA-25F4-4380-A6CE-7C514B0C5C06}']

    ///  <summary>
    ///    List of Icon Sets that are available for search and retrieval
    ///  </summary>
    ///  <remarks>
    ///    Returns a JSON array that includes the following.
    ///    - Name of Icon Set
    ///    - License Information
    ///    - Count of Icons included in Set
    ///    - Default Icon Width for Set
    ///    - Default Icon Height for Set
    ///
    ///    The order of the array should be used to identify which sets are to be included or excluded when a search is requested.
    ///  </remarks>
    [HttpGet] function AvailableIconSets:TStream;

    ///  <summary>
    ///    Performs a search for icons, returning whatever icons were found as a JSON array.
    ///  </summary>
    ///  <remarks>
    ///    The returned array is a JSON list of icons, including the SVG parts needed to build the icon.
    ///  </remarks>
    ///  <param name="SearchTerms">
    ///    Up to three terms will be used in conducting the search.  Any more that are passed in will be ignored.
    ///  </param>
    ///  <param name="Results">
    ///    Indicates how many icons are to be returned.  If conducting searches while someone is typing, this should be a much smaller number than if a more deliberate search is being performed.
    ///  </param>
    [HttpGet] function SearchIcons(SearchTerms: String; Results:Integer):TStream;
  end;

implementation

initialization
  RegisterServiceType(TypeInfo(IHexaGongsService));

end.
The implementation is largely the same as we covered previously, simplified only very slightly by assuming we're searching across all available icon sets. Note that the AvailableIconSets is still being used (with the sets), even though we're not presenting an interface to select the sets searched. We're still using icon sets internally and we will need this information as it includes the default icon sizes for each set. Still doing the same amount of work, in other words. Here's what we're working with.
unit HexaGongsServiceImplementation;

interface

uses
  XData.Server.Module,
  XData.Service.Common,

  System.Classes,
  System.JSON,
  System.SysUtils,

  HexaGongsService;

type
  [ServiceImplementation]
  THexaGongsService = class(TInterfacedObject, IHexaGongsService)
  private
    function AvailableIconSets:TStream;
    function SearchIcons(SearchTerms: String; Results:Integer):TStream;
  end;

implementation

uses Unit2;

function THexaGongsService.AvailableIconSets: TStream;
begin
  // Returning JSON, so flag it as such
  TXDataOperationContext.Current.Response.Headers.SetValue('content-type', 'application/json');

  Result := TStringStream.Create(MainForm.AppIconSets);
end;

function THexaGongsService.SearchIcons(SearchTerms: String; Results: Integer): TStream;
var
  IconsFound: TJSONArray;
  IconSet: TJSONObject;
  IconSetList: TStringList;
  i: integer;
  j: integer;
  k: integer;
  IconName: String;
  Icon: TJSONArray;
  IconCount: Integer;
  Terms:TStringList;
  Matched: Boolean;
begin
  // Returning JSON, so flag it as such
  TXDataOperationContext.Current.Response.Headers.SetValue('content-type', 'application/json');

  // JSON Array we'll be returning
  IconsFound := TJSONArray.Create;
  IconCount := 0;

  // If all, will just iterate through the sets
  // Otherwise, we'll build a list and only iterate through the contents of that list
  IconSetList := TStringList.Create;
  k := Mainform.AppIcons.Count;

  // Sort out Search Terms
  Terms := TStringList.Create;
  Terms.CommaText := StringReplace(Trim(SearchTerms),' ',',',[rfReplaceAll]);

  i := 0;
  while (i < k) and (IconCount < Results) and (Terms.Count > 0) do
  begin

    // Load up an Icon Set to Search
    IconSet := (MainForm.AppIcons.Items[i] as TJSONObject).GetValue('icons') as TJSONObject;

    // Search all the icons in the Set
    for j := 0 to IconSet.Count-1 do
    begin

      if (IconCount < Results) then
      begin

        IconName := (Iconset.Pairs[j].JSONString as TJSONString).Value;

        // See if there is a match using the number of terms we have
        if Terms.Count = 1
        then Matched := (Pos(Terms[0], IconName) > 0)
        else if Terms.Count = 2
             then Matched := (Pos(Terms[0], IconName) > 0) and (Pos(Terms[1], IconName) > 0)
             else Matched := (Pos(Terms[0], IconName) > 0) and (Pos(Terms[1], IconName) > 0) and (Pos(Terms[2], IconName) > 0);

        // Got a match
        if Matched then
        begin
          Icon := TJSONArray.Create;
          Icon.Add(IconName);

          // Need to know what set it is in so we get lookup default width, height, license, set name
          Icon.Add(i);

          // Add in the icon data - the SVG and width/height overrides
          Icon.Add(IconSet.GetValue(IconName) as TJSONObject);

          // Save to our set that we're returning
          IconsFound.Add(Icon);
          IconCount := IconCount + 1;
        end;
      end;
    end;

    i := i + 1;
  end;

  // Return the array of results
  Result := TStringStream.Create(IconsFound.ToString);
end;

initialization
  RegisterServiceType(THexaGongsService);

end.
In the next post, we'll address how to block access from other applications, but for now, this will get things up and running. We can test this with Swagger. The AvailableIconSets endpoint doesn't have any parameters. It just returns a JSON object listing all the icon sets it found. By default, it looks in the "icon-sets" folder relative to wherever the XData server is running. This can be adjusted by providing an option in a JSON configuration file. The SearchIcons endpoint needs a search term and a limit for the number of results. If we were to search for "hexagon" we should get something like the following.
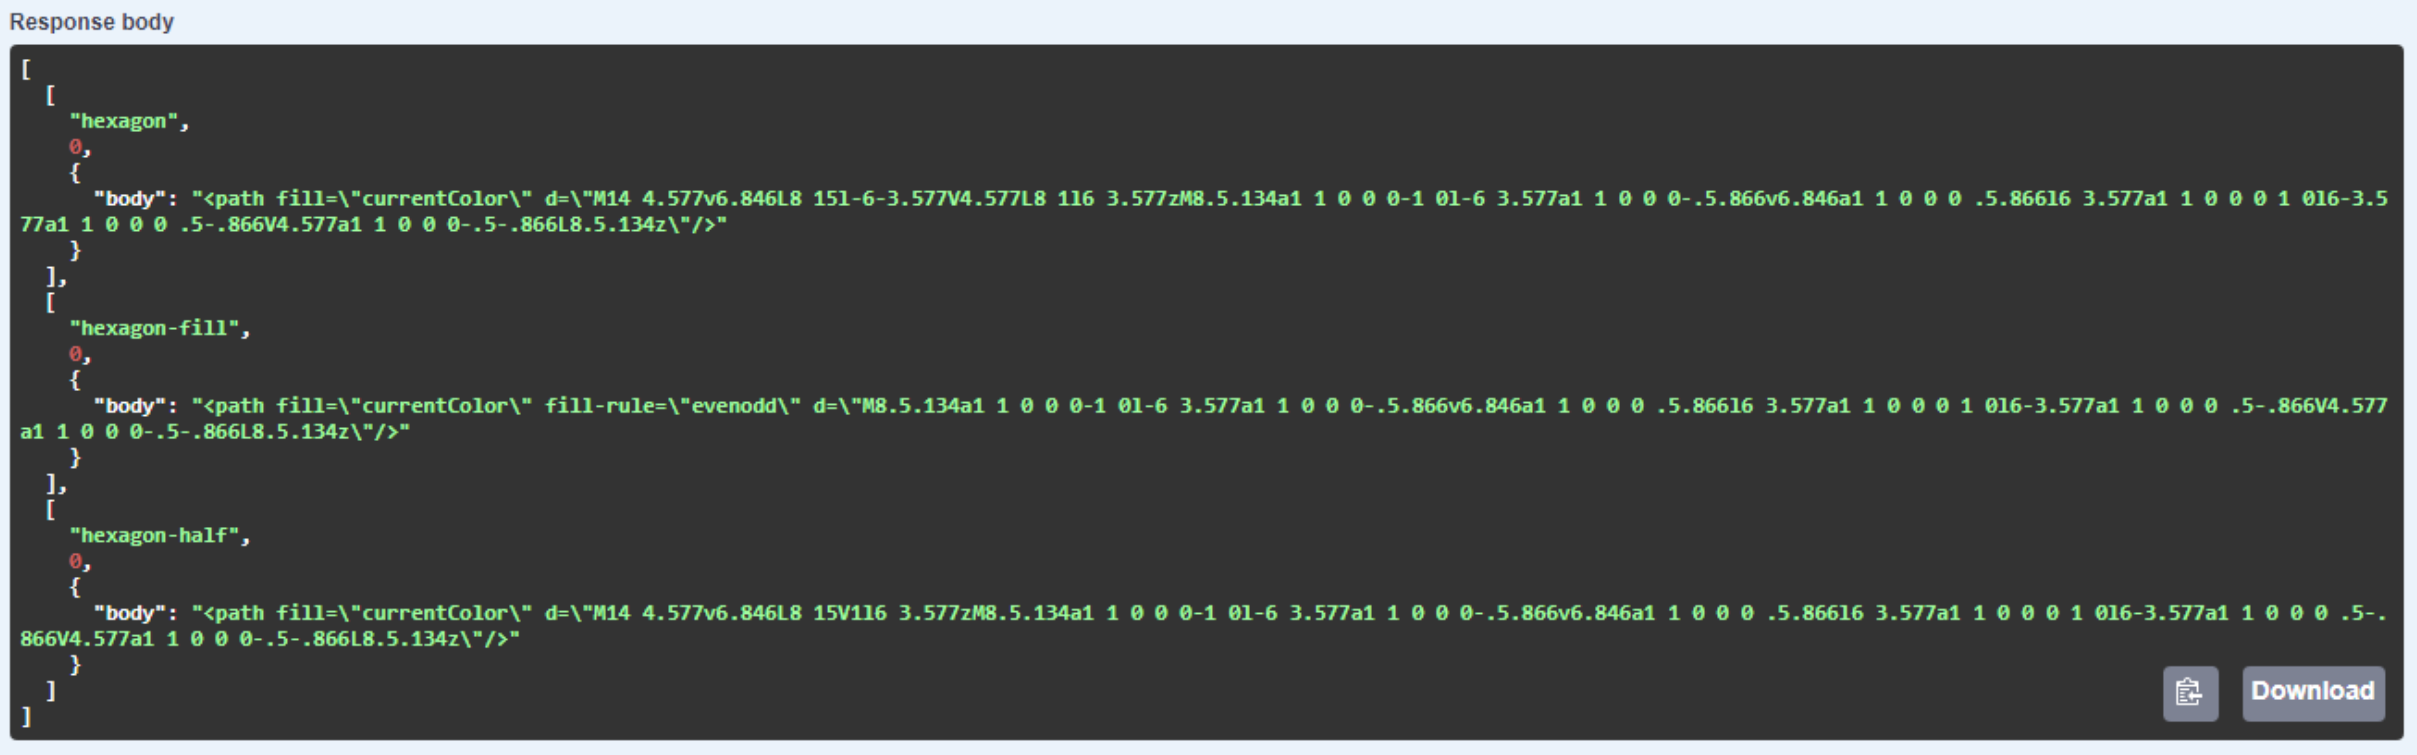
XData Icon Search Results via Swagger.
This shows us that our icon search function is up and running. We'll be sure to add more icon-sets when we look
at this particular aspect again during the deployment of the project in our final post in this miniseries.
Icons Incorporated.
Back in our TMS WEB Core project, we'll need to include a call to the AvailableIconSets endpoint to retrieve
the list of icon sets as well as the count. We can display the count but we will need the actual list when we
generate the icons that are returned from any searches.
procedure TForm1.InitializeXData;
var
  i: Integer;
  c: Integer;
begin
  // This intializes the custom icon editor to use the "remote" approach.
  asm
    this.IconSets = [];
    this.IconSetNames = [];
    this.IconSetCount = [];

    // Load up our Local icon sets
    var response = await fetch('http://localhost:65432/tms/xdata/HexaGongsService/AvailableIconSets');
    var IconSetList = await response.json()

    // Original list is soprted by filename.  Lets sort it by library name instead (case-insensitive)
    IconSetList = IconSetList.sort((a, b) => {
      if (a.name.toLowerCase() < b.name.toLowerCase()) {
        return -1;
      }
    });

    // Get count data from this list
    for (var i = 0; i < IconSetList.length; i++) {
      var iconcount = IconSetList[i].count
      this.IconSetNames.push(IconSetList[i].name+': '+iconcount+' icons');
      this.IconSetCount.push(iconcount);
    };
  end;

  // Populate the listLibraries control
  c := 0;
  for i := 0 to Length(IconsetNames)-1 do
  begin
    c := c + IconSetCount[i];
  end;
  labelIconSearch.Caption := 'Icon Search: '+FloatToStrF(c,ffNumber,5,0)+' icons available';
end;
To perform a search, we'll need to make another XData call. And again, we can make a very slightly simpler version of what was included in the icons post, but we'll still need to use the icon list returned to get the default icon parameters needed to generate the display. Even with this change, it is certainly a lot quicker to copy and paste code than starting from a blank page.
In this case, we'll just update the names and tie some of
the components to this event, like a TWebButton "click" event and a TWebEdit "change" event. The whole process
should be fast enough, with a limit of 500 icons at that, to call the endpoint after each keystroke, even with
just one letter entered.
procedure TForm1.btnIconSearchClick(Sender: TObject);
var
  Search: String;
  IconSize:Integer;
  MaxResults: Integer;
  SearchLib: String;
begin
  // Icon names are always lower case, so search with that
  Search := LowerCase(Trim(editIconSearch.text));

  // Limit returns while typing
  MaxResults := 500;
  if True then MaxResults := MaxResults; // hide compiler hint


  // Icon Size from slider - determines font-size
  IconSize := 40;
  if True then IconSize := IconSize; // hide compiler hint

  // Figure out which libraries we're searching through
  SearchLib := 'all';
  if True then SearchLib := SearchLib; // hide compiler hint


  // Must have something to search for and somewhere to search
  if (Search <> '') then
  begin
    asm

      // Build a new results array
      var results = [];

      // Search for at most three terms
      var searchterms = Search.split(' ').slice(0,3).join(' ');

      var response = await fetch('http://localhost:65432/tms/xdata/HexaGongsService/SearchIcons'+
        '?SearchTerms='+encodeURIComponent(searchterms)+
        '&Results='+MaxResults);
      var results = await response.json();

      // Sort results by icon name
      results = results.sort((a, b) => {
        if (a[0] < b[0]) {
          return -1;
        }
      });

      // Update count
      labelIconInfo.innerHTML = 'Results: '+results.length;
      this.IconResults = results.length;

      // Clear existing results
      divResultsInner.replaceChildren();

      // Create icons for display
      var display = '';
      for (var i = 0; i < results.length; i++) {

        // Figure out which library we're using - note that it is now sorted differently
        var lib = this.IconSetList.find( o => o.library == results[i][1]);

        // Each library has its default width and height, and then overrides at the icon level
        var iconheight = results[i][2].height || lib.height;
        var iconwidth = results[i][2].width || lib.width;

        var displayicon = '<div style="font-size:'+IconSize+'px;" class="SearchIcon" '+
                               'icon-library="'+lib.name+'" '+
                               'icon-license="'+lib.license+'">'+
                             '<svg width="1em" height="1em" xmlns="http://www.w3.org/2000/svg" xmlns:xlink="http://www.w3.org/1999/xlink" '+
                               'viewBox="0 0 '+iconwidth+' '+iconheight+'">'+
                                 results[i][2].body+
                             '</svg>'+
                             '<div class="text-wrap" style="font-size:12px; text-align:center; width:100%;">'+
                               results[i][0]+
                             '</div>'+
                           '</div>';

        display += displayicon;
      }
      divResultsInner.innerHTML = display;
    end;

  end;
end;
To get our list of icons to display nicely, we'll need a bit of CSS. The first sections deal with ensuring that the container holding the icons is sized properly, factoring in our hexagonal corners, padding, and so on. Then we have to deal with the icons themselves, giving them enough space to display long icon names while still big enough to show the icon itself. And some hover styles to make it a little more interactive while scrolling through a long list of icons.
/* Search Icons */
#divResultsOuter {
  height: auto !important;
  padding-bottom: 1px;

}
#divResultsInner {
  height: auto !important;
  margin-bottom: 3px !important;
  min-height: 100px;
}
.SearchIcon {
  border-radius: 0.375rem;
  cursor: pointer;
  max-width: 125px;
  max-height: 125px;
  display: flex;
  gap: 3px;
  flex-direction: column;
  align-items: center;
  text-align: center;
}
.SearchIcon > div {
  color: silver;
}
.SearchIcon:hover {
  color: orange;
}
.SearchIcon:hover > div {
  color: white;
}
.SearchIcon.Selected > div,
.SearchIcon.Selected {
   color: darkorange !important;
}
And finally, we need a bit of code to deal with what happens when we click on an icon. We'd like the ability to display the icon license information, but mobile devices don't really have a "hover" mode that we can use for this. So instead, we'll set it up so that a click on an icon will select it and close the icon picker, whereas a click on the icon name will update the information about the icon. This saves us also from having to scroll to the top to click on the check button, though that still works - as does the cancel button. As this is a separate JavaScript event, it can be found in WebFormCreate.
  // Icon Picker
  asm
    divResultsInner.addEventListener('click', (e) => {

      // Remove current highlight
      var selected = divResultsInner.querySelectorAll('.Selected');
      selected.forEach(el => {
        el.classList.remove('Selected');
      });
      pas.Unit1.Form1.btnIconOK.FEnabled = false;
      btnIconOK.setAttribute('disabled','');

     // What was clicked on? Could be the icon itself or the icon name
      var el = null;
      if (e.target.getAttribute('icon-library') !== null) {
        var el = e.target;
        this.ImageIcon = el.firstElementChild.outerHTML;
        this.OptionsImageIcon = el.lastElementChild.innerHTML;
        pas.Unit1.Form1.btnIconOKClick(null);
      } else if (e.target.classList.contains('IconName')) {
        var el = e.target.parentElement;
        el.classList.add('Selected');
        btnIconOK.removeAttribute('disabled');
        pas.Unit1.Form1.btnIconOK.FEnabled = true;
        labelIconInfo.innerHTML = '<div class="d-flex justify-content-between align-itens-center pe-3">'+
            '<div>Results: '+this.IconResults+'</div>'+
            '<div>'+el.getAttribute('icon-library')+'</div>'+
            '<div>'+el.getAttribute('icon-license')+'</div>'+
          '</div>';
      }
    });
  end;
This takes care of updating the information we have about the icon as well as handling the addition and removal of the "Select" class that we use to style the currently selected icon. If an icon is clicked on (and not the icon name) then we just use that icon and close the icon search interface.
procedure TForm1.btnIconOKClick(Sender: TObject);
begin
  editImageSource.Text := OptionsImageIcon;
  btnIconCancelClick(Sender);
  divImage.HTML.Text := ImageIcon;
end;
Here's what this all looks like. With the image type of "icon" selected, clicking on the icon name will bring
up the search interface. From here, any text entered will be sent to XData and the results returned to our
interface. Clicking on the icon name will show the information about the icon, and clicking the icon will
select it.

Icon Picker in Action.
In our final deployment, we'll use all of the icons that we have (free) access to. For now, we've got the
Bootstrap Icons and the Noto Emoticons loaded, which include some excellent color icons. Once an icon has been
selected, the icon itself (an SVG element) is simply stored as a string for subsequent use.
Missing Gradients.
One small diversion before we move on from icons. These color icons are sure pretty, but they have a bit of a dark side. It turns out that the SVG contents of many icons make use of HTML "id" attributes. This is potentially problematic because, as we know, all HTML "id" properties should be unique on a given page. If the same icon were to appear more than once, then this rule would be violated, with.... unexpected results.
And
indeed, we have an unexpected problem here. It turns out that gradients within these icons are a popular choice
for being configured this way. And it also turns out that if the first of these gradients to appear on the page
happens to be hidden using the ubiquitous "display: none" CSS mechanism, any subsequent gradients will be hidden
as well. Sounds pretty obscure, though, right? Well, not really. If we're not careful, we can run into this
pretty easily. With our icon picker, for example, once we've selected an icon, we hide the icon picker (internally, this is done via display:none" and then
display the icon further down the page - and we end up with a headless duck!
Disappearing SVG Gradients.
This happens because the duck's head is drawn with one of these id-assigned gradients. When we hide the icon
search interface, the duck icon there is hidden, and thus our problem manifests itself. To alleviate this
problem, and resurrect our poor duck, we can simply clear the icons in the search interface when the search
interface is closed. Then the instance of the duck appearing further down the page is the only instance of the
duck, and the problem is resolved, right? Well, not quite.
We also run into the same problem when we have these icons displayed in their normal spot on our page, inside one of our HexaGong elements. But only when the Options Dialog is shown. When the Options dialog is displayed, the currently selected icon (our duck) is automatically loaded into the same part of the interface, but when the TWebPageControl component is not viewing that page, it is hidden in the same way. So opening the Options dialog results in the duck icon, which was otherwise displayed properly, suddenly losing its head again.
In this case, the culprit is that the Options dialog HTML element comes before the divBackground HTML element
in the DOM. So when the icon is hidden by the TWebPageControl component, it triggers our problem. The solution? Move
the Options dialog HTML element so that it comes after the divBackground HTML element. This way, any icons on
the page (which are never hidden) will always come first, and we won't have any disappearing gradients. And it
turns out we can write a JavaScript function to do exactly that (attribution). So in our startup, we just swap them.
asm
const swap = function (nodeA, nodeB) {
const parentA = nodeA.parentNode;
const siblingA = nodeA.nextSibling === nodeB ? nodeA : nodeA.nextSibling;
// Move `nodeA` to before the `nodeB`
nodeB.parentNode.insertBefore(nodeA, nodeB);
// Move `nodeB` to before the sibling of `nodeA`
parentA.insertBefore(nodeB, siblingA);
};
swap(divBackground,divOptions);
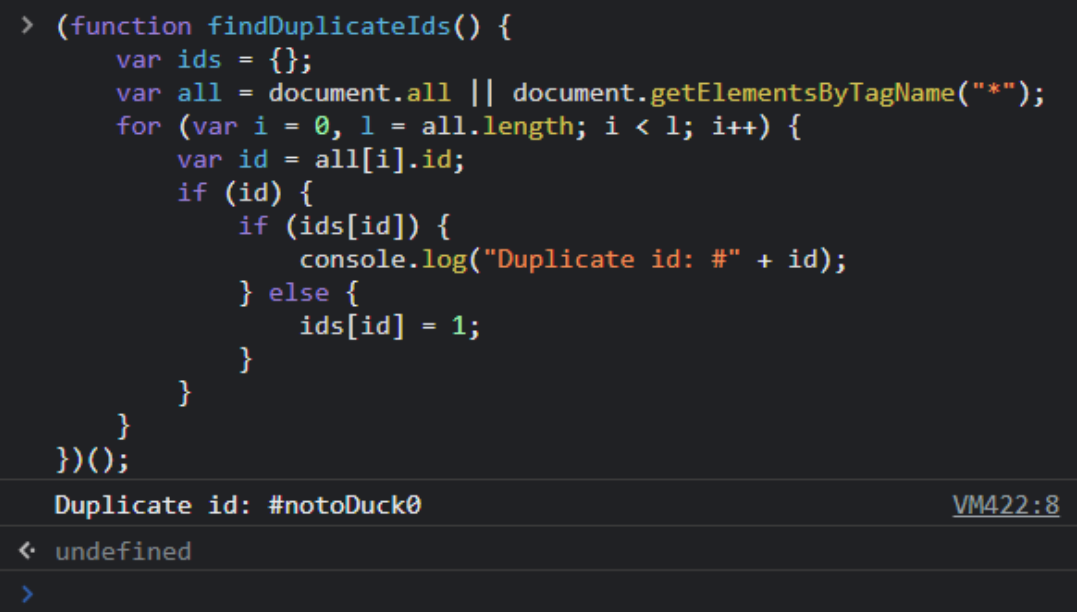
end;We'll still have duplicate IDs in our document, but they won't be causing a problem, or at least these icon gradients will be displayed and not hidden. It's also a good idea to check and see if we have any other duplicate IDs appearing on our page as well, in case other mysterious problems arise. We covered this in the Basics 3 post, but worth repeating here as well. Just copy and paste this into the browser console and we'll get a list of duplicate IDs.
 (function findDuplicateIds() {
    var ids = {};
    var all = document.all || document.getElementsByTagName("*");
    for (var i = 0, l = all.length; i < l; i++) {
        var id = all[i].id;
        if (id) {
            if (ids[id]) {
                console.log("Duplicate id: #" + id);
            } else {
                ids[id] = 1;
            }
        }
    }
})();
For example, when our duck icons are on the page, they'll show this result. "Noto" is the name of the icon set,
so "#notoduck0" is what is causing us all this grief.
Duplicate HTML id Attributes.
And it's not just the Noto Emoji icons that exhibit this feature - the Microsoft Fluent Emoji icons do as well.
And potentially others, though this seems to be related more to gradients than anything else.
Uploading Images.
Next up, what if we don't want to use an icon but would rather use a local image instead? Maybe small photos of faces, screenshots from movies, that sort of thing, or for when there just isn't a good icon choice. Ideally what we'd like to get is a nice Base64-encoded image (of a format supported by all browsers, like JPG or PNG, ideally) that we can just store as a string and attach to an <img> src attribute whenever we want to display it.
We'll need a TWebOpenDialog component on the form - a non-visual component that we can use to deal with the file-related aspects of accessing local files. Here, we can set properties like whether we want multiple files (nope) or what filter to use to narrow down the files that we will "accept". Then an async call can be made, and one of its supporting events can be used to format the data into what we need.
In this instance, we're after a Base64-encoded representation. In our
interface, then, we'll need to connect the same mechanism we used to trigger the icon picker to instead trigger
a file picker. Which has no interface directly other than the selected filename.
  // Upload
  else if OptionsImageStyle = 2 then
  begin
    WebOpenDialog1.Accept := 'image/*';
    await(string, WebOpenDialog1.Perform);
    // If files were selected, iterate through them
    i := 0;
    while (i < WebOpenDialog1.Files.Count) do
    begin
      WebOpenDialog1.Files.Items[i].GetFileAsBase64;
      i := i + 1;
    end;
  end;
We're only expecting one file, but there may actually be zero, so we have to account for that. Note that because of our use of the await() function, we'll have to mark this whole method with the [async] attribute or we'll get a compiler error. Once the await() call completes, if the user has selected a file, we can get the Base64-encoded string representation of the image file using the GetFileAsBase64() method.
procedure TForm1.WebOpenDialog1GetFileAsBase64(Sender: TObject; AFileIndex: Integer; ABase64: string);
var
  ImageType: String;
begin
  // Figure out what kind of image we have
  OptionsImageFile := Lowercase(WebOpenDialog1.Files[AFileIndex].Name);
  if Pos('jpg',  OptionsImageFile) > 0 then ImageType := 'image/jpeg';
  if Pos('jpeg', OptionsImageFile) > 0 then ImageType := 'image/jpeg';
  if Pos('png',  OptionsImageFile) > 0 then ImageType := 'image/png';
  if Pos('gif',  OptionsImageFile) > 0 then ImageType := 'image/gif';
  if Pos('bmp',  OptionsImageFile) > 0 then ImageType := 'image/bmp';
  if Pos('webp', OptionsImageFile) > 0 then ImageType := 'image/webp';
  if Pos('svg',  OptionsImageFile) > 0 then ImageType := 'image/svg+xml';
  if Pos('ico',  OptionsImageFile) > 0 then ImageType := 'image/x-icon';

  // Set Form variables
  ImageData := '<img width="70%" src="data:'+ImageType+';base64,'+ABase64+'">';
  OptionsImageFile := WebOpenDialog1.Files[AFileIndex].Name;

  // Update interface
  editImageSource.Text := OptionsImageFile;
  divImage.HTML.Text := ImageData;
end;
There's nothing fancy going on here in terms of progress bars or size limits or anything like that - the user
is free to load whatever image they like. In fact, if they try and load an image not listed in the types, it may
even still work. Different browsers support different image types, so this can be an issue at times. For our
purposes, hopefully, people will just be loading smaller JPG or PNG files, but the other types have been tested
and work equally well. Ultimately this does exactly what was intended - converts the image to a string and
stores it in the same manner that was used with the icons.
Linking Images.
Sometimes it would be useful to use an image from elsewhere, via a link. Perhaps a collection of HexaGongs
might be used to play famous movie lines, and we'd like to use the actor's photos. It would be a nuisance
(though entirely possible) to download these images and then upload them into our app. Why not just copy a link
from somewhere on the web and paste it into our app?
procedure TForm1.editImageSourceChange(Sender: TObject);
begin
  // Set Form variables
  ImageData := '<img width="70%" src="'+editImageSource.Text+'">';
  OptionsImageFile := editImageSource.Text;

  // Update interface
  divImage.HTML.Text := ImageData;
end;
The assumption we're making here is that the image will be available when we need it, and we'll need to wait for
it to download if we store this value and want to use it later. But it is quite simple relative to the other
approaches.
A little later in this post, we'll deal with accessing audio files in the same way. But in that
case, we need to actually process the audio data in our app, so we are going to potentially run up against the
dreaded CORS
problem. We don't have that problem here (hopefully) as we're not accessing any of the image data
directly in our app - just displaying the image as part of an <img> element, where CORS is normally not used.
Image Adjustments.
Having said that, we do want to make image adjustments. They just happen to be the kinds that do not require access to the content (data) of the image - just generic transforms that we'll apply. The approach we're taking here is simply to add a pile of range sliders, each connected to a CSS transform.
- Scale - for adjusting width and height, but also for flipping horizontally and vertically.
- Skew - for adjusting the slant along the X or Y axis.
- Rotate - to rotate around the center of the image.
- Translate - to shift along the X or Y axis.
- Opacity - to adjust the transparency of the image.
The last one, opacity, isn't really a transform but rather just a regular CSS property. All of the others, though, are components of the CSS transform property. These can be a bit tricky, particularly as their order is important. So we'll be careful to always apply them in the same order to be able to consistently have the same results.
For the RGB range sliders, they are set at a particular size, and just their width is adjusted when the Options dialog is resized. The hexagonal color grid is resized using the CSS transform: scale property to achieve what we've done there. In the case of our image adjustments, we'll instead include the range sliders in this scaling mechanism, and even rotate some of them 90 degrees to get our desired look. The idea is to have a pair of range sliders on each side of our image. By default, they show an icon representing their function when at the initial position, and then show a % or degree value when adjusted.
In the screenshot below, we have our duck shown on a black background. The surrounding sliders are all
available to adjust the respective properties. The entire image editor will scale with the width of the Options
dialog, and the page can be scrolled just like any other page. It can be a little difficult to read the slider
values (or even use them) if the size becomes too small, but they still work.
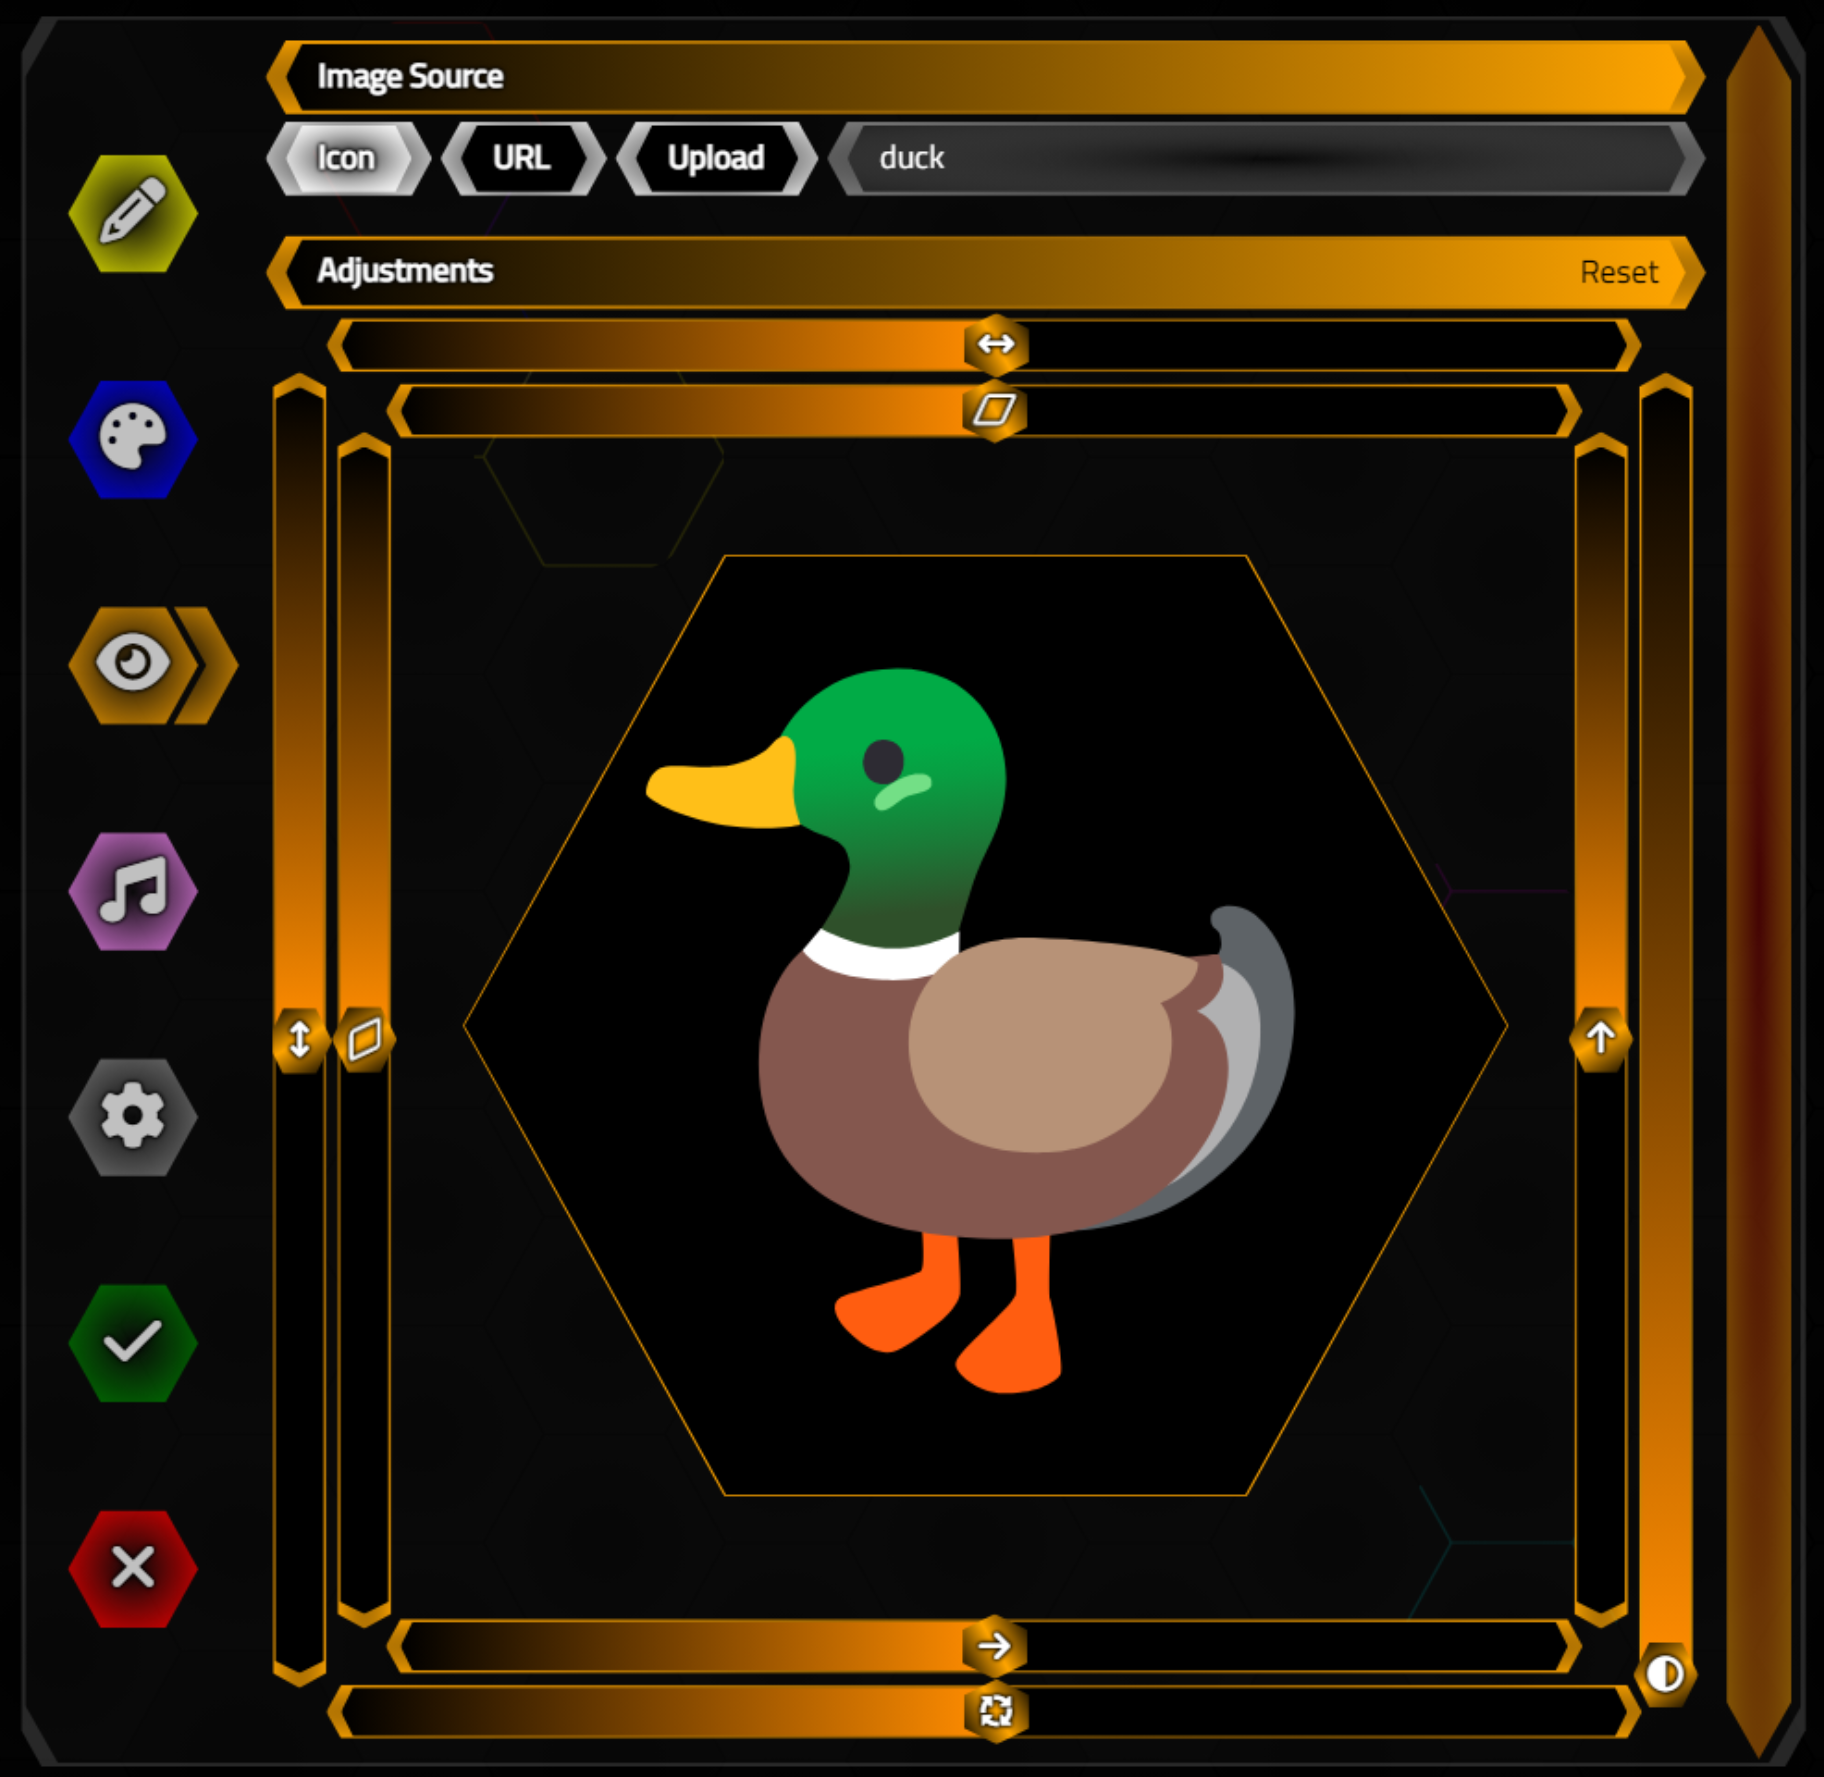
Image Adjustment Sliders.
Just as with the RGB range sliders, there's a bit of work to get these all sorted, but as we've already covered
most of that, there are just a few items to note about them here.
- When positioning our custom ranger slider thumbs, we get a value from the slider, but when we use the getBoundingClientRect() function, it returns the scaled value, which we have to unscale to get the "left" value that we assign to position the thumb.
- Rotating the sliders doesn't really change much - they are treated just the same, and the same "left"
property is adjusted to move the thumb.
- Note that the hexagons on the vertical thumbs are rotated as well, so the text has to be rotated to restore the proper orientation.
- Each range slider has a different range.
- The layout was achieved by "absolute positioning" on a default 1000px square, and then scaling that to the available space.
As changes are made to the sliders, the preview image is updated. When we're done, we save all of these as
part of our HexaGong data, into the Gong JSON object. And of course, we update our HexaGong with this
information as well.
  asm
   this.GongData['HexaGongs'][this.GongID]['Image W'] = this.ImageW;
    this.GongData['HexaGongs'][this.GongID]['Image H'] = this.ImageH;
    this.GongData['HexaGongs'][this.GongID]['Image T'] = this.ImageT;
    this.GongData['HexaGongs'][this.GongID]['Image L'] = this.ImageL;
    this.GongData['HexaGongs'][this.GongID]['Image X'] = this.ImageX;
    this.GongData['HexaGongs'][this.GongID]['Image Y'] = this.ImageY;
    this.GongData['HexaGongs'][this.GongID]['Image R'] = this.ImageR;
    this.GongData['HexaGongs'][this.GongID]['Image O'] = this.ImageO;

    var This = pas.Unit1.Form1;
    var gong = document.getElementById('Gong-'+this.GongID).firstElementChild;
    gong.style.setProperty('transform',
      'translate('+(This.ImageL - 100)+'%,'+(This.ImageT - 100)+'%) '+
      'scale('+This.ImageW/100+','+This.ImageH/100+') '+
      'skew('+(-This.ImageX)+'deg,'+(This.ImageY)+'deg) '+
      'rotate('+This.ImageR+'deg) ');
    gong.style.setProperty('opacity',This.ImageO / 100);
  end;
To help with editing images, an extra hexagon is overlaid on top of the image, in the same place as the
background underneath the image. This is particularly helpful with photos. Here's what it looks like when
sizing a photo and rotating it ever so slightly.
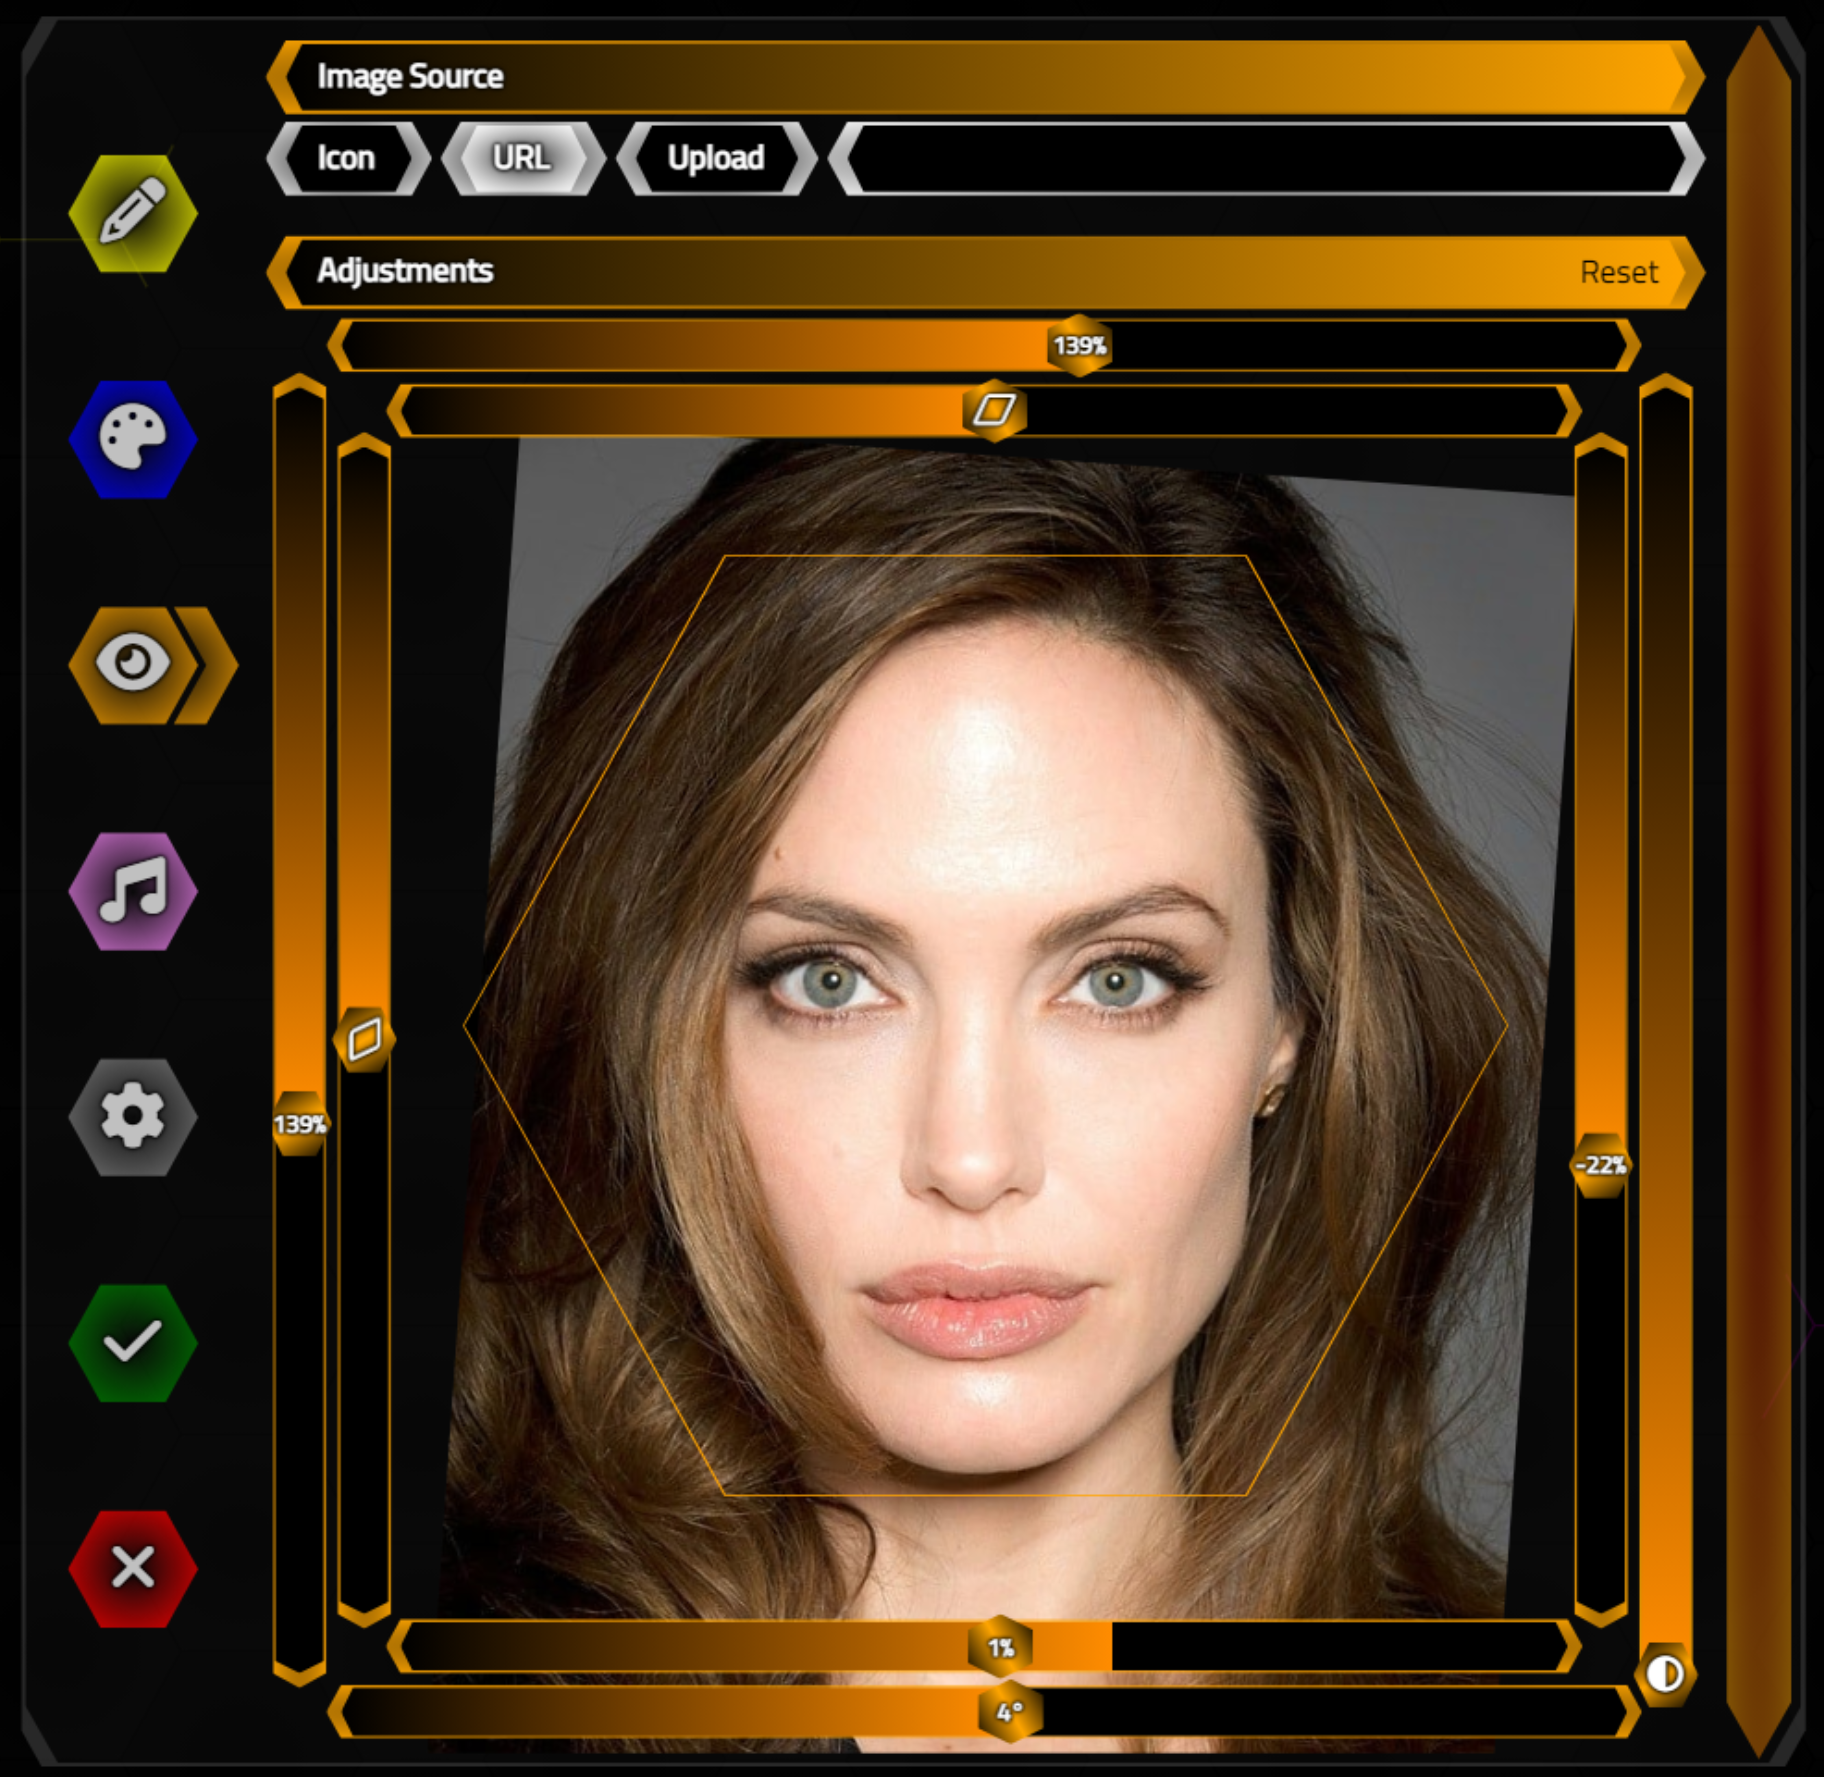
Image Adjustments for Photos.
The overlaid hexagon is created using a CSS clip-path transform just like the rest of the hexagons. In this
case, we've taken it a couple of steps further. Once the border of the hexagon is completely
defined, the path then walks in reverse, one pixel less than the original points, to complete the border. We'll
want both - the image background and foreground, with the actual image displayed between them.
#divImageBG {
  clip-path: polygon(25% 5%, 75% 5%, 100% 50%, 75% 95%, 25% 95%, 0% 50%);
}
#divImageFG {
  background: orange;
  clip-path: polygon(25% 5%, 75% 5%, 100% 50%, 75% 95%, 25% 95%, 0% 50%, 25% 5%,
                      calc( 25% + 1px) calc(5% + 1px),
                      calc(  0% + 1px) 50%,
                      calc( 25% + 1px) calc(95% - 1px),
                      calc( 75% - 1px) calc(95% - 1px),
                      calc(100% - 1px) 50%,
                      calc( 75% - 1px) calc(5% + 1px),
                      calc( 25% + 1px) calc(5% + 1px));
  z-index: 1;
}
This approach could also be used to draw more complex borders, rather than overlaying multiple <div> elements. It can be a bit tedious to create the clip-path list, as was the case above. There are of course tools to help, like CSS Clip-Path Generator, where you can create one just by clicking a series of polygonal points in order, or select from a number of common shapes. Combining multiple sets of clip-path-defined <div> elements makes it possible to display any shape needed.
Panning and Zooming.
One last item before we're done with image handling. While the scrollbars work pretty well, much of the time the only adjustments needed, if any, are simply the size and position of the image or icon. And if this is on a mobile device, the pinch-to-zoom mechanism is the general way to approach this. And we've covered this before in this post.
We're going to do something very similar for our project here, but we're going to use a different JavaScript library this time, the similarly named panzoom
by Timmy Willison. We can add it to our project in the usual way - by adding a line to our Project.html file or
via the Delphi Manage JavaScript Libraries feature.
<script src="https://cdn.jsdelivr.net/npm/@panzoom/panzoom@latest/dist/panzoom.min.js"></script>
This works like many other JavaScript libraries. We can call a function to connect an element on our page to the JavaScript library, passing along any particular parameters, similar to what we did with SimpleBar earlier. In this case, there are a few options that we want to make use of. The biggest problem we're facing is to try and have this work with our range sliders.
  asm
    this.pz = Panzoom(divImage, {
      animate: true,
      cursor: 'all-scroll',
      setTransform: (elem, { scale, x, y }) => {

        var This = pas.Unit1.Form1;
        This.ImageL = 100 + parseInt( 100 * x / divImage.offsetWidth * (divImage.offsetWidth / divImage.getBoundingClientRect().width));
        This.ImageT = 100 + parseInt( 100 * y / divImage.offsetHeight * (divImage.offsetWidth / divImage.getBoundingClientRect().width));
        This.ImageW = parseInt(scale * 100);
        This.ImageH = parseInt(scale * 100);

        AdjShiftX.value = This.ImageL;
        AdjShiftY.value = This.ImageT;
        AdjWidth.value = This.ImageW;
        AdjHeight.value = This.ImageH;

        divImage.style.setProperty('transform',
          'translate('+(This.ImageL - 100)+'%,'+(This.ImageT - 100)+'%) '+
          'scale('+This.ImageW/100+','+This.ImageH/100+') '+
          'skew('+(-This.ImageX)+'deg,'+(This.ImageY)+'deg) '+
          'rotate('+This.ImageR+'deg) ');

        This.UpdateImageAdjustments();
      }
    });
    divImage.addEventListener('wheel',pas.Unit1.Form1.pz.zoomWithWheel)
  end;
Here, we get the new values for our range sliders from panzoom, being careful to try and compensate for the fact that the element we're panning and zooming happens to be already scaled. We then update our range sliders and apply the same transform function that we normally do, just now incorporating the panzoom data. This works pretty well in normal use - making small adjustments with panzoom initially, and maybe fine-tuning it a bit with the range sliders afterward.
And that wraps up our image handling. There might be a few other tweaks to the code made between the time this
blog post was written and the time you're reading this, so be sure to check out the GitHub repository links at
the end of this post for the latest version. Image handling tends to be one of those things where there's
always more that can be improved. What we've covered so far gets us as far as we need to go for our purposes
here.
Audio Data.
Next up, we'll need to get audio data into our app. Much like images, we'll want to be able to supply audio data to our app via a number of different mechanisms. And once we have our audio data, we'll want to be able to make a few adjustments.
Unlike images, however, we'll need access to the contents of the audio files in order
to do more than just play them. Specifically, we want to be able to use them with the Web Audio API. We
covered the Web Audio API previously, in this
post about building an audio player, and this
post about building an audio track editor. We'll be making use of code from the track editor,
specifically the code for drawing the audio waveform, along with other bits pertaining to the Web Audio API.
To begin with, we'll have a set of (radio-style) buttons to help in selecting the audio file that we want to use, just as we did with the images. Here are the options we're after.
- Clips. A set of audio files that we can serve up via XData.
- Upload. The user can provide a clip from their local device.
- URL. Like with images, a URL that points to an audio file can be used.
- Record. Capture audio from a local camera or microphone directly.
- Set. Select multiple items from the HexaGongs already created, played in series, or parallel.
Curiously, we don't get to reuse much of the image code at all, as there are some deceptively simple but
significant differences that we'll need to address. We'll try and keep the UI aspects the same, however,
presenting the name of the audio file selected, and using that element as the way to bring up the other UI bits for
addressing each audio source.
Audio Clips.
The idea here is to have a set of audio clips stored on the XData server that we can serve up as a sort of "starter set" of audio data. All we're after is presenting a list of audio files that reside in a server folder somewhere. We'll initially load this list into our app, just as we load the list of icon sets. We'll retrieve an item from the list whenever we need to, either to play as a preview from the list itself or when it is to be included as the chosen audio data for a HexaGong element.
To get this sorted out, we'll first need to configure
XData. We can select a folder for these clips, and then generate a JSON object that contains the name of the
file, along with its type and size. This is handled when XData first starts (Unit2.pas in the default XData project). This also makes use of a configuration JSON file that we've used in the projects mentioned previously.
  // Load up Audio clips
  if (AppConfiguration.GetValue('Audio') <> nil)
  then AppAudioClipsFolder := (AppConfiguration.GetValue('Audio') as TJSONString).Value
  else AppAudioClipsFolder := GetCurrentDir+'/audio-clips';
  if RightStr(AppAudioClipsFolder,1) <> '/'
  then AppAudioClipsFolder := AppAudioClipsFolder + '/';
  ForceDirectories(AppAudioClipsFolder);
  AudioClips := TDirectory.GetFiles(AppAudioClipsFolder,'*.*',TsearchOption.soAllDirectories);

  AppAudioClips := TJSONArray.Create;

  if length(AudioClips) = 0 then
  begin
    mmInfo.Lines.Add('...No Audio Clips Loaded: None Found.');
  end
  else
  begin
    mmInfo.Lines.Add('...Found '+IntToStr(Length(AudioClips))+' Audio Clips');
    for i := 0 to Length(AudioClips)-1 do
    begin
      AppAudioClips.Add(TJSONObject.ParseJSONValue('{'+
        '"Name":"'+TPath.GetFileNameWithoutExtension(AudioClips[i])+'",'+
        '"Type":"'+Uppercase(StringReplace(TPath.GetExtension(AudioClips[i]),'.','',[rfReplaceAll]))+'",'+
        '"FullName":"'+StringReplace(copy(AudioClips[i],length(AppAudioClipsFolder)+1,length(AudioClips[i])),'\','/',[rfReplaceAll])+'",'+
        '"Size":'+IntToStr(GetSizeOfFile(AudioClips[i]))+
        '}') as TJSONObject);
    end;
  end;
Note that there's a custom function for GetSizeOfFile (attribution),
but otherwise, nothing particularly new going on here as compared to how we handled icons previously. Quite a
bit simpler, in fact. Note that we have to take a bit of extra care with the filenames to ensure any
sub-directories have the backslash replaced with a forward slash so our JSON object isn't messed up. This will serve up everything, including sub-directories. The endpoint to serve up this list is just as simple
as you'd expect.
function THexaGongsService.AvailableAudioClips: TStream;
begin
  // Returning JSON, so flag it as such
  TXDataOperationContext.Current.Response.Headers.SetValue('content-type', 'application/json');

  Result := TStringStream.Create(MainForm.AppAudioClips.ToString);
end;
If we just copied all the .WAV files from C:\Windows\Media (on a Windows 10 system, for example), we might get something that looks like this when accessing this endpoint via Swagger.
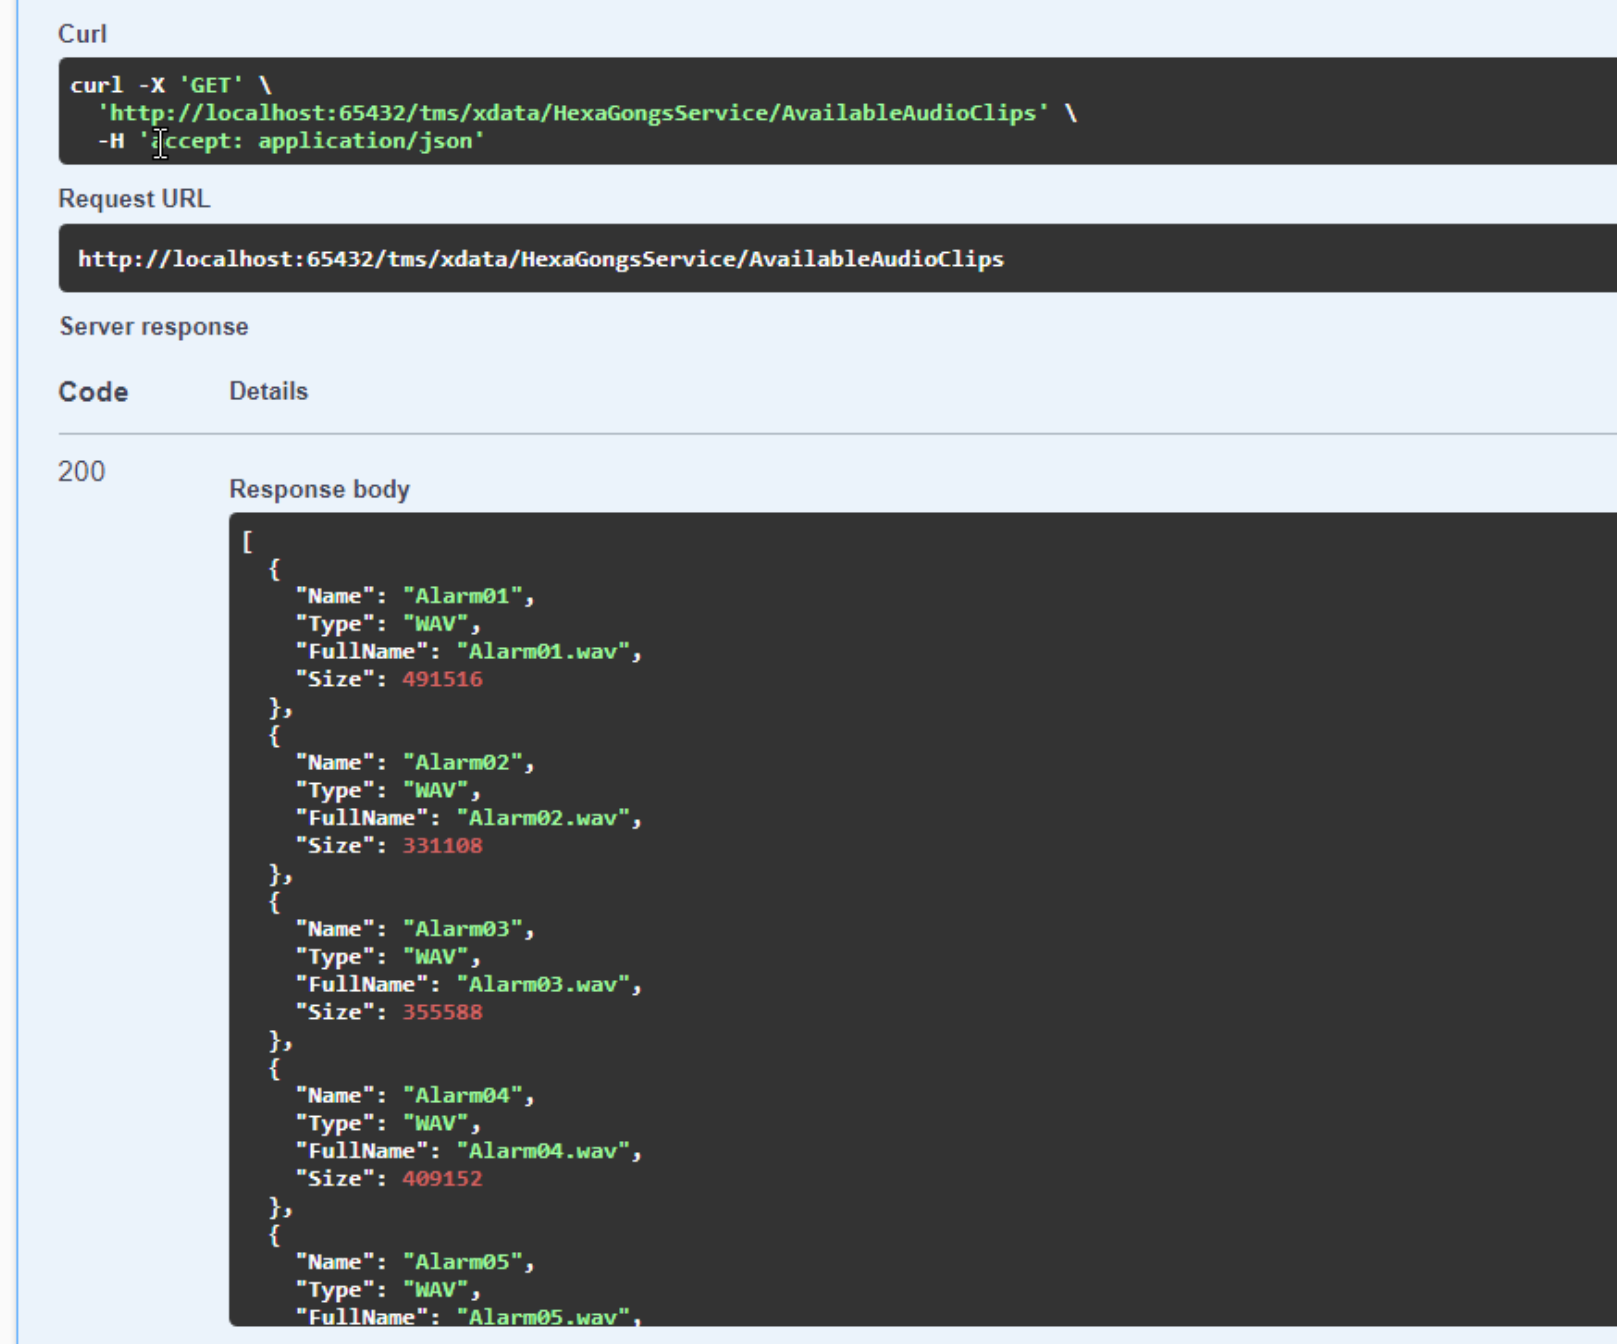
AvailableAudioClips via Swagger.
The other endpoint we need is for retrieving the audio file itself. Here, we're just loading and returning
whatever file that was requested. We should be careful that we're only returning a file from the audio-clips
folder - wouldn't want this to return any old file on our server, after all.
function THexaGongsService.GetAudioClip(AudioClip: String): TStream;
var
  AudioType: String;
  AudioFIle: String;
begin
  AudioFile := MainForm.AppAudioClipsFolder + AudioClip;

  if fileExists(AudioFile) then
  begin
    AudioType := lowercase(StringReplace(TPath.GetExtension(AudioFile),'.','',[rfReplaceAll]));
    if      AudioType = 'mp3' then TXDataOperationContext.Current.Response.Headers.SetValue('content-type', 'audio/mpeg')
    else if AudioType = 'wav' then TXDataOperationContext.Current.Response.Headers.SetValue('content-type', 'audio/wav')
    else if AudioType = 'ogg' then TXDataOperationContext.Current.Response.Headers.SetValue('content-type', 'audio/ogg')
    else if AudioType = 'oga' then TXDataOperationContext.Current.Response.Headers.SetValue('content-type', 'audio/ogg')
    else if AudioType = 'acc' then TXDataOperationContext.Current.Response.Headers.SetValue('content-type', 'audio/acc')
    else TXDataOperationContext.Current.Response.Headers.SetValue('content-type', 'audio/'+AudioType);
  end
  else  raise EXDataHttpUnauthorized.Create('AudioClip was not found.');

 Result := TFileStream.Create(AudioFile,fmOpenRead);
end;
By putting in that extra bit of effort with the content-type assignment, we can also play the audio file directly within Swagger.
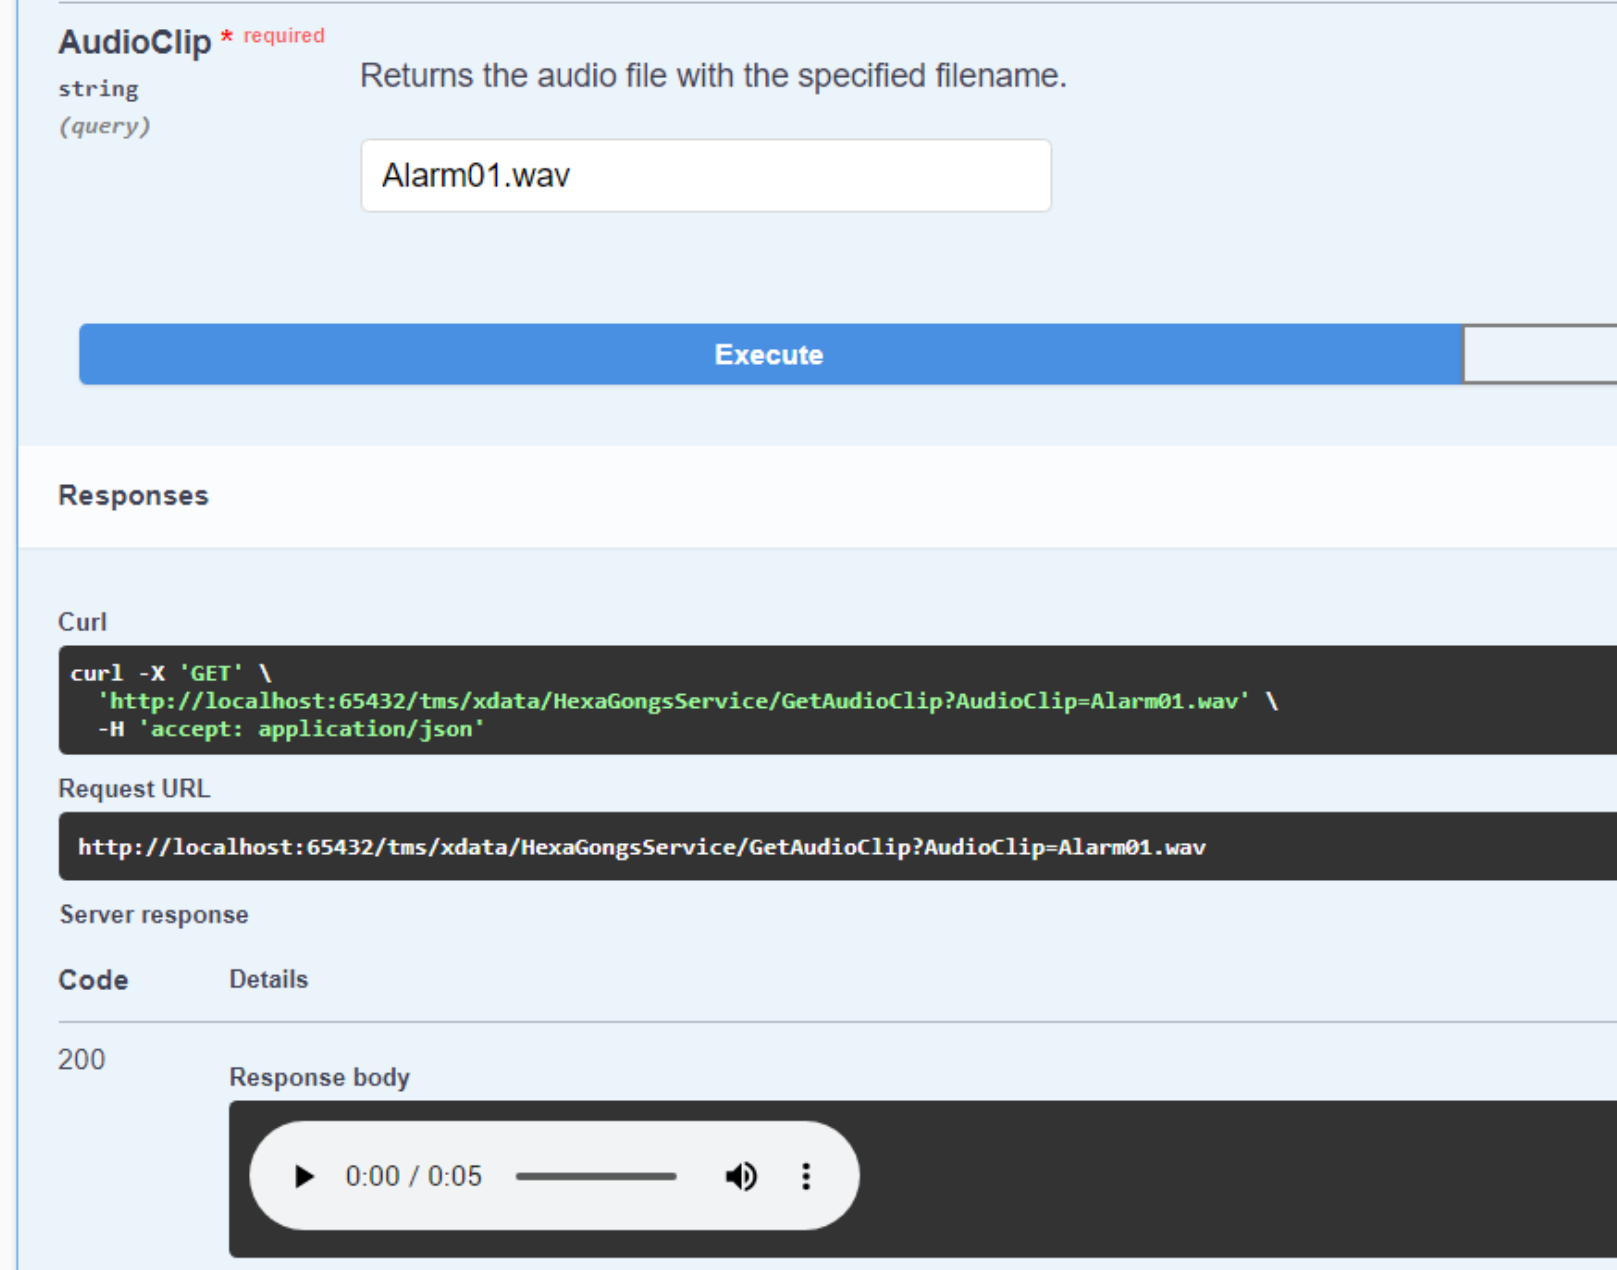
Content-Types and Swagger.
That's all we need from XData for our audio clips. Flipping back to our TMS WEB Core app, we'll need to
retrieve the list of available audio clips when our app first starts, and then present it to the user when they
opt to use an audio clip.
Let's use Tabulator
as our table/grid component for this. It accepts data directly as JSON, so we can fetch our audio clips the
same way we did with our icon sets, and then just dump the results into Tabulator. First, we have to set up
Tabulator, as part of WebFormCreate. Our blog miniseries focused entirely on Tabulator can be found starting
with this
post. While it can be super-easy to get started with Tabulator, here we're going a bit further to get
everything configured just so.
  asm
    this.tabAudioClips =  new Tabulator("#divAudioClipTable", {
      layout: "fitColumns",
      rowHeight: 30,
      selectable: 1,
      headerVisible: false,
      columnDefaults:{
        resizable: false
      },
      columns: [
        { title: "Play", minWidth: 40, width: 40, hozAlign: "center", cssClass: "PlayClip",
          formatter: function(cell, formatterParams, onRendered) {
            return '<div style="width: 30px; height: 29px; margin: -3px 0px 0px 4px; padding: 4px 8px; "><i class="fa-solid fa-play fa-xl"></i></div>'
          },
          cellClick: function(e, cell) {
            pas.Unit1.Form1.tabAudioClips.selectRow(cell.getRow());
            pas.Unit1.Form1.PlayAudioClip(cell.getRow().getCell('FullName').getValue(), cell.getElement());
          },
        },
        { title: "Name", field: "Name" },
        { title: "Type", field: "Type", width: 50 },
        { title: "FullName", field: "FullName", visible: false },
        { title: "Size", field: "Size", width: 60, hozAlign: "right",
          formatter: function(cell, formatterParams, onRendered) {
            var audiosize = 0;
            if (parseInt(cell.getValue()) < 1024) {
              audiosize = cell.getValue()+' B';
            } else if (parseInt(cell.getValue()) < 1024*1024) {
              audiosize = parseInt(cell.getValue() / 1024)+' KB';
            } else if (parseInt(cell.getValue()) < 1024*1024*1024) {
              audiosize = parseInt(cell.getValue() / 1024 / 1024)+' MB';
            } else {
              audiosize = parseInt(cell.getValue() / 1024 / 1024 / 1024)+' GB';
            }
            return '<div style="padding-right: 8px;">'+audiosize+'</div>';
          }
        }
      ]
    });
    this.tabAudioClips.on('rowClick', function(e, row){
      pas.Unit1.Form1.tabAudioClips.selectRow(row);
    });
    this.tabAudioClips.on('rowDblClick', function(e, row){
      pas.Unit1.Form1.tabAudioClips.selectRow(row);
      pas.Unit1.Form1.SelectAudioClip(row.getCell('FullName').getValue());
    });
  end;
There are quite a few different things going on here. We create most of the columns based on the data coming from XData. But we've also got a "Play" column to show a button that we can click on to play the audio file for that record. And the column that shows the file size also has a bit of customization, formatting the number to show B, KB, MB, or GB as needed.
In terms of events, we've got the click event for the Play button, calling the PlayAudioClip() method. And we've got row-click and row-double-click event handlers that look after highlighting the selected row, and also selecting the row as our chosen audio clip. We can retrieve the list of audio clips from XData and populate this table using the following.
  asm
    var response = await fetch(this.Server_URL+'/HexaGongsService/AvailableAudioClips');
    var AudioClips = await response.json();
    this.tabAudioClips.setData(AudioClips);
  end;
We'll also need a bit of CSS to adjust the styling for Tabulator and for our Play button. Fortunately, this time, we're primarily just getting rid of the formatting for Tabulator for the most part, much easier than trying to style all of its many elements. PlayClip is the class for the Play buttons.
#divAudioClipTable {
  background-color: transparent !important;
  padding-bottom: 2px;
}
.PlayClip > div {
  background: violet;
  color: white;
  clip-path: polygon(25% 5%, 75% 5%, 100% 50%, 75% 95%, 25% 95%, 0% 50%);
  filter: drop-shadow(0px 0px 1px black) drop-shadow(0px 0px 1px black);
}
.PlayClip > div:hover {
  background: purple;
  color: silver;
}
.PlayClip.Playing > div {
  background: violet;
  color: white;
  clip-path: polygon(25% 5%, 75% 5%, 100% 50%, 75% 95%, 25% 95%, 0% 50%);
  filter: drop-shadow(0px 0px 1px black) drop-shadow(0px 0px 1px black);
}
.PlayClip.Playing > div:hover {
  color: silver;
}

.tabulator-table {
  background-color: black !important;
}
.tabulator-holder,
.tabulator-row,
.tabulator-row-even,
.tabulator {
  background-color: transparent !important;
  color: silver;
}
.tabulator-cell {
  border: none !important;
}
.tabulator-selected {
  background-color: deeppink !important;
  color: white !important;
}
There are many ways to actually play the clips. Here, we're going to create an HTML Audio object at run-time to do this. We'd like to see some indication of the progress, as well as have the ability to stop playing the clip. And also to play multiple clips at once. This can get a bit tricky, as we'll then have to keep track of the Audio objects that we create, and be sure to clear them (and reset our Play button progress) whenever the clip finishes playing or when we stop the playback manually.
For the progress indicator, we're likely all familiar with this sort of thing - a play button that changes to a stop button, along with a circular pie-chart-style progress that is updated as the playback proceeds. Setting this up isn't too difficult, but of course, we want our circle to be a hexagon. Using a hexagonal clip-path takes care of that, but the pie chart itself can be drawn using a CSS conic-gradient. This is similar to the CSS radial-gradient and linear-gradient rules that we've been using, just that it works in a conical direction. Setting color stops works the same way here.
Initially, we show a 5% value to indicate that playback has
started, even though it is likely that there will be a brief delay as the audio file is downloaded. Then we just increase this
when the "timeupdate" event gets triggered, typically a few times per second. We've got a JSON array,
AudioClipsPlaying, in place to keep track of the Audio objects that we create, so they can be paused and then
removed when we click the stop button.
procedure TForm1.PlayAudioClip(AudioClip: String; AudioProgress: TJSHTMLElement);
begin
  if AudioProgress.classList.contains('Playing') then
  begin
    AudioProgress.classList.remove('Playing');
    asm
      var This = pas.Unit1.Form1;
      for (var i = 0; i < This.AudioClipsPlaying.length; i++) {
        if (This.AudioClipsPlaying[i].AudioClip == AudioClip) {
          AudioProgress.firstElementChild.innerHTML = '<i class="fa-solid fa-play fa-xl"></i>';
          This.AudioClipsPlaying[i].Player.pause();
          This.AudioClipsPlaying[i].Player.currentTime = 0;
          This.AudioClipsPlaying[i].Player.srcObj = null;
          const indexToRemove = This.AudioClipsPlaying.findIndex((clip) => clip.AudioClip == AudioClip);
          This.AudioClipsPlaying.splice(indexToRemove, 1);
        }
      }
    end;
  end
  else
  begin
    AudioProgress.classList.add('Playing');
    asm
      var This = pas.Unit1.Form1;
      var playthis = new Audio(This.Server_URL+'/HexaGongsService/GetAudioClip?AudioClip='+encodeURIComponent(AudioClip));
      playthis.addEventListener('ended', function (e) {
        AudioProgress.classList.remove('Playing');
        AudioProgress.firstElementChild.style.setProperty('background','violet');
        AudioProgress.firstElementChild.innerHTML = '<i class="fa-solid fa-play fa-xl"></i>';
        const indexToRemove = This.AudioClipsPlaying.findIndex((clip) => clip.AudioClip == AudioClip);
        This.AudioClipsPlaying.splice(indexToRemove, 1);
      });
      playthis.addEventListener('timeupdate', function (e) {
        var progress = Math.max(5,parseInt(playthis.currentTime / playthis.duration * 360));
        if (playthis.currentTime == 0) {
          AudioProgress.firstElementChild.style.setProperty('background','violet');
        } else {
          AudioProgress.firstElementChild.style.setProperty('background','conic-gradient(purple 0deg '+progress+'deg, violet '+progress+'deg)');
        }
      });
      AudioProgress.firstElementChild.innerHTML = '<i class="fa-solid fa-square"></i>';
      AudioProgress.firstElementChild.style.setProperty('background','conic-gradient(purple 0deg 5deg, violet 1deg)');
      This.AudioClipsPlaying.push({'AudioClip':AudioClip, 'Player':playthis, 'Element':AudioProgress });
      playthis.play();
    end;
  end;
end;
Not the easiest thing to work through, but it gets us exactly the results we're after.

Audio Clip Playback and Stop.
In terms of the rest of the UI for these audio clips, we're again opting to use the main scrollbar for the
page as the only scrollbar, scrolling the entire page vertically. This is an alternative to adding a second scrollbar just for the
table. This is purely a design choice, not a limitation by any means. Another approach might be to scroll the whole page, rather
than having the top-most elements set to "sticky" so that they don't scroll. Lots of choices for doing things
differently if desired.
The final item related to our audio clips is that we need the actual audio file itself to be loaded into our app. Using the JavaScript Audio object is great for simple playback, and can even be tied to other components to provide seeking and other functionality. What we're really after is the waveform, though, and we're not getting that from the Audio object no matter what we do.
As we're targeting the Web Audio API, ultimately
we're after something called an "array buffer" - essentially an in-memory binary version of the file. And it
turns out that the JavaScript fetch() method that we've been using to get JSON from XData can just as easily
provide an array buffer for us to use.
Web Audio API.
Before continuing with the next audio source type, let's see if we can do something with the audio file that we've just retrieved, using the Web Audio API. First, we'll need to initialize the Web Audio API environment, which we can do in WebFormCreate. Here, we're establishing the Web Audio API "context" that everything else flows from. Then we add an AudioGain component which serves as the "master volume" mechanism. The destination is what gets the audio to the system speakers.
There are other nodes we could use. For example, we could use an AnalyserNode if
we wanted to visualize the audio as it is playing. We could also use an AnalyserNode to augment any kind of
progress indicator that we might have, but let's try and keep things simple - just playback with the option to
adjust the volume, which we'll get to a bit later.
  asm
    this.AudioCtx = new (window.AudioContext || window.webkitAudioContext)();
    this.AudioGain = new GainNode(this.AudioCtx);
    this.AudioMediaDestination = new MediaStreamAudioDestinationNode(this.AudioCtx);
  end;
The Web Audio API works in a bit of an unusual way. We will need to create a new AudioBufferSource object each time we want to play any kind of audio. When this object is created, we can set it to start playing with various parameters, but once it has been started, it can be stopped but not started again. Instead, we have to create a new AudioBufferSource object again and start it playing.
procedure TForm1.SelectAudioClip(AudioClipName: String; AudioClip: String);
begin
  divAudioClips.Visible := False;
  asm
    var This = pas.Unit1.Form1;
    var response = await fetch(This.Server_URL+'/HexaGongsService/GetAudioClip?AudioClip='+encodeURIComponent(AudioClip));
    var audiodata = await response.arrayBuffer();
    This.GongAudio[This.GongID] = This.AudioCtx.createBufferSource();
    This.AudioCtx.decodeAudioData(
      audiodata,
      (buffer) => {
        This.GongAudio[This.GongID] = buffer;
        editAudioSource.value = AudioClipName+' [ '+buffer.duration.toFixed(1)+'s ]';
      }
    );
  end;
end;
Note that this is where, for example, an MP3 file is decoded. All we're doing, after loading up the audio file
from XData, is running it through the decodeAudio() method and then storing the result in another array, GongAudio,
corresponding to the HexaGong we're currently working with. The other sources of data (URL, Upload, etc.) will
need to do the same thing here. We also have the duration available, so we can add that to the UI along with
the name of the audio clip chosen.
To play this audio clip, stored as just a buffer, we'll need to create a new AudioBufferSource object. And to get the same effect that we had previously used for a progress notification and cancel feature, we'll need yet more timers. One timer array (GongTimers) is used to keep track of timers that close and clear the AudioBuffersource after its duration has elapsed. Another timer array (GongProgress) is used to keep track of timers that are updating the progress display. And under various conditions, these timers will need to be cleared.
The progress, in this case, is another <div> element added to the HexaGong "cup", using the same
kind of animation based again on CSS conic-gradient calculations. This can be found in WebFormCreate, as part
of the mechanism we set up previously to handle mouse clicks for the main UI buttons.
      asm
      ...
        if (event.target.classList.contains('Gong')) {
          var playid = parseInt(event.target.getAttribute('gongid'));

          function stopplaying(hexid, element) {
            element.classList.remove('Playback');
            if (element.lastElementChild.classList.contains('progress')) {
              element.lastElementChild.remove();
            }
            clearInterval(This.GongTimers[hexid])
            clearTimeout(This.GongProgress[hexid]);
            This.GongSource[hexid].disconnect();
            This.GongSource[hexid].stop();
            This.GongSource[hexid] = null;
          }

          // If currently playing, stop
          if (event.target.classList.contains('Playback')) {
            stopplaying(playid, event.target);
          }

          // If not playing, start
          else {
            event.target.classList.add('Playback');
            This.GongSource[playid] = This.AudioCtx.createBufferSource();
            This.GongSource[playid].buffer = This.GongAudio[playid];
            This.GongSource[playid].connect(This.AudioGain).connect(This.AudioCtx.destination);
            This.GongSource[playid].start(0, 0, This.GongSource[playid].buffer.duration);
            event.target.setAttribute('starttime',This.AudioCtx.currentTime);

            // Update progress display
            var progress = '<div class="progress" style="position:absolute; top:0px; left:0px; width:100%; height:100%; z-index:100; background:none; pointer-events:none;"><div>';
            event.target.innerHTML += progress;
            This.GongProgress[playid] = setInterval(function() {
              if (This.GongSource[playid] !== null) {
                var elapsed = Math.min(360, ((This.AudioCtx.currentTime - event.target.getAttribute('starttime'))  / This.GongSource[playid].buffer.duration * 360.0));
                if (elapsed >= 360) {
                  stopplaying(playid, event.target);
                }
                else {
                  event.target.lastElementChild.style.setProperty('background','conic-gradient(#FFFFFF60 0deg '+elapsed+'deg, transparent '+elapsed+'deg 360deg)')
                }
              }
            },100);

            // Stop when we're done playing
            This.GongTimers[playid] = setTimeout(function() {
              stopplaying(playid, event.target);
            }, This.GongSource[playid].buffer.duration * 1000);

          }
        }
      ...
     end;
Might seem like a mess, but it works pretty well and seems to be able to keep up easily enough with multiple audio clips playing back and progress animations running independently of one another. Here's what it looks like (the audio is, of course, working as well, but not part of our animated GIF here). And this is, after so much work, the actual HexaGong result that we were after from the outset.

HexaGongs. Finally.
As can be readily seen in the above example, each HexaGong can be started or stopped independently from the
others, and the animation seems to keep up just fine. The setInterval timer for the progress update is set to
100ms in the code above but could be set to a higher value (less frequent updates) easily enough if the performance turned out to be sluggish on some devices during testing.
Master Volume.
While we're dealing with the Web Audio API, there's one more thing we can take off our to-do list. The main UI
buttons in the bottom left corner are intended to be used for master volume controls. When we set up our Web
Audio API context, we included an AudioGain node with this in mind. Using this node, we can adjust the "gain"
or "volume" of the audio passing through this system. We'll also be able to set the volume of individual audio files, but more on that a little later. For now, all we need to do is adjust the AudioGain node to change
the volume. A Form variable, MasterVolume, is used to help keep track of the current volume.
procedure TForm1.btnVolumeUpClick(Sender: TObject);
begin
  MasterVolume := Max(0,Min(MasterVolume + 0.1, 1.0));
  asm
    btnVolumeUp.innerHTML = '<div style="pointer-events: none; color: white !important; font-family: Cairo;">'+parseInt(this.MasterVolume * 100)+'</div>';
    this.AudioGain.gain.value = this.MasterVolume;
    setTimeout(function() {
      btnVolumeUp.innerHTML = '<i class="fa-solid fa-volume-high text-white pe-none"></i>';
    },500);
  end;
end;
The Volume Down button works much the same way, and Volume Mute just sets the AudioGain to zero. To make it a
bit fancier, the current Master Volume setting is shown in place of the button being clicked, and then 0.5s
later, this is replaced with the original button. Fancy. But not too fancy.
Audio Uploads.
With all that out of the way, we still have some work before we're finished with the audio sources. Uploading
an audio file is next on the list. This works very much like the image upload mechanism. In fact, we can
use the same TMS WEB Core component, TWebOpenDialog, and even the same instance, just with a different "accept"
property and by calling the GetFileAsArrayBuffer instead of GetFileAsBase64 method.
  ...
  else if OptionsAudioStyle = 2 then
  begin
    WebOpenDialog1.Accept := 'audio/*';
    await(string, WebOpenDialog1.Perform);
    // If files were selected, iterate through them
    i := 0;
    while (i < WebOpenDialog1.Files.Count) do
    begin
      WebOpenDialog1.Files.Items[i].GetFileAsArrayBuffer;
      i := i + 1;
    end;
  end
Note here that "audio/*" is intended to represent all the audio file formats that the browser supports. We're
assuming that the browser only includes the formats that are also supported by its Web Audio API
implementation. Not entirely sure if that is in fact the case, but this works well enough for MP3 and WAV
files, which are what we're primarily interested in.
procedure TForm1.WebOpenDialog1GetFileAsArrayBuffer(Sender: TObject; AFileIndex: Integer; ABuffer: TJSArrayBufferRecord);
begin
  OptionsAudioFile := WebOpenDialog1.Files[AFileIndex].Name;
  asm
    var This = pas.Unit1.Form1;
    This.GongAudio[This.GongID] = This.AudioCtx.createBufferSource();
    This.AudioCtx.decodeAudioData(
      ABuffer.jsarraybuffer,
      (buffer) => {
        This.GongAudio[This.GongID] = buffer;
        This.OptionsAudioTime = buffer.duration;
        editAudioSource.value = This.OptionsAudioFile+' [ '+buffer.duration.toFixed(1)+'s ]';
      }
    );
  end;
end;
Note that we get our audio file uploaded and decoded without ever having to even know what the file type is (MP3, WAV, etc.). Once we've got the file loaded into an array buffer (or a TJSArrayBufferRecord in this case) we can pass it off to the decodeAudioData() method of the Web Audio API and proceed as we've done with the Audio Clips.
Audio URLs.
In order to retrieve the actual audio file corresponding to an Audio Clip, we essentially used the JavaScript fetch() method to retrieve a URL, where that URL was pointed at our XData server. Not too difficult, but as we've already configured CORS within XData, we weren't really expecting any problems. Check out this post about CORS and all the fun it can cause.
When we entered a URL for the images section, we just passed that URL over to an <img> src attribute. So again not really an issue for CORS as the <img> tag by default is not configured to use CORS, although it can be made to do so by adding the "crossorigin" attribute. Similarly, when we were previewing Audio Clips, we were using the <audio> tag and not the Web Audio API. And we were also using our XData server, so CORS was dodged twice. Therefore, we've not run head-first into any CORS issues. Until now. If we want to fetch() an MP3 file, for example, from a remote site, the odds are pretty good that we're going to run into this problem.
Let's try an example. The website https://bigsoundbank.com
hosts a number of different audio clips for all kinds of things and reportedly offers these, royalty-free, both for
commercial and non-commercial use. Perfect. We can find a "rooster" sound with a quick search. And there's a
link to download the file. But there's also an option to access it via a permalink:
https://bigsoundbank.com/UPLOAD/mp3/0283.mp3
So we can download the file easily enough, or click the link to play it in the browser. No apparent issues so
far. But when we try to use the same URL in our app? Nope. Their server doesn't have CORS configured in a way
that allows us to do this. We could try and ask them to make a change, and if we had some other relationship
with them, then perhaps that might be an idea. But we can't possibly track down every potential website
supplying audio files to try and get them to work with our application.
Instead, we're going to use a CORS proxy, particularly as we already have an XData server up and running in our project. This means that the XData server will make the request for the remote file, and then we can access it from our XData server without having to worry about CORS anymore.
The downside is that a user of our application might not much like that we're essentially able to see what data they're accessing in this fashion - this isn't the case for anything else in our app, for example. Thus this is a potential security concern. In our settings, then, we'll have an option to disable this default proxy, or alternatively use a different user-supplied proxy.
If the proxy is disabled, then the user will have to download any CORS-blocked audio files to their local system and then upload them to get around this issue. As we're not dealing with
anything particularly security-related, we can just use our XData-supplied CORS proxy by default. The proxy endpoint (adapted
from our CORS blog post linked above) looks like this.
function THexaGongsService.GetRemoteData(RemoteURL: String): TStream;
var
  Client: TNetHTTPClient;
  ContentType: String;
  Response: TStream;
begin
  ContentType := 'undefined';

  if      Pos('.mp3', LowerCase(RemoteURL)) > 0 then ContentType := 'audio/mpeg'
  else if Pos('.wav', LowerCase(RemoteURL)) > 0 then ContentType := 'audio/wav'
  else if Pos('.ogg', LowerCase(RemoteURL)) > 0 then ContentType := 'audio/ogg'
  else if Pos('.oga', LowerCase(RemoteURL)) > 0 then ContentType := 'audio/ogg'
  else if Pos('.acc', LowerCase(RemoteURL)) > 0 then ContentType := 'audio/acc';

  if ContentType = 'undefined' then raise EXDataHttpUnauthorized.Create('RemoteURL must reference an audio file.');

  TXDataOperationContext.Current.Response.Headers.SetValue('content-type', ContentType);

  Client := TNetHTTPClient.Create(nil);
  Client.Asynchronous := False;
  Client.ContentType := ContentType;
  Client.SecureProtocols := [THTTPSecureProtocol.SSL3, THTTPSecureProtocol.TLS12];
  Response := Client.Get(RemoteURL).ContentStream;

  Result := TMemoryStream.Create;
  if Response.Size > 0 then
  begin
    Result.CopyFrom(Response, Response.Size);
    Client.Free;
  end
  else
  begin
    Client.Free;
    raise EXDataHttpUnauthorized.Create('RemoteURL returned no data.');
  end;
end;
Options for configuring our app to use this proxy can be found on the last Options dialog page - Settings. Incorporating the choice of proxy, when the user enters a new URL we can then get our audio data using the following.
procedure TForm1.editAudioSourceChange(Sender: TObject);
begin
  OptionsAudioFile := editAudioSource.Text;
  asm
    var This = pas.Unit1.Form1;

    var Proxy = '';
    if (This.OptionsProxyStyle == 0) {
      Proxy = This.Server_URL+'/HexaGongsService/GetRemoteData?RemoteURL=';
    }
    else if (This.OptionsProxyStyle == 2) {
      Proxy = This.OptionsProxy;
    }

    var response = await fetch(Proxy+This.OptionsAudioFile);
    var audiodata = await response.arrayBuffer();
    This.GongAudio[This.GongID] = This.AudioCtx.createBufferSource();
    This.AudioCtx.decodeAudioData(
      audiodata,
      (buffer) => {
        This.GongAudio[This.GongID] = buffer;
        This.OptionsAudioTime = buffer.duration;
      }
    );
  end;
end;
With the CORS proxy in place, users should be able to copy and paste any URL that points to one of the supported audio files. The XData endpoint was configured with a specific set of audio file types and will return an error (which is normally ignored by our app) if the request isn't covered. This helps a bit when people are typing in a URL - no remote fetches (beyond XData) are made until a URL is provided with a proper extension.
Recording.
Next up, we can also record an audio clip. We could have done this with images - capturing an image from a camera - but opted not to mostly because the default file browser on mobile devices makes it pretty easy to get at the photo library and the camera all on its own, so this isn't all that important. With audio, it is a little less easy to do that as audio clips aren't stored in the same place, and may not even be accessible.
We'd like to be able to record short clips, like individual spoken words or letters, to match up to whatever icons or images we're using. This is most helpful for the use case where the user wants to use HexaGongs to say words that might be difficult or impossible to find elsewhere.
To get this to work, we're going to use the TMS WEB Core TWebMediaCapture component, set to "audio", as well as
the TWebCamera component. The browser takes care of much of the work when it comes to selecting an available
microphone, so all we're going to worry about is starting and stopping the recording via a pair of buttons,
where the visibility is swapped. Once the recording is stopped, we can use the TWebMediaCapture component's
onStopRecording event handler to retrieve the recorded audio and process it just as we've been doing with the
other audio sources.
procedure TForm1.WebMediaCapture1StopCapture(Sender: TObject; ABinary: TJSUint8Array; ABase: string);
begin
  OptionsAudioFile := 'Locally Recorded Audio';
  asm
    var This = pas.Unit1.Form1;
    This.GongAudio[This.GongID] = This.AudioCtx.createBufferSource();
    This.AudioCtx.decodeAudioData(
      ABinary.buffer,
      (buffer) => {
        This.GongAudio[This.GongID] = buffer;
        This.OptionsAudioTime = buffer.duration;
        editAudioSource.value = This.OptionsAudioFile;
      }
    );
  end;
end;
In this case, the audio data is coming in as a TJSUint8Array, which conveniently has a buffer property that we can reference, which is exactly what the decodAudioData() method needs. If the recorded audio wasn't quite right, it is just a matter of going through the recording step again - no trouble at all.
Audio Preview.
We have one more audio source to deal with - HexaGong Sets. But before we get to those, we have another rabbit hole to explore. With the audio sources we've got so far, we've got a bit of a problem. It is very tedious to test what audio we've loaded. Well, Audio Clips have a preview which is good for this, but the Upload, URL, and Record options don't. We have to close the Options dialog, clear the HexaGong change mode, and then click on our HexaGong to hear whatever it is that we've recorded (or selected via one of the other options).
Furthermore, even with Audio Clips, we might want to make minor adjustments to the audio data. Like trimming the start or end, adding delays, changing the pitch or volume, or perhaps other options. And, when we built the TrackEditor, we also had a handy waveform displayed. So let's see if we can build something like that here.
For the waveform, we'll need another JavaScript library - D3
Charts. We first covered this library in our miniseries on Charting,
where D3 was introduced in Part
3. Thus we'll need another JavaScript library entry in our Project.html file, or added via the Delphi
Manage JavaScript Libraries feature, as per usual.
<script src="https://cdn.jsdelivr.net/npm/d3@7/dist/d3.min.js"></script>
The idea here is that we're drawing a chart based on the data contained in an audio file. We've already extracted the data for all of our audio source options, so our function to draw the waveform can just start from there. We'll be drawing this into another TWebHTMLDiv component, divAudioWaveform, and its dimensions will form the dimensions of our chart. This draws pretty quickly, so no problem redrawing this as the Options dialog is resized.
procedure TForm1.UpdateWaveform;
begin

  if (GongID < 0) then
  begin
    divAudioWaveform.HTML.Text := '';
    exit;
  end;

  asm
    var This = pas.Unit1.Form1;
    var h = 52;
    var w = divAudioWaveform.getBoundingClientRect().width - 10;

    const detachedSVG = d3.create("svg");
    const audio = This.GongAudio[This.GongID];

    if (audio == undefined) {
      divAudioWaveform.replaceChildren();
      return;
    }

    const step = Math.floor(
      audio.getChannelData(0).length / w
    );

    const samplesL = [];
    for (let i = 0; i < w; i++) {
      samplesL.push(audio.getChannelData(0)[i * step]);
    }
    const samplesR = [];
    for (let i = 0; i < w; i++) {
      samplesR.push(audio.getChannelData(1)[i * step]);
    }

    detachedSVG.attr("width", w)
               .attr("height", h);

    const dataL = Array.from(samplesL.entries());
    const dataR = Array.from(samplesR.entries());

    const xValue = d => d[0];
    const yValue = d => d[1];

    const xScale = d3
      .scaleLinear()
      .domain([0, dataL.length - 1])
      .range([0, w]);

    // Draw Channel 0
    detachedSVG.selectAll('.ch0')
      .data(dataL)
      .enter()
      .append('rect')
        .attr('width', ((w / dataL.length) * 0.8))
        .attr('height', function (d) { return Math.abs(yValue(d) * 24)})
        .attr('x', function (d, i) { return (((w / dataL.length) * i) + ((w / dataL.length) * 0.1)) })
        .attr('y', function (d) { return 25 - Math.abs(yValue(d) * 24)})
        .attr('fill', 'silver');

    // Draw Channel 1
    detachedSVG.selectAll('.ch1')
      .data(dataR)
      .enter()
      .append('rect')
        .attr('width', ((w / dataL.length) * 0.8))
        .attr('height', function (d) { return Math.abs(yValue(d) * 24) })
        .attr('x', function (d, i) { return (((w / dataL.length) * i) + ((w / dataL.length) * 0.1)) })
        .attr('y', 25)
        .attr('fill', 'silver');

    divAudioWaveform.innerHTML = '<div style="width: '+w+'px; top: 2px; left: 5px; height: '+h+'px; width: '+w+'px; color: #fff; overflow:hidden; position:absolute;">'+
                                   detachedSVG.node().outerHTML+
                                 '</div>';
  end;
end;
This gets us our waveform, with a left/right or channel 0/channel 1 presentation. If the Options dialog is resized, the waveform is redrawn. In order to play the file, we'll do something similar to what we did when clicking on a HexaGong in the main interface. Except in this case, instead of using a CSS conic-gradient to show our progress, we'll use a CSS linear-gradient to superimpose a vertical bar on our waveform.
procedure TForm1.divAudioWaveformHolderClick(Sender: TObject);
begin
  // Play the waveform
  asm
    var This = pas.Unit1.Form1;
    var audio = this.GongAudio[This.GongID];

    if (audio == undefined) {
      return;
    }

    function StopPreview() {
      divAudioWaveform.classList.remove('Playback');
      if (divAudioWaveform.lastElementChild.classList.contains('progress')) {
        divAudioWaveform.lastElementChild.remove();
      }
      clearInterval(This.AudioPreviewProgress)
      clearTimeout(This.AudioPreviewTimer);
      This.AudioPreview.disconnect();
      This.AudioPreview.stop();
      This.AudioPreview = null;
    }

    // If currently playing, stop
    if (divAudioWaveform.classList.contains('Playback')) {
      StopPreview();
    }

    // If not playing, start
    else {
      divAudioWaveform.classList.add('Playback');
      This.AudioPreview = This.AudioCtx.createBufferSource();
      This.AudioPreview.buffer = This.GongAudio[This.GongID];
      This.AudioPreview.connect(This.AudioGain).connect(This.AudioCtx.destination);
      This.AudioPreview.start(0, 0, This.AudioPreview.buffer.duration);
      divAudioWaveform.setAttribute('starttime',This.AudioCtx.currentTime);

      // Update progress display
      var progress = '<div class="progress" style="position:absolute; top:0px; left:0px; width:100%; height:100%; z-index:100; background:none; pointer-events:none;"><div>';
      divAudioWaveform.innerHTML += progress;
      This.AudioPreviewProgress = setInterval(function() {
        if (This.AudioPreview !== null) {
          var elapsed = Math.min(1, ((This.AudioCtx.currentTime - divAudioWaveform.getAttribute('starttime'))  / This.AudioPreview.buffer.duration));
          if (elapsed >= 1) {
            StopPreview();
          }
          else {
            var bar = 4 + elapsed * (divAudioWaveform.getBoundingClientRect().width - 8);
            divAudioWaveform.lastElementChild.style.setProperty('background','linear-gradient(to right, transparent 0px, transparent '+(bar - 5)+'px, #FFFFFF60 '+(bar - 5)+'px, #FFFFFF60 '+bar+'px, transparent '+bar+'px, transparent 100%)');
          }
        }
      },100);

      // Stop when we're done playing
      This.AudioPreviewTimer = setTimeout(function() {
        StopPreview();
      }, This.AudioPreview.buffer.duration * 1000);

    }
  end;
end;
Still a lot of code, but mostly just copied and pasted from the HexaGong click code, so not really much work. But this gets us a reasonably functional waveform display. Clicking on the waveform will play it. Clicking it again will stop it if it is already playing, just as it does with the main interface.
Audio Preview Animation.
With that in place, we can play whatever audio source we've loaded without having to exit the Options dialog.
Audio Adjustments.
As with icons and images, it would be handy to make some adjustments to the audio. There are quite a number of things we might want to alter, and more will likely be added over time. The ability to trim the start and end times, as well as set the volume or gain of the audio are likely the most important, so let's start with those.
As with the images, we can use range sliders for all of these parameters. And this time we've got one of
the sliders rotated 180 degrees so we don't have to think too much about how to reconfigure it.
- Gain. Adjusts the gain of the audio file from 0% (muted), through 100% (normal), up to 200% (loud).
- Start Offset. A percent value representing where in the clip to start playing.
- End Offset. A percent value representing where in the clip to stop playing.
Adjusting the start and end offsets allows us to truncate any quiet time or adjust the clip around the
highlights we can see in the waveform. Here's an example of what this looks like.
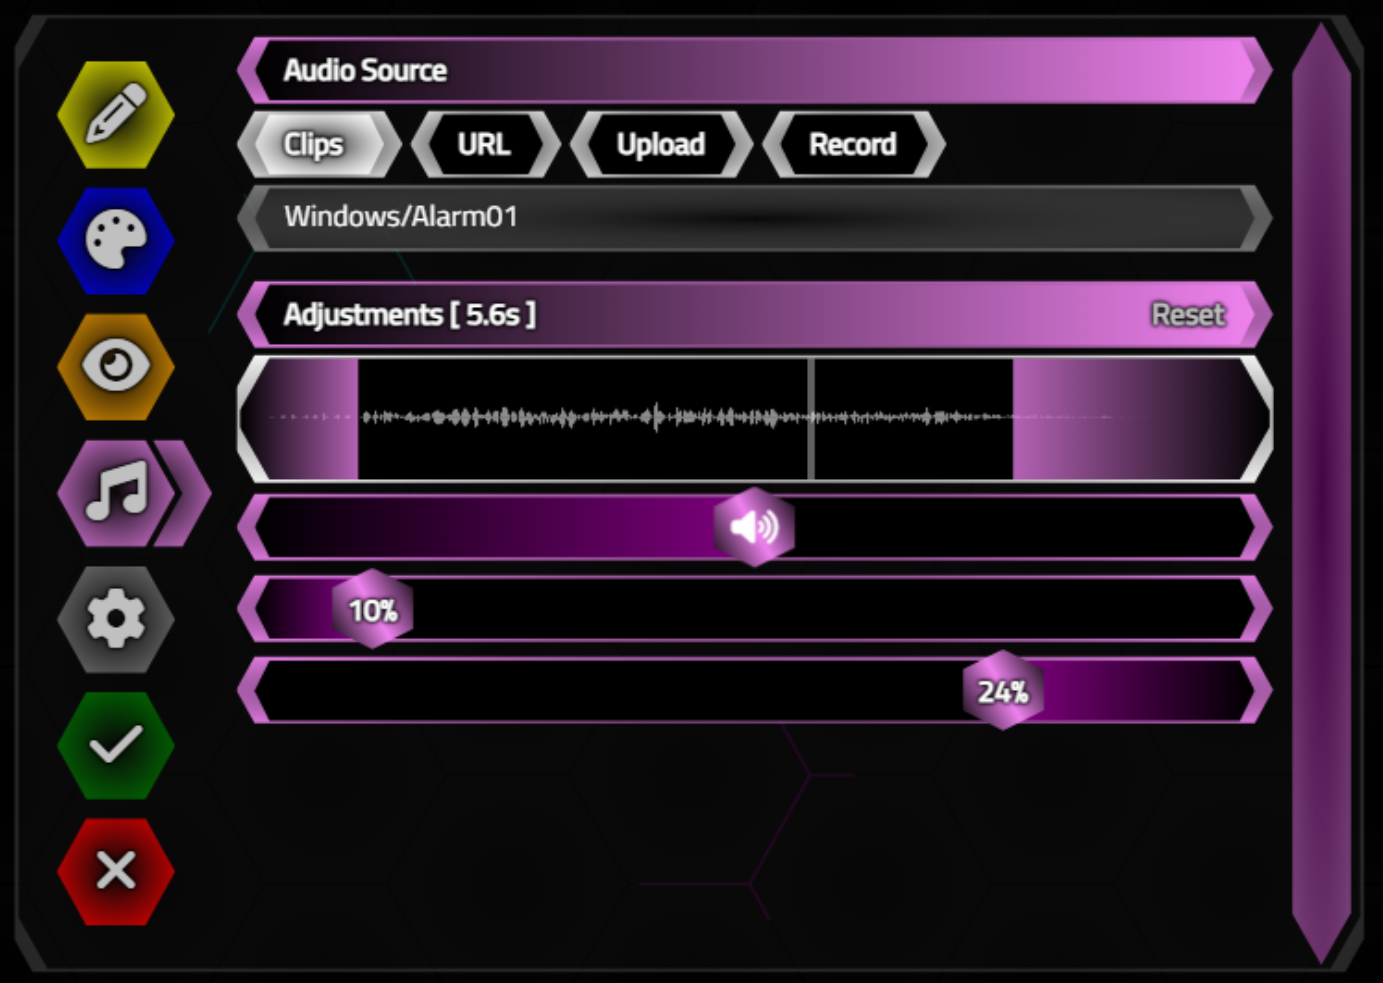
Applying Audio Adjustments.
These audio parameters are stored as part of the GongData JSON object and also added as HTML attributes to the HexaGong HTML element so it is easily available later, much the same as the image parameters are
managed. More audio parameters might be added in the future, such as something to help with ramping up/down at the start/end. This would be helpful in particular for new recordings, where there might be ambient noise to deal with. Or perhaps other filters could be added, taking advantage of the
full gamut of what the Web Audio API brings to the table.
Incorporating the audio parameters visually into the waveform (well, overlaid on the waveform-containing element)
involves using separate <div> elements with their own CSS linear-gradients, much like how the range sliders
themselves are drawn. And factoring in the gain, start offset, and end offset values into the actual playback also adds to
the complexity. Here's what we've ended up with.
procedure TForm1.divAudioWaveformHolderClick(Sender: TObject);
begin
  // Play the waveform
  asm
    var This = pas.Unit1.Form1;
    var audio = this.GongAudio[This.GongID];

    if (audio == undefined) {
      return;
    }

    function StopPreview() {
      divAudioWaveform.classList.remove('Playback');
      if (divAudioWaveform.lastElementChild.classList.contains('progress')) {
        divAudioWaveform.lastElementChild.remove();
      }
      clearInterval(This.AudioPreviewProgress)
      clearTimeout(This.AudioPreviewTimer);
      This.AudioPreview.disconnect();
      This.AudioPreview.stop();
      This.AudioPreview = null;
    }

    // If currently playing, stop
    if (divAudioWaveform.classList.contains('Playback')) {
      StopPreview();
    }

    // If not playing, start
    else {
      divAudioWaveform.classList.add('Playback');

      var ClipGain = new GainNode(This.AudioCtx);
      ClipGain.gain.value = This.OptionsAudioGain / 100;
      This.AudioPreview = This.AudioCtx.createBufferSource();
      This.AudioPreview.buffer = This.GongAudio[This.GongID];
      This.AudioPreview.connect(ClipGain).connect(This.AudioGain).connect(This.AudioCtx.destination);

      var offset = (This.OptionsAudioStart / 100) * This.AudioPreview.buffer.duration;
      var playlength = ((100 - (This.OptionsAudioStart + This.OptionsAudioEnd)) / 100) * This.AudioPreview.buffer.duration;

      This.AudioPreview.start(0, offset, playlength);
      divAudioWaveform.setAttribute('starttime',This.AudioCtx.currentTime);

      // Update progress display
      var progress = '<div class="progress" style="position:absolute; top:0px; left:0px; width:100%; height:100%; z-index:100; background:none; pointer-events:none;"><div>';
      divAudioWaveform.innerHTML += progress;
      This.AudioPreviewProgress = setInterval(function() {
        if (This.AudioPreview !== null) {
          var elapsed = Math.min(1, (This.AudioCtx.currentTime - divAudioWaveform.getAttribute('starttime')) / playlength);
          if (elapsed >= 1) {
            StopPreview();
          }
          else {
            var bar = 12 +
                     ((This.OptionsAudioStart / 100)) * (divAudioWaveform.getBoundingClientRect().width - 20) +
                      elapsed * ((divAudioWaveform.getBoundingClientRect().width - 20) * playlength / This.AudioPreview.buffer.duration);
            divAudioWaveform.lastElementChild.style.setProperty('background','linear-gradient(to right, transparent 0px, transparent '+(bar - 4)+'px, #FFFFFF60 '+(bar - 4)+'px, #FFFFFF60 '+bar+'px, transparent '+bar+'px, transparent 100%)');
          }
        }
      },100);

      // Stop when we're done playing
      This.AudioPreviewTimer = setTimeout(function() {
        StopPreview();
      }, playlength * 1000);

    }
  end;
end;
Note in particular that we're creating an extra Gain Node and adding it into the sequence that we use to actually play the file. These same changes have been applied to the main HexaGong play code as well, retrieving the audio parameters from the HTML attributes of the HexaGong being played.
Next Time.
That's quite a lot of ground we've managed to cover in this post, and this brings us very nearly to the end of
our adventure. Next time out, we'll finish up by looking at how to save and load entire HexaGongs projects, as
well as what is involved in deploying both our TMS XData project and the TMS WEB Core project into a production
(or public) environment.
HexaGongs website.
HexaGongs repository on GitHub.
HexaGongs XData repository on GitHub.
Related Posts.
HexaGongs Part 1: Background
HexaGongs Part 2: Interface
HexaGongs Part 3: Options (Edits, Memos, Buttons, Colors, Trackbars)
HexaGongs Part 4: Options (Image and Audio)
HexaGongs Part 5: Deployment
Follow Andrew on 𝕏 at @WebCoreAndMore or join our 𝕏 Web Core and More Community.
Andrew Simard

This blog post has not received any comments yet.
All Blog Posts | Next Post | Previous Post