TMS Cloud & Mapping Controls
Obtaining a client and secret or API key
A first step, when using the TMS cloud and/or mapping controls, will be to register your application so you can obtain an application key and secret or api key at the different services. Listed below are the instructions for all currently supported services in our range of products.

|

|
|
|

|

|

|

|

|

|

|

|

|

|

|

|

|

|

|

|

|

|

|

|

|

|

|
|
|
|
|
|
|
|
|
|
|
|
|
|
|
|
|
|
|

|

|

|
|

|

|

|

|

|

|

|
StellarDS.io
- Go to https://stellards.io/ and sign-up to create an account.
- Go to "Manage Database"
- Select "Applications" from the left-side menu
- Client id and client secret
- Select the "OAUTH APPLICATIONS" tab and add a new application
- The client id and client secret are displayed
- Access Tokens (API Key)
- Select the "ACCESS TOKENS" tab and add a new access token
- The access token is displayed
Note: for TMS FNC Cloud Pack the access token should be used as an API key.

HiDrive
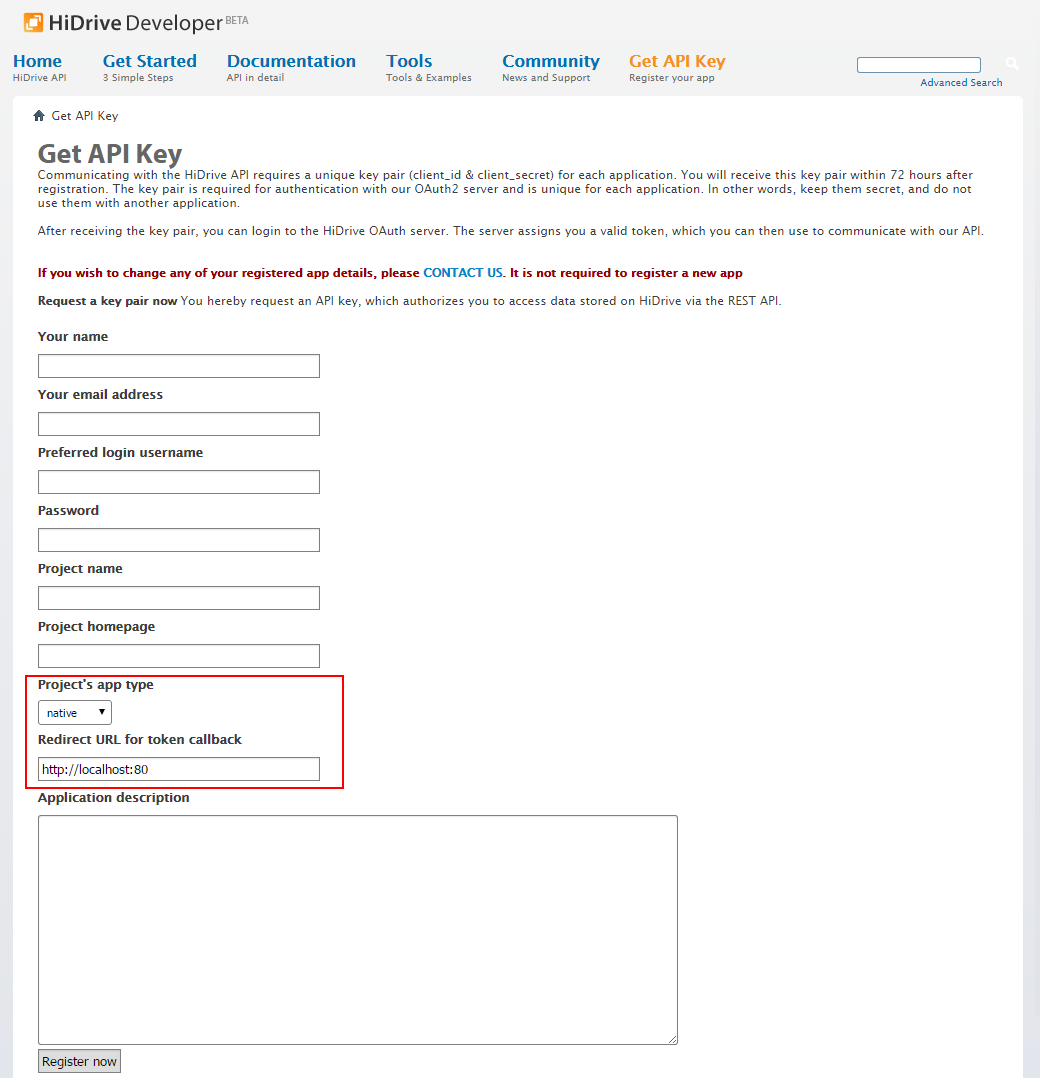
- Go to HiDrive developer site: https://dev.strato.com/hidrive/
- Go to the 'Get API Key' tab and fill in the form.
- Register your app by subimitting the form.
- If the form data is accepted the key and secret values will be provided in an e-mail message.
Apple CloudKit
- An active iOS developer account and an App with iCloud and CloudKit enabled is required before the CloudKit dashboard can be accessed.
Detailed information can be found here: Apple CloudKit Quick Start - Go to: https://icloud.developer.apple.com/dashboard/
- Select a project
- Click on Record Types and create the desired database schema.
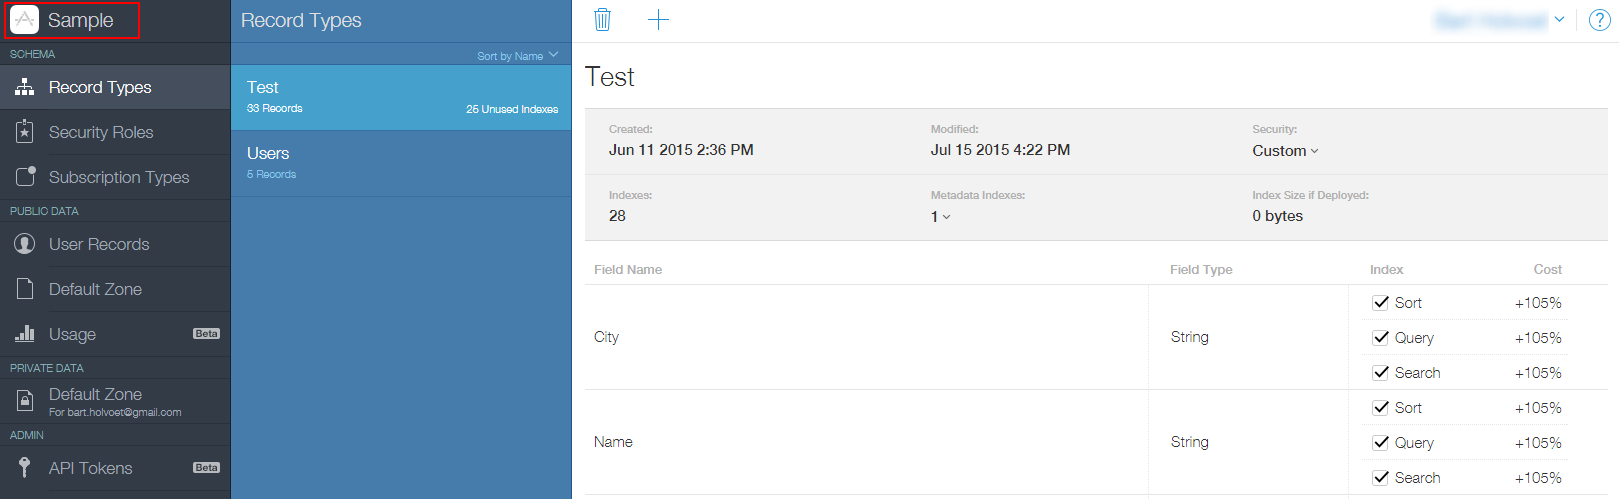
- The API key can found on the 'API Access' tab.

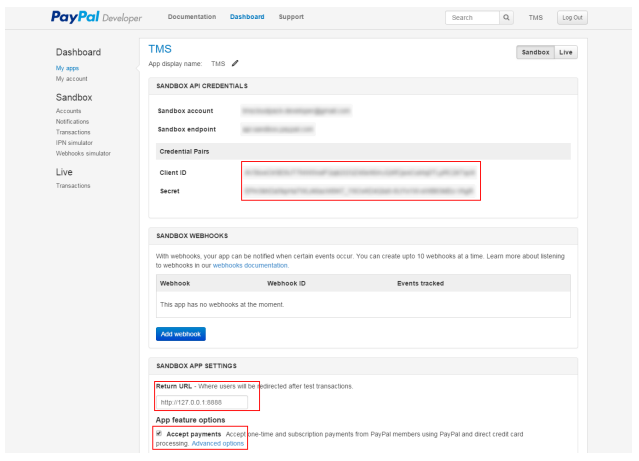
PayPal
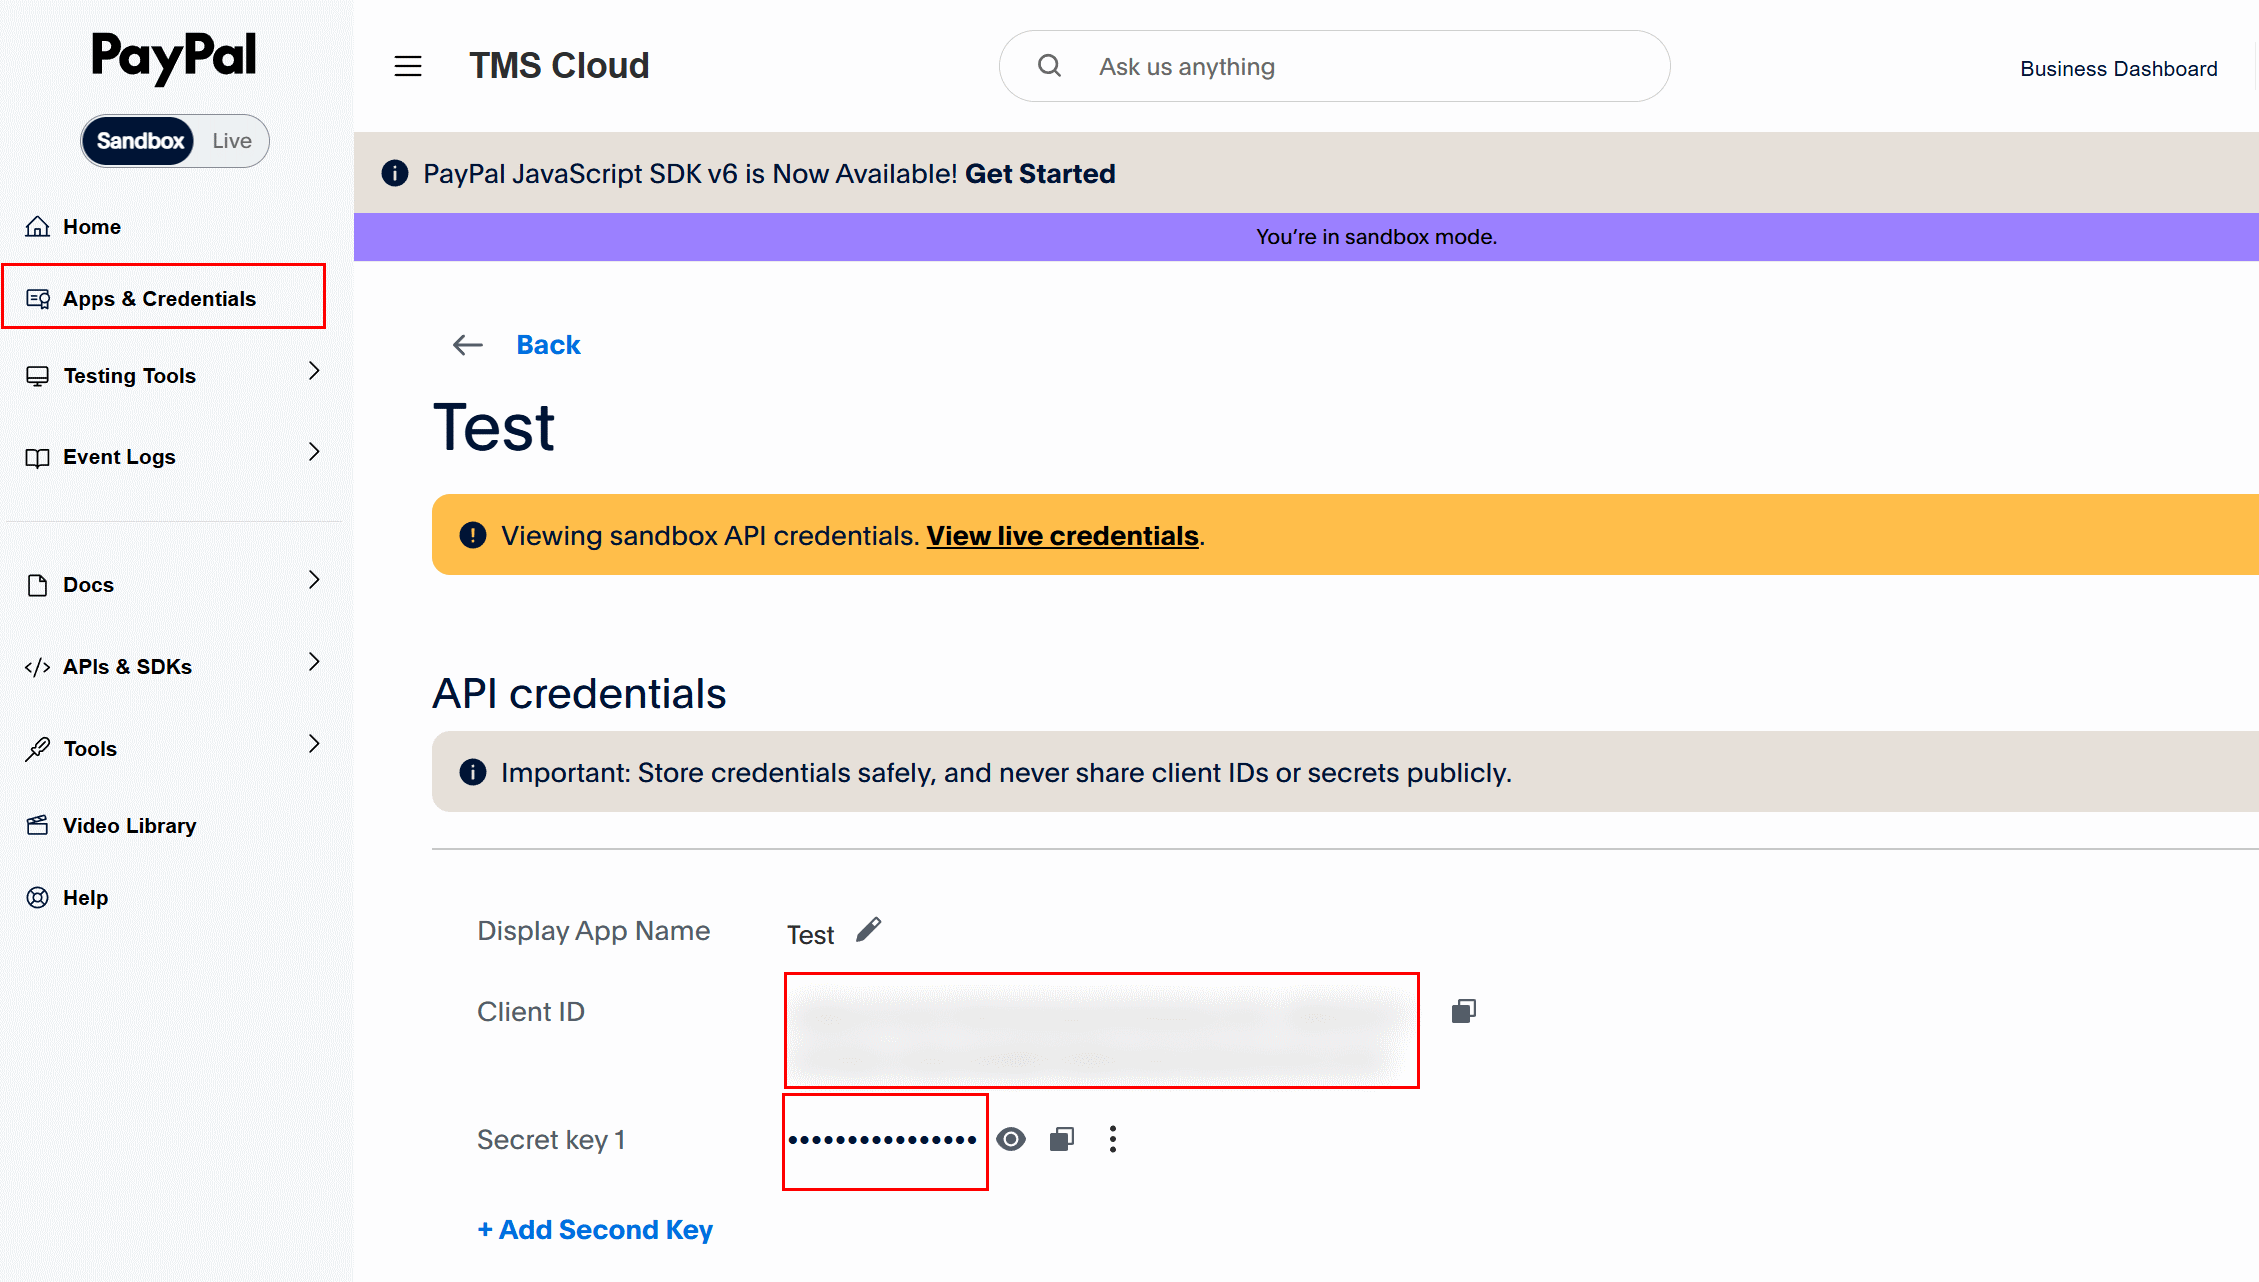
- Go to https://developer.paypal.com/
- Login with your PayPal account
- Go to https://developer.paypal.com/developer/applications
- Select the 'Apps & Credentials' tab in the left pane
- Click 'Create App' button, and create the app after entering a name
- Your Application Client ID and Secret are displayed on the App page
Callback URL
- Under 'Features' > 'Add-on services', enable 'Log in with PayPal'
- Click the 'Manage' link to open a dialog
- Set Return URL to 'http://127.0.0.1:8888'
- Click 'Save' to close the dialog
- Click 'Save Settings' on the bottom of the 'Features' section

CloudConvert
Sign up for an account at: https://cloudconvert.com After login the API key is displayed on the user profile page: https://cloudconvert.com/user/profile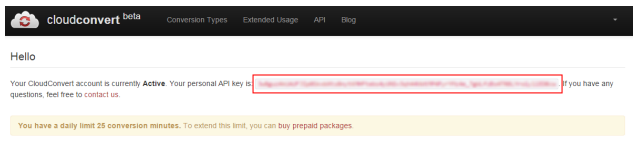
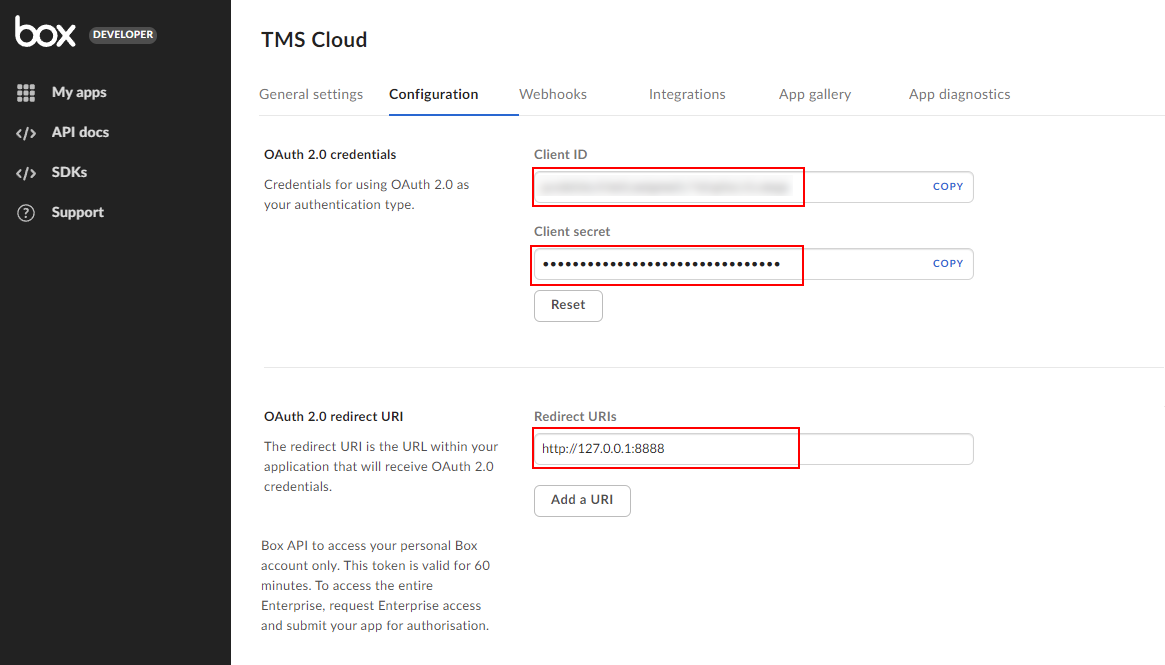
Box
To create an application for Box, you'll need a Box developer account. Login at http://developers.box.com/ and request the application key and secret via the link: https://app.box.com/developers/consoleClick the "Create New App" button and select "Custom App". In the dialog that pops up select "User authentication (OAuth 2.0)" and enter a name for your app. After submitting the App ID (Key) and Secret are displayed as well as the Callback URL.
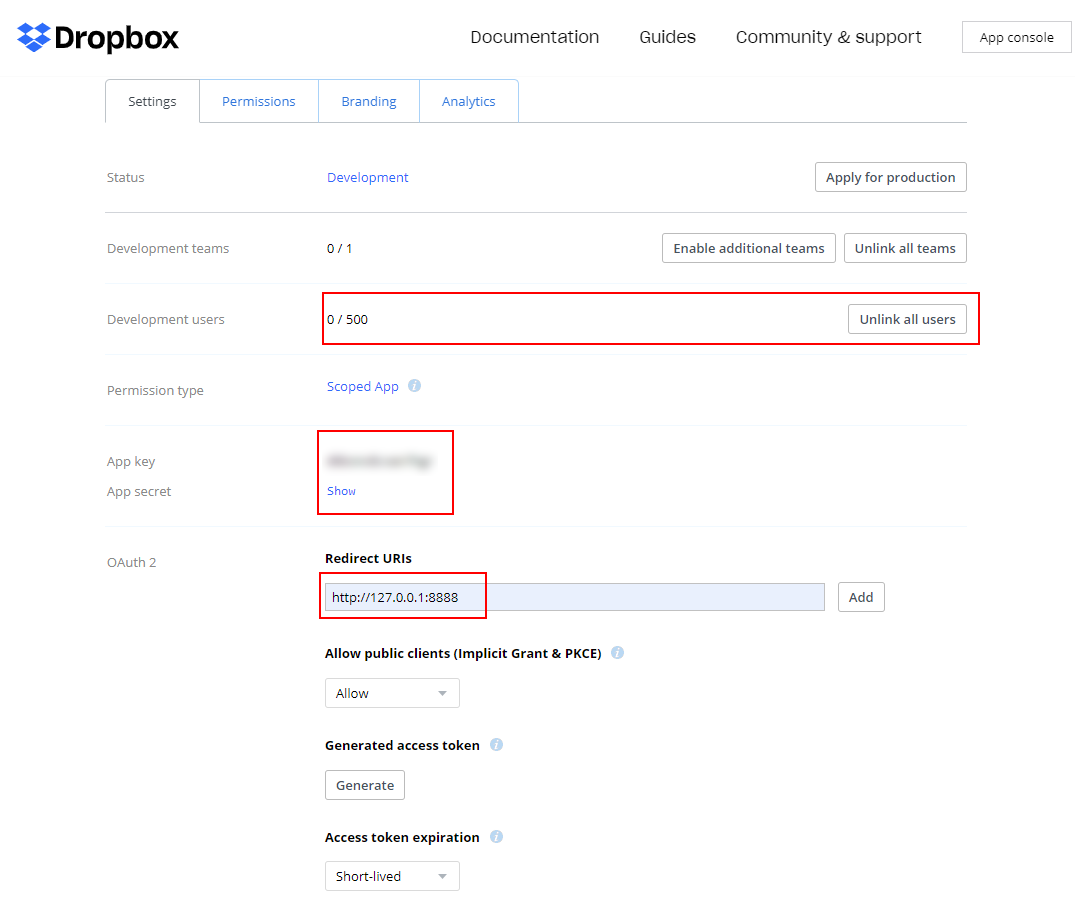
DropBox
To create an application for DropBox, you'll need a DropBox account. Login and request the application key and secret via the link: https://www.dropbox.com/developers/apps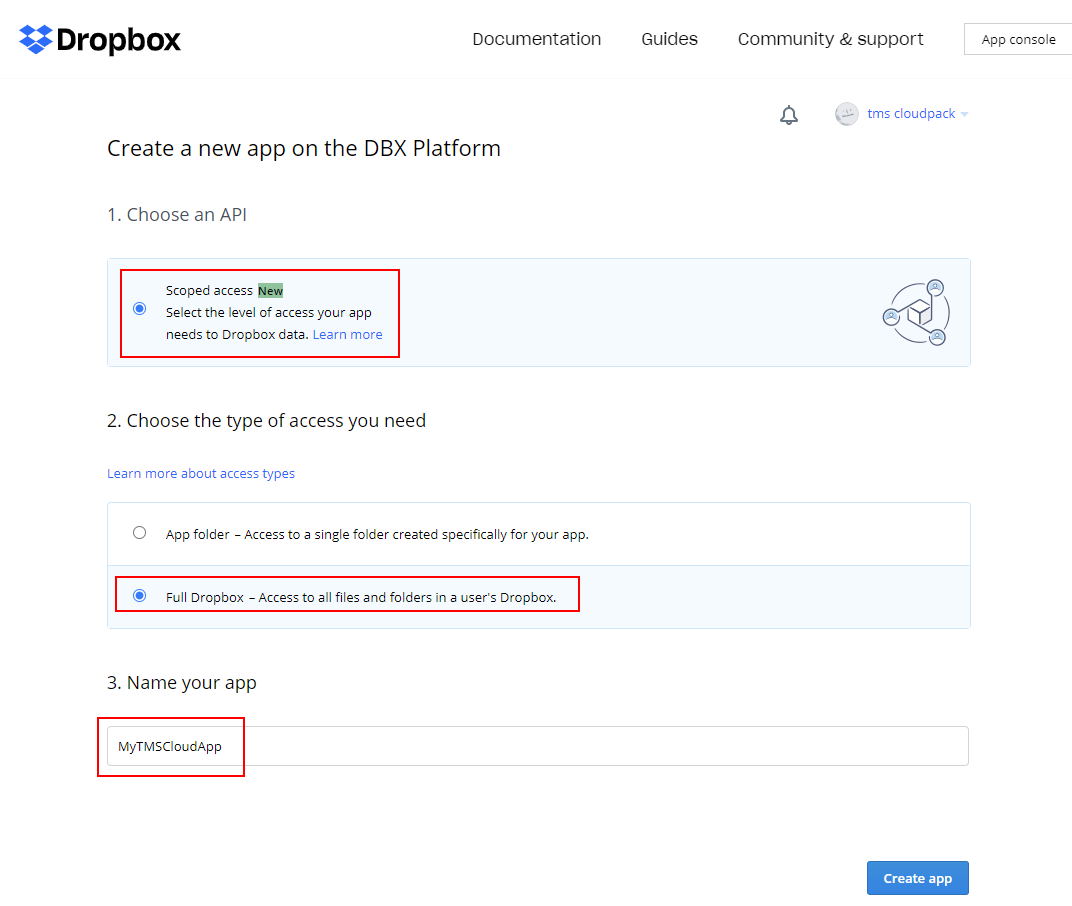 When confirming the creation of this app, you will see on the next page the application key and application secret.
 Make sure to add an URL to the list of 'Redirect URIs' that is identical to the App.CallBackURL property value.
This is required for using the TMS Cloud access components.
Also click the "Enable additional users" button to allow other users to authenticate through your app.
Optionally the "Access token expiration" value can be set to "No expiration" to avoid having to deal with frequent re-authentication.
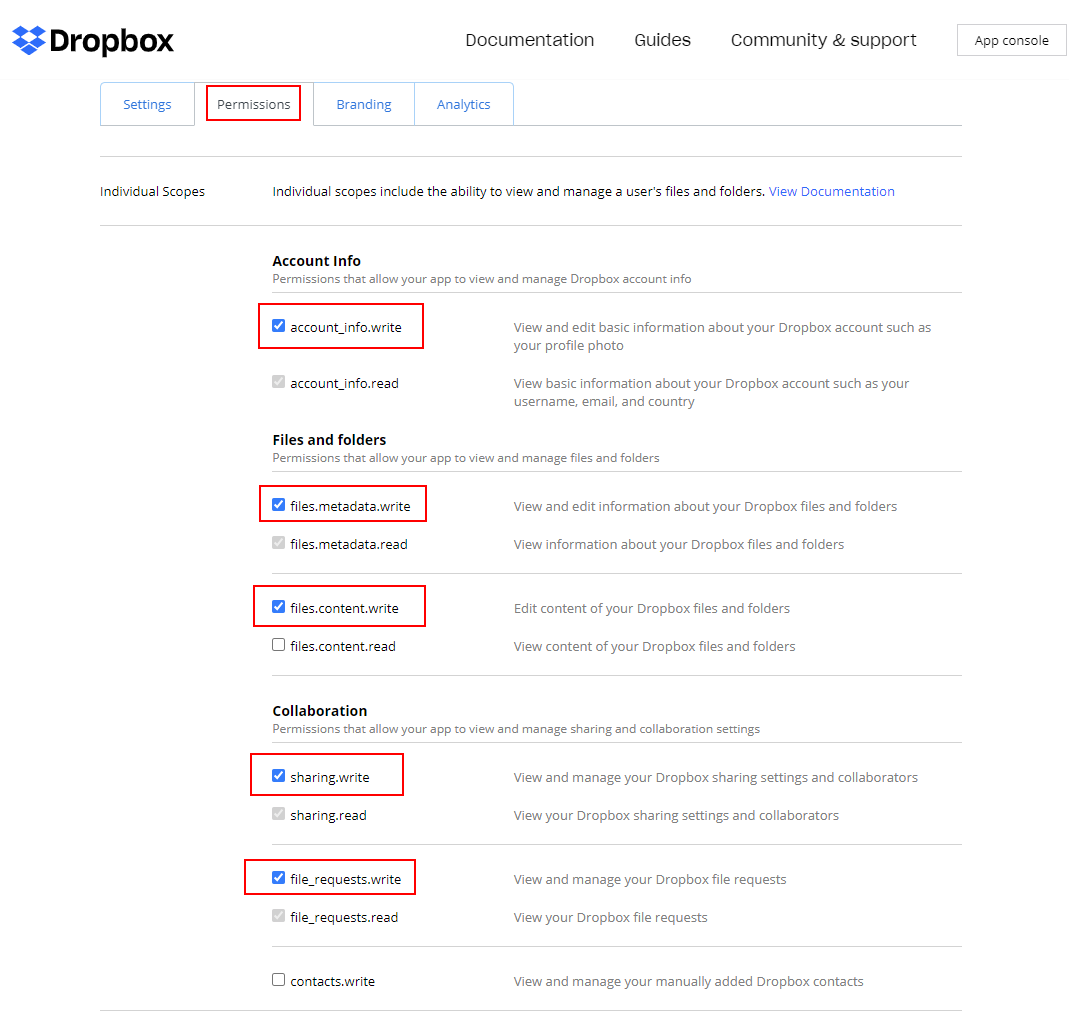
 Now select the "Permissions" tab and select the required checkboxes.
Drive, Geocoding, Routes, Places, Tasks, Calendar, People, Photos, Picasa, YouTube, Mail, Sheets, Analytics, Maps.
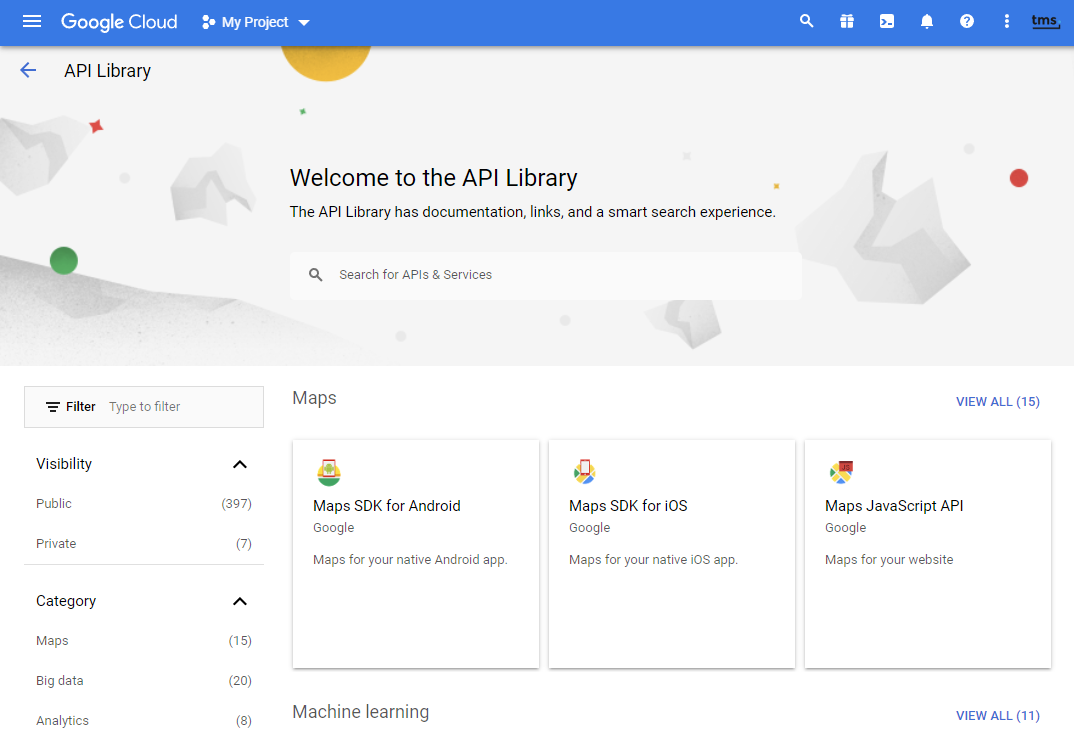
- To create an application for Google's APIs, go to the API console:https://console.developers.google.com
- Select a project or create a new one.
- From the top-left menu 'APIs & Services' choose 'Library'. Select the required APIs one by one and enable them.
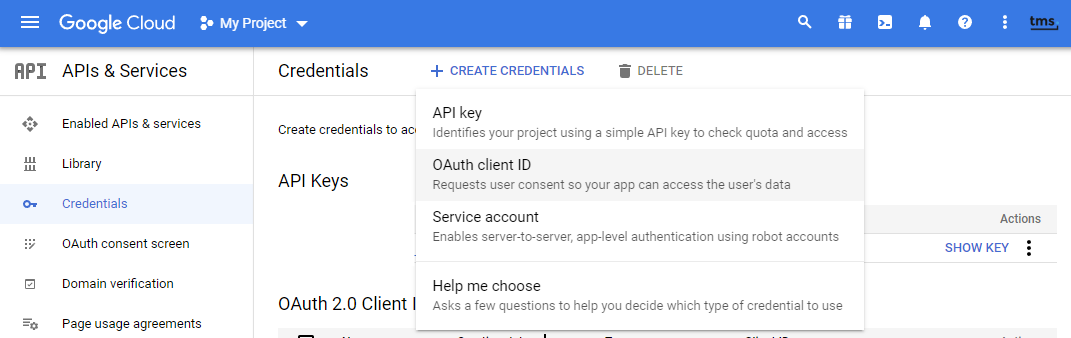
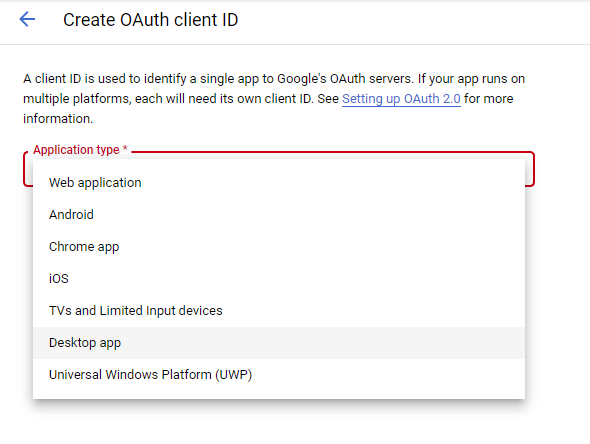
 Then select 'Credentials' from the left menu, click 'Create credentials' and select "OAuth client ID".
Application Type
Desktop or mobile application
Select "Desktop app" and press the "Create" button
There is no need to configure a redirect URI in the Google developer console. In your application you can use a localhost url as CallBackURL.
For example: http://127.0.0.1:8888
Web application
Select: 'Web application' and enter the URL where the web application is located for the "Authorized redirect URIs". Then press create.
Note: Localhost URLs are not accepted by Google during the app verification process. This is a Google requirement which we have no control over.
The client ID and client secret are displayed on the following screen.
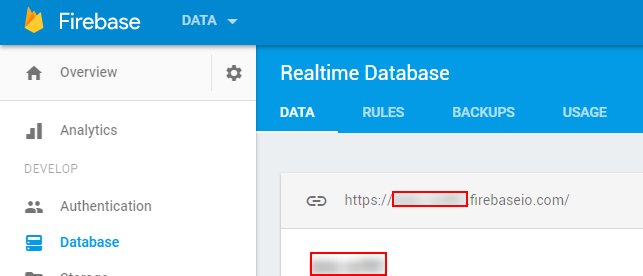
Google Firebase Database
- Follow the instructions above to create an application.
- Then go to: https://console.firebase.google.com/
- Select an exising project or create a new project.
- Select the Database topic
- Note the automatically generated Database name
 Then enter the application details on the following page to receive the API Key and Secret.
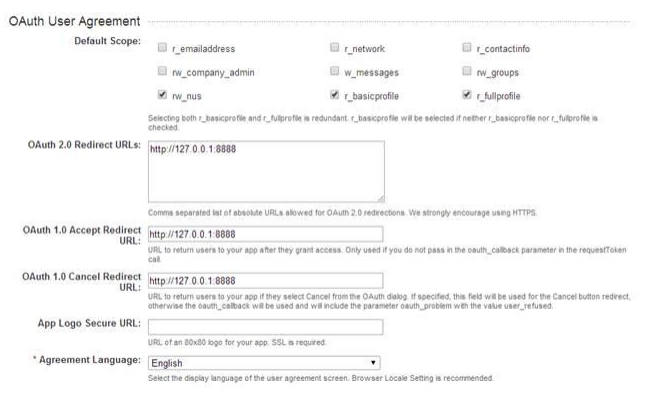
Please note that the field 'Oauth 2.0 Redirect URLs' is required for authentication.
Then enter the application details on the following page to receive the API Key and Secret.
Please note that the field 'Oauth 2.0 Redirect URLs' is required for authentication.
Microsoft
These guidelines apply to all supported Microsoft Graph-based API services, including but not limited to: OneDrive, Calendar, Contacts, Mail.Note
Windows Live Contacts and Calendar APIs are deprecated. It is recommended to use Outlook Contacts and Calendar instead.
Note
Microsoft now requires signing up for Azure or the M365 Developer Program to create new Client IDs and Secrets for OAuth2.
For detailed information on potential costs, please refer to the specific websites:
Steps
- Go to: https://portal.azure.com/#blade/Microsoft_AAD_RegisteredApps/ApplicationsListBlade and sign in.
- Click the "New registration" button and enter a name for your application.
- Supported account types:
- Select the second option
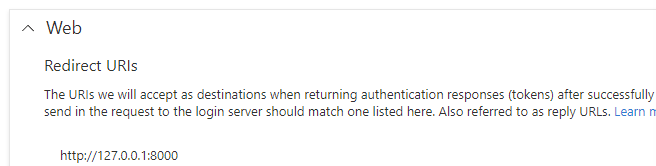
- In the Authentication section:
- Add a platform and select "Web"
Note: Even when creating a desktop and/or mobile application, select "Web" to make the authentication function correctly - Enter a valid redirect URL.
- Example: "http://localhost:8000"
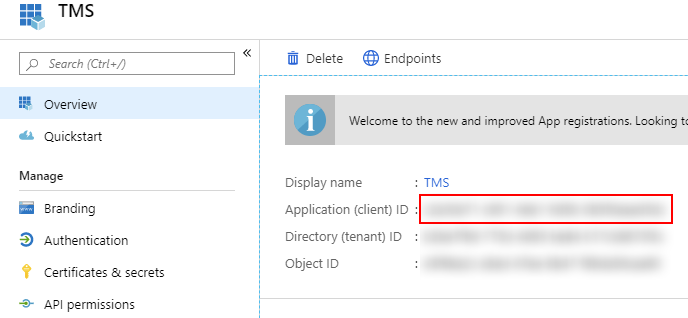
- Click the "Register" button and the Client ID is displayed.
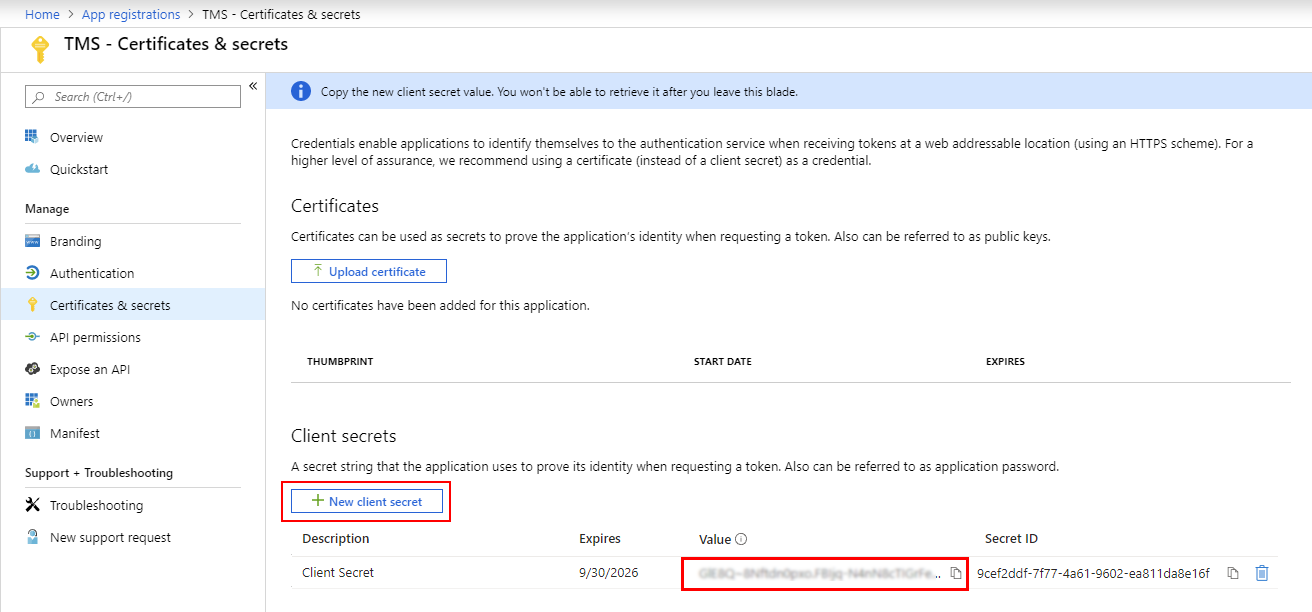
- Click "Certificates & secrets" in the menu on the left
- Click the "New client secret" button
- Add a description and preset "Add"
- The Client Secret is displayed Important: Please ensure you use the data from the "VALUE" column, not the "CLIENT ID" column.

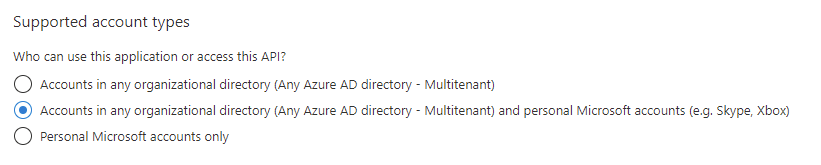
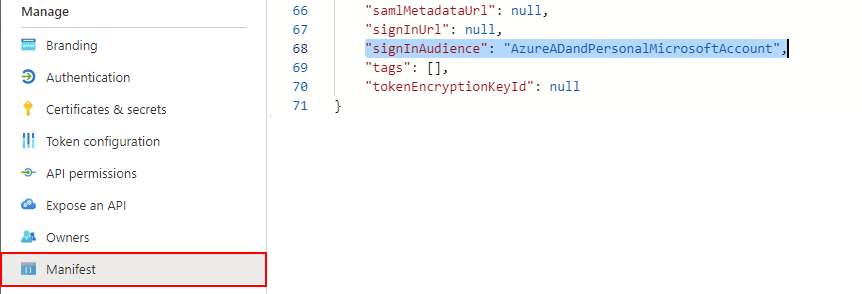
 Note: To change the "Supported account types" option for an existing app, select "Manifest" and change "signInAudience" to "AzureADandPersonalMicrosoftAccount".
 Note: An additional app verification process was added recently. However the steps above are still sufficient for testing purposes.
- Go to https://docs.microsoft.com/en-us/azure/active-directory/develop/publisher-verification-overview and follow the instructions for the verification process.
- Go to http://developers.facebook.com
- Login with your Facebook account
- Select 'Apps'
- Click 'Create New App'
- Enter a name for your App and click 'Create App'
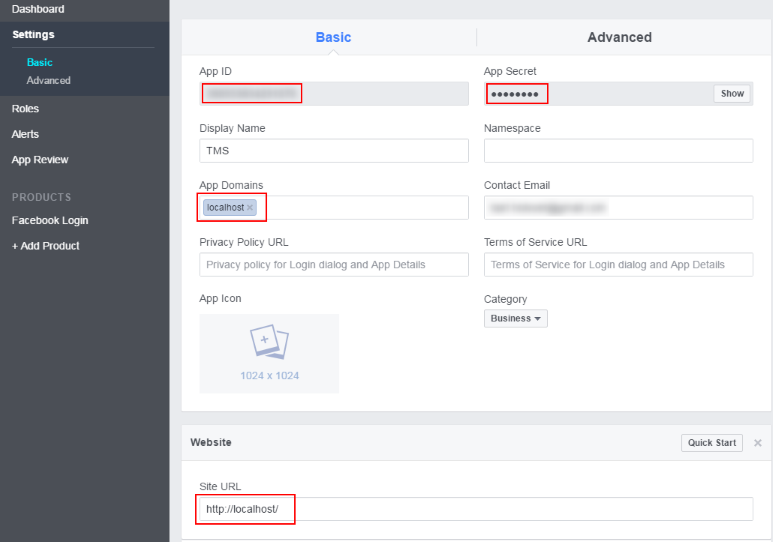
- The 'Dashboard' page is displayed with the App ID and App Secret
- Click Settings
- Click on '+ Add Platform' and select 'Website'
- You still need to enter the appropriate values in the 'App Domains' and 'Site URL' fields
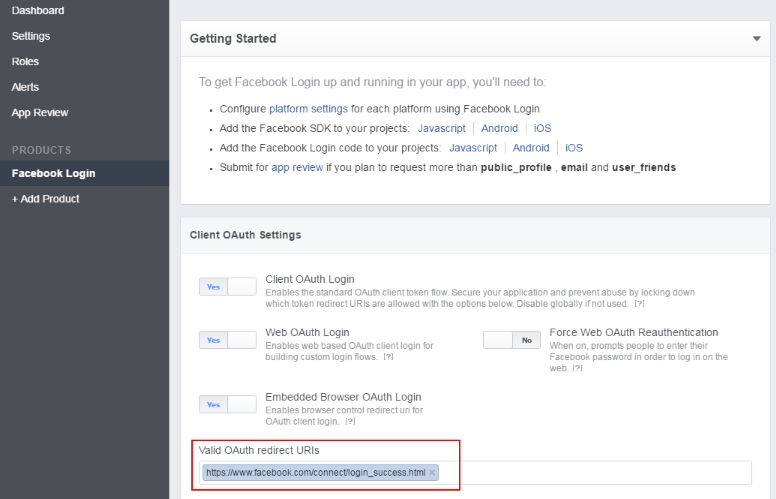
 If not yet available, add the 'Facebook Login' on the 'Products' tab.
On the 'Client OAuth Settings' page:
If not yet available, add the 'Facebook Login' on the 'Products' tab.
On the 'Client OAuth Settings' page:
- Make sure 'Client OAuth Login', 'Web OAuth Login' and 'Embedded browser OAuth Login' are set to True.
- Add the url 'https://www.facebook.com/connect/login_success.html' in the 'Valid OAuth redirect URIs' field.
 Note:
Due to changes in the Facebook API some permissions require approval before public usage is enabled.
Note:
Due to changes in the Facebook API some permissions require approval before public usage is enabled.People logging into your app won't be able to grant unapproved permissions. Only people listed in the Roles section of your App Dashboard can grant any permission without approval by Facebook. As indicated in the Facebook Developers FAQ
To submit these permission for approval:
- Go to the 'Status & Review' tab.
- Click the 'Start a Submission' button.
- Select the permission.
- Continue the sumbission process.
Detailed information about submitting permissions for approval can be found on the Facebook Developers Login Review page.
PushOver
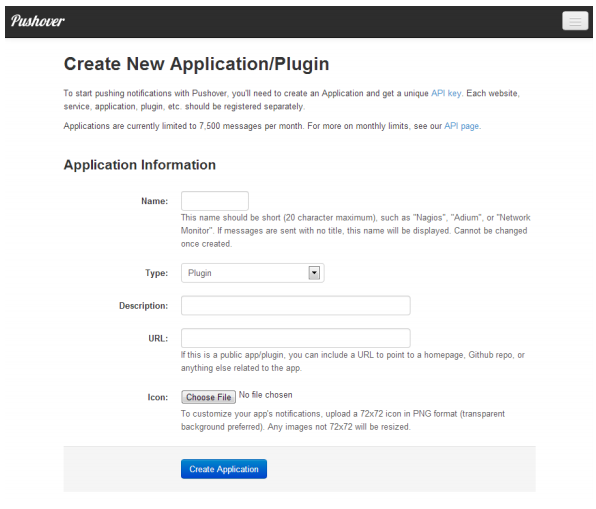
- Go to https://pushover.net/apps/build
- Fill in the account details and click to signup for a key
- Select as type 'application '
Twilio
Create an account at Twilio, http://www.twilio.com.For your account, you will get an Account SID and an Auth Token. Set AdvTwilio.App.Key to the account SID and AdvTwilio.App.Secret to the auth. token. You will have a telephone nr. associated with the Twilio account, set AdvTwilio.App.Name to this phone number received.
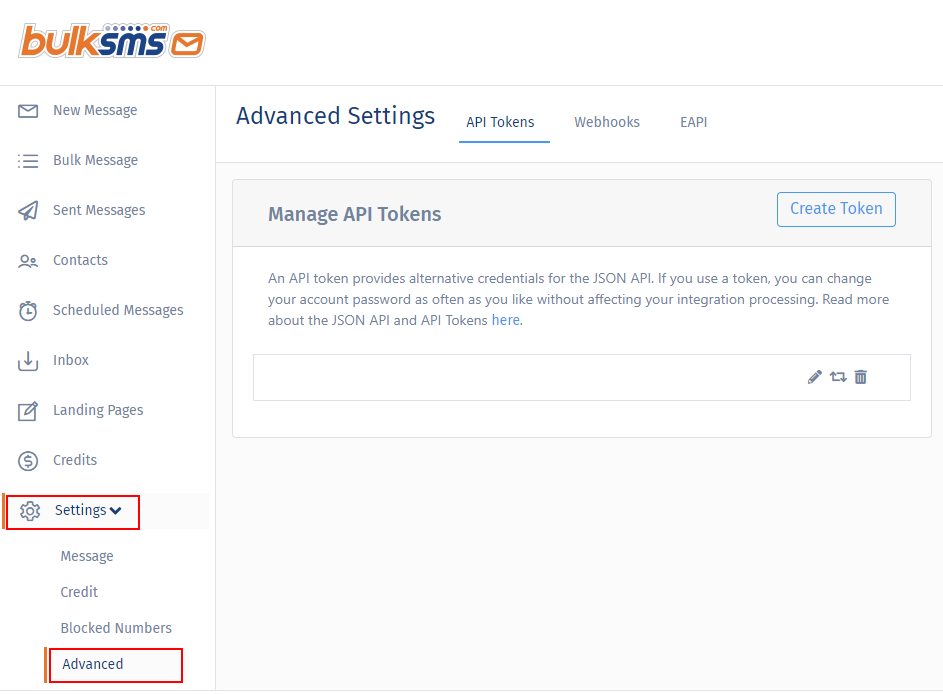
BulkSMS
Create an account at BulkSMS, http://www.bulksms.com.TMS FNC Cloud Pack
Go to "Settings">"Advanced" and click the "Create Token" button. The Token ID (Client ID) and Token Secret are displayed.
 TMS VCL/FMX Cloud Pack
Set AdvBulkSMS.App.Key to your BulkSMS account name and AdvBulkSMS.App.Secret to your BulkSMS account password.
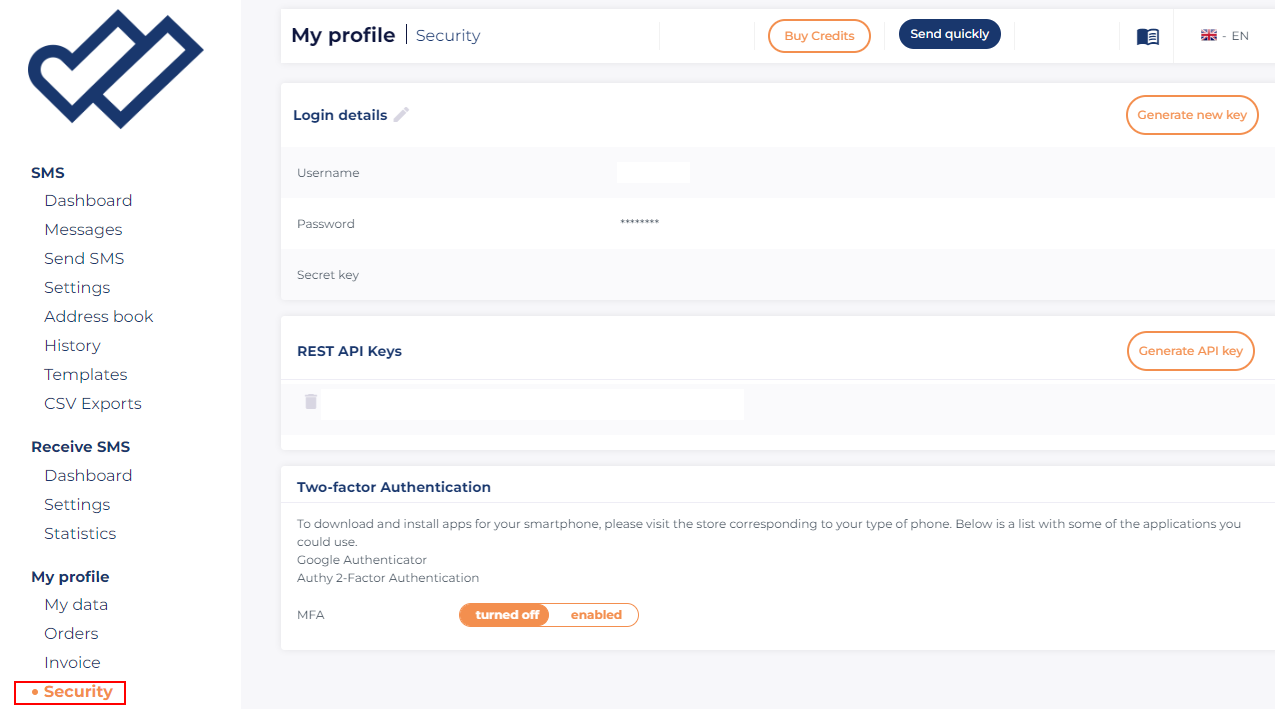
Spryng
Create an account at Spryng, http://www.spryng.be.Go to "Security" and click the "Generate API Key" button. The API Key is displayed.
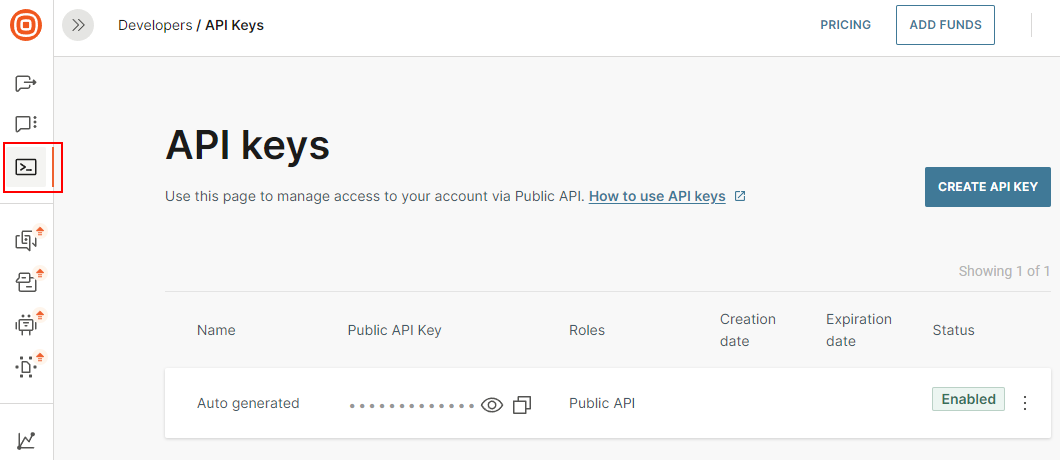
InfoBip
Create an account at InfoBip, http://www.infobip.com.Go to "Developers">"API Keys" and click the "Create API Key" button. The API Key is displayed.
TelAPI
Create an account at TelAPI, http://www.telapi.com. For your account, you will get an Account SID and an Auth Token. Set AdvTelAPI.App.Key to the account SID and AdvTelAPI.App.Secret to the auth. token.Esendex
Create an account at Esendex, http://www.esendex.co.uk. For your account, you will get an account code. Set AdvEsendex.App.Key to your Esendex account name, set AdvEsendex.App.Secret to your account password and set AdvEsendex.App.Name to your Esendex account ID.Pryv
- At this time the Pryv service does not provide automatic generation of app keys. Please send an email to developers@pryv.com with a short request message to retrieve your app key.
- The Pryv service only requires an app key for authentication, an app secret is currently not required.
- Pryv developer information and documentation can be found at http://api.pryv.com
Trello
Sign-in on https://trello.com and navigate to the URL: https://trello.com/1/appKey/generate This will either generate your API key the first time or redirect to the page where you will find your existing developer API key: https://trello.com/app-keyMicrosoft Cognitive Services: Computer Vision, Emotion, Bing Speech
- An active Microsoft Azure account is required
- Go to https://www.microsoft.com/cognitive-services/en-us/subscriptions and login with a Microsoft Azure account.
- Activate the Azure Cognitive Services
- Make sure to set the region to "West Europe"
- The required API Key value is displayed
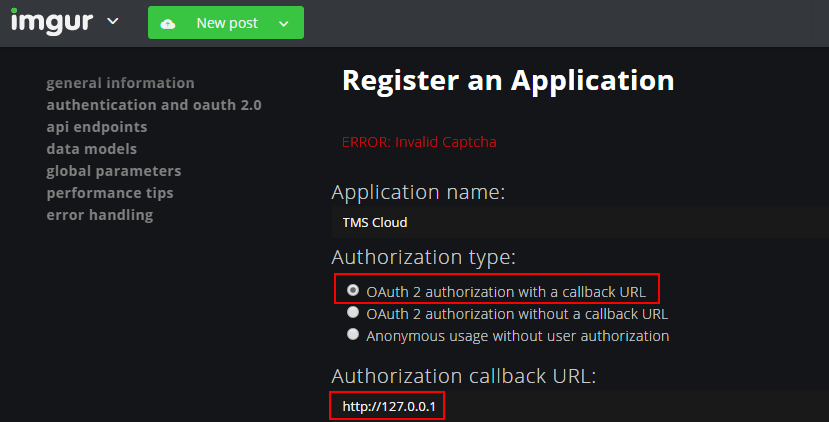
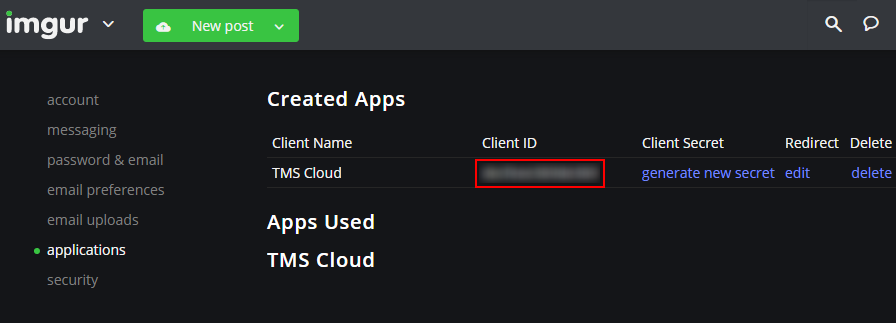
Imgur
- Signup at Imgur
- Go to https://api.imgur.com/oauth2/addclient and login.
- Enter an application name and select "Oauth 2 authorizaction with a callback URL"
- Enter "http://127.0.0.1" as "Authorization callback URL"
- Click submit and the API Key and Secret are displayed at https://imgur.com/account/settings/apps
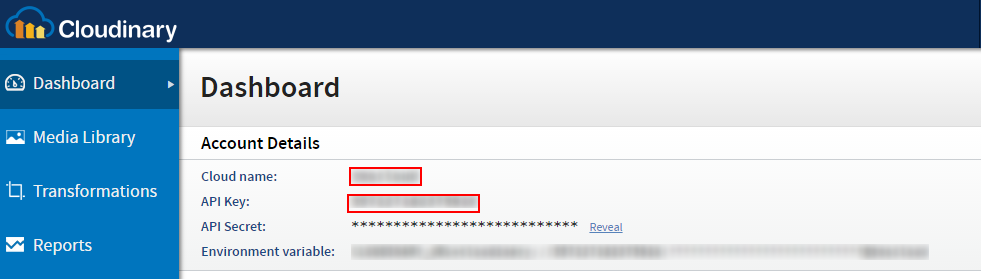
Cloudinary
- Signup at Cloudinary
- Go to https://cloudinary.com/console and login
- The Cloud name, API Key and API Secret are displayed on this page
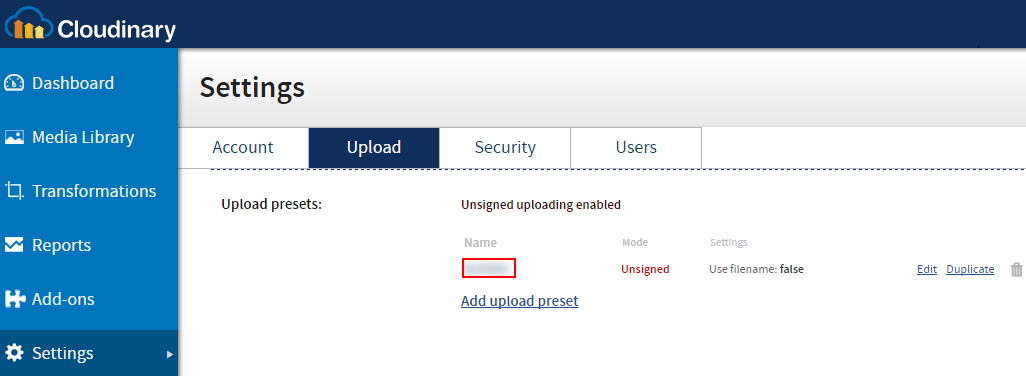
- Go to the "Settings" topic and click the "Upload" tab
- In the "Upload presets" click "Add upload preset"
- The upload preset name is displayed next
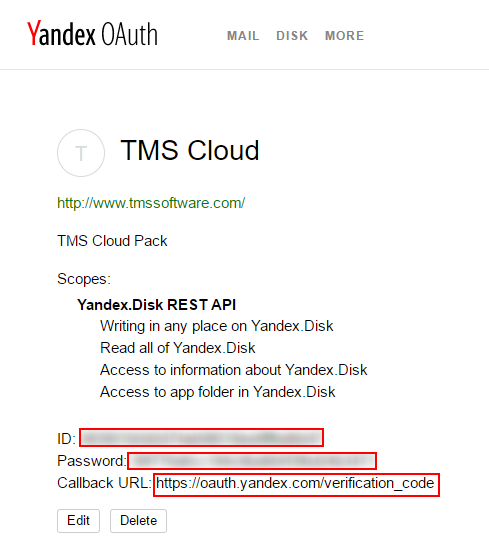
Yandex Disk
- Signup at Yandex
- Go to https://oauth.yandex.com/ and login
- Click "Create New Client"
- Fill in the required details, select "Yandex.Disk REST API" in the Scopes list.
- Add the following callback URL: https://oauth.yandex.com/verification_code
- Click Submit and the Key and Secret are displayed
Slack
Go to https://api.slack.com/ If you are not connected yet, you will find the button 'Go to Slack' in the top right corner of the page.
There you can sign in to your workspace with your Slack credentials.
Now at the place where the button 'Go to Slack' was, should be the button 'Your Apps', click on it and you will get an overview of your apps.
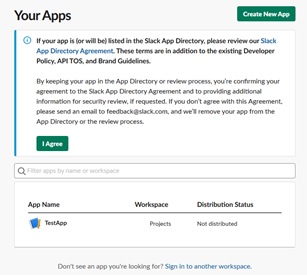
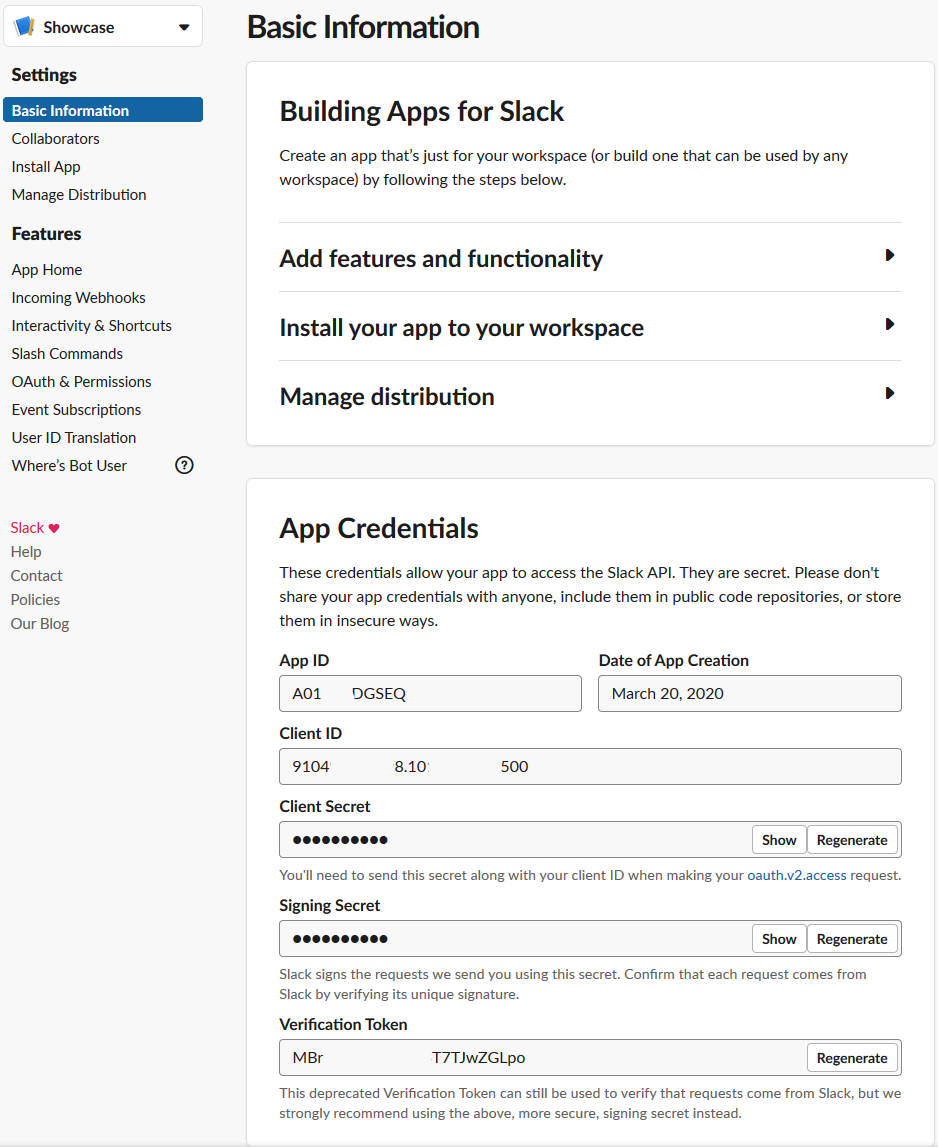
When you click 'Create New App', you will be asked to give a name for your app and the workspace that you want to connect it to. This will forward you to the following page with the most important information. In case your app already exists, you can click the App in the list on the bottom (in this case TestApp).
Before you can install the application on your workspace you need to configure the redirect URLs and add the necessary scope. You can do this by clicking on 'Add features and functionality', different settings will drop down and if you select 'Permissions' you will get to the page 'OAuth & Permissions'.
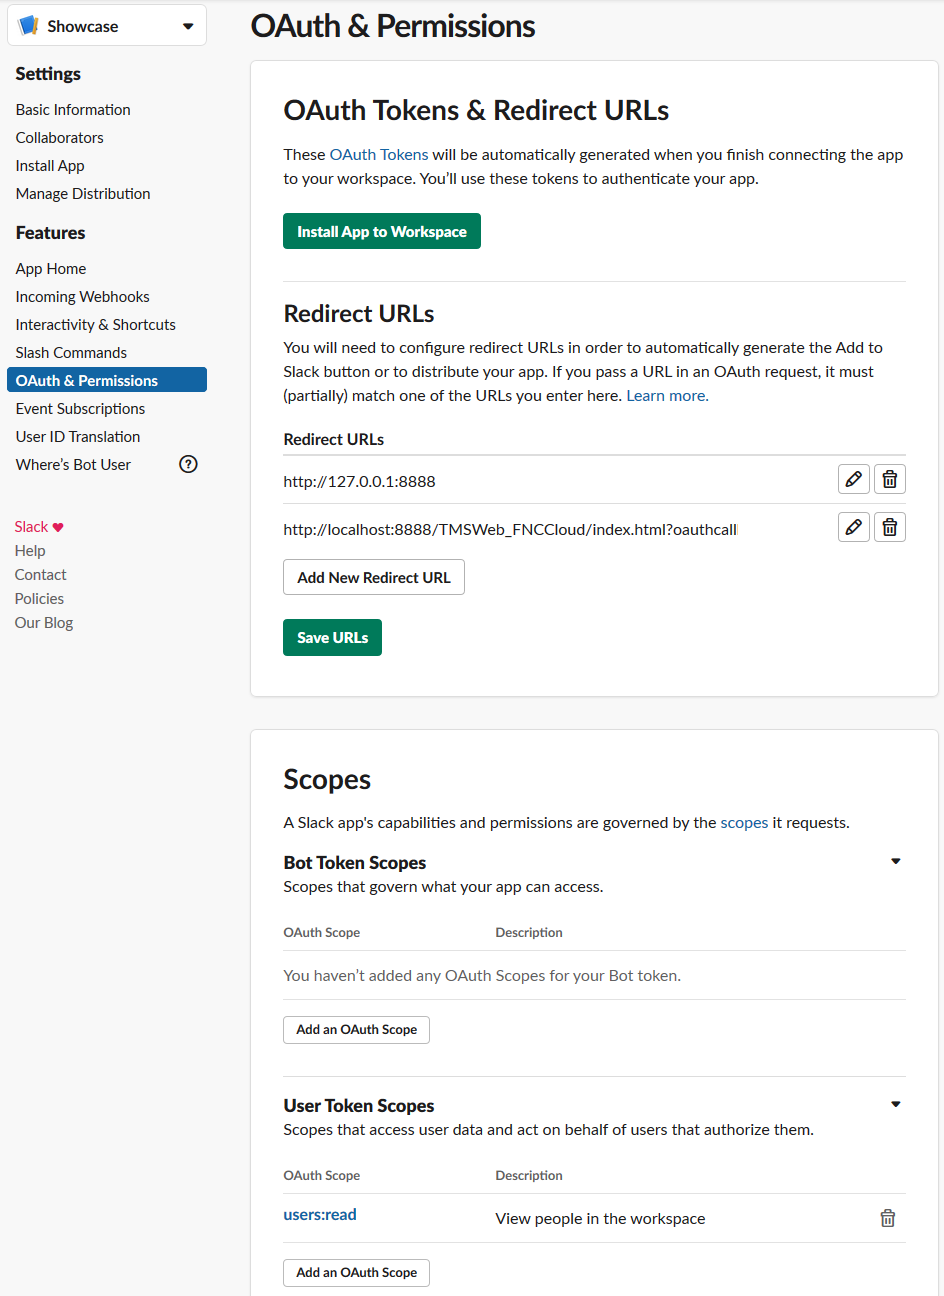
When you assign redirect URLs, do not forget to click the 'Save URLs' button. Once one scope is defined, you can click the button 'Install App to Workspace'.
One thing about the Slack API is that the tokens do not get expired, so in case you want to force everyone to login again, you can click the red button 'Revoke Tokens' on the bottom of this page.
Now you have everything you need to start working with the TTMSFNCCloudSlack component.
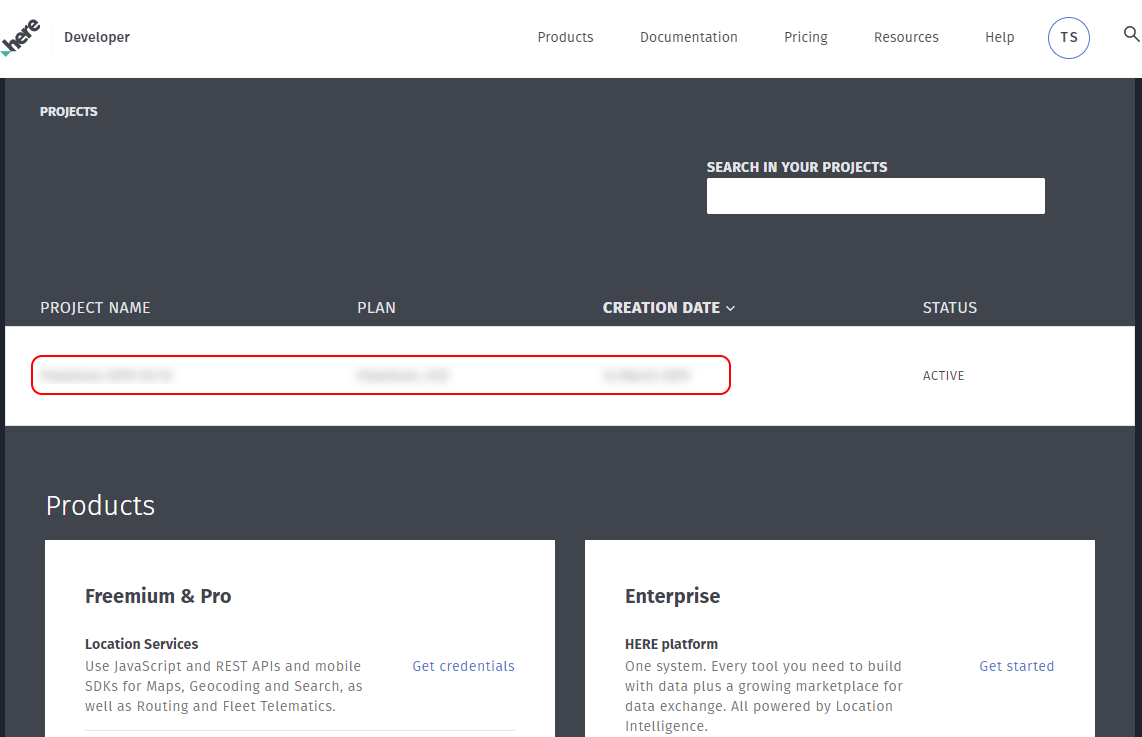
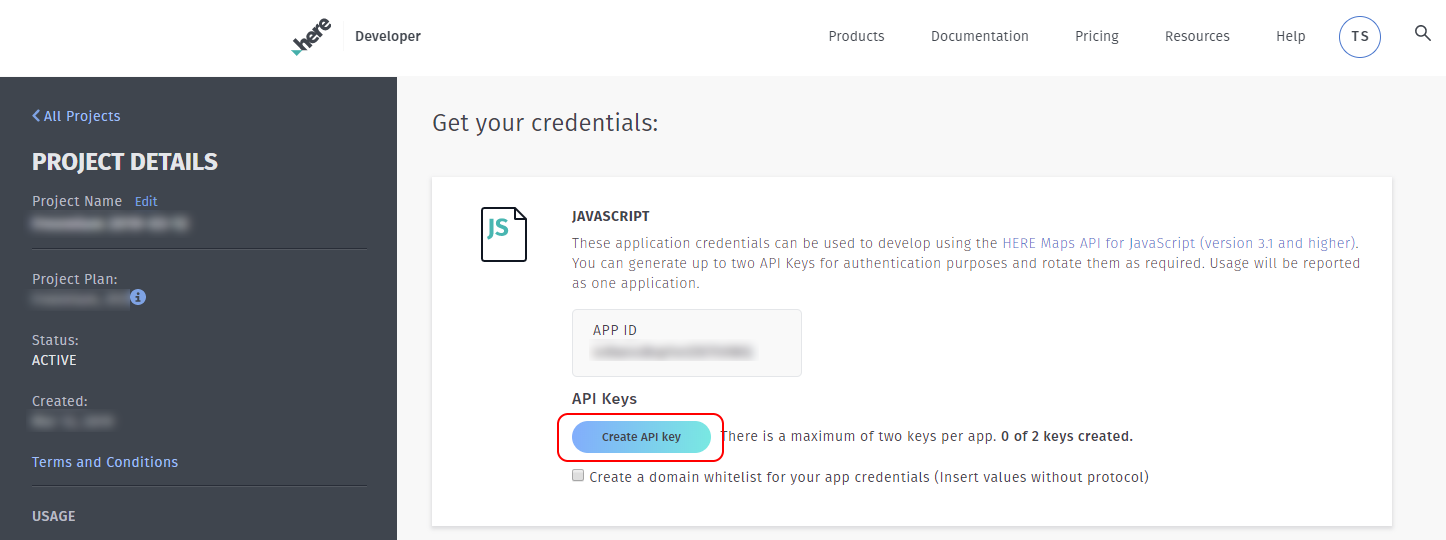
Here Maps
- Signup at Here
- Go to https://developer.here.com/projects and login
- Select your project
- Under the JavaScript topic, click "Generate App"
- Then click "Create API Key"
- The API Key is displayed
Microsoft Azure Maps
- Signup at Microsoft Azure
- Follow instructions as indicated here
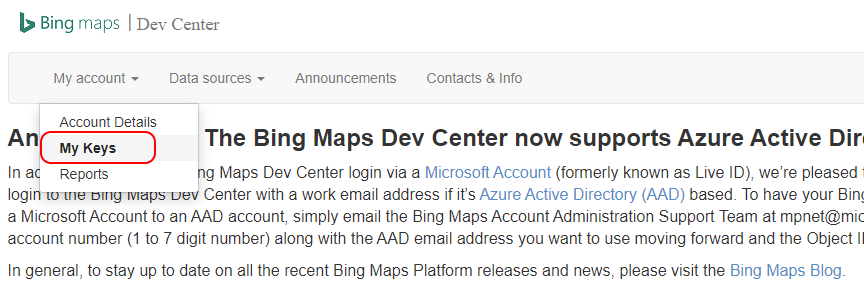
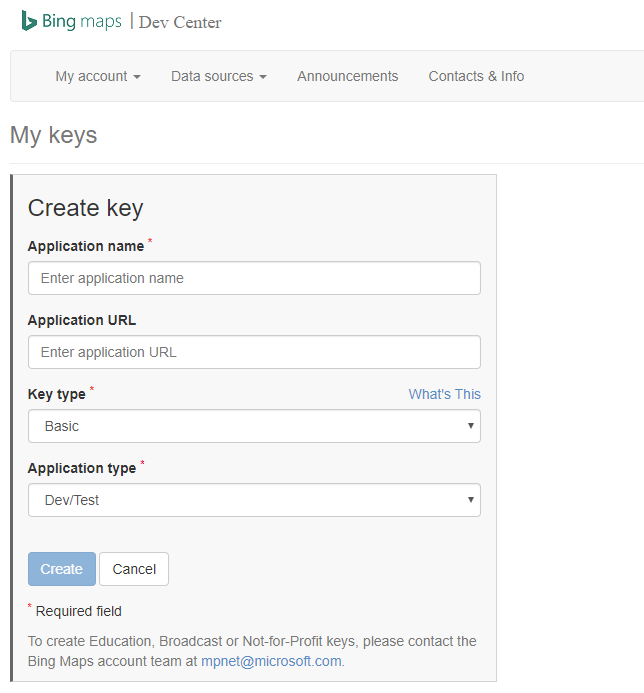
Microsoft Bing Maps
- Signup at Bing Maps
- From the top left menu, select "My account">"My Keys"
- Fill in the requested details and click "Create"
- The API Key is displayed
TomTom
- Signup at TomTom
- Go to https://developer.tomtom.com/user/me/apps and login
- From the left-side menu, select the "Keys" tab
- The API Key is displayed

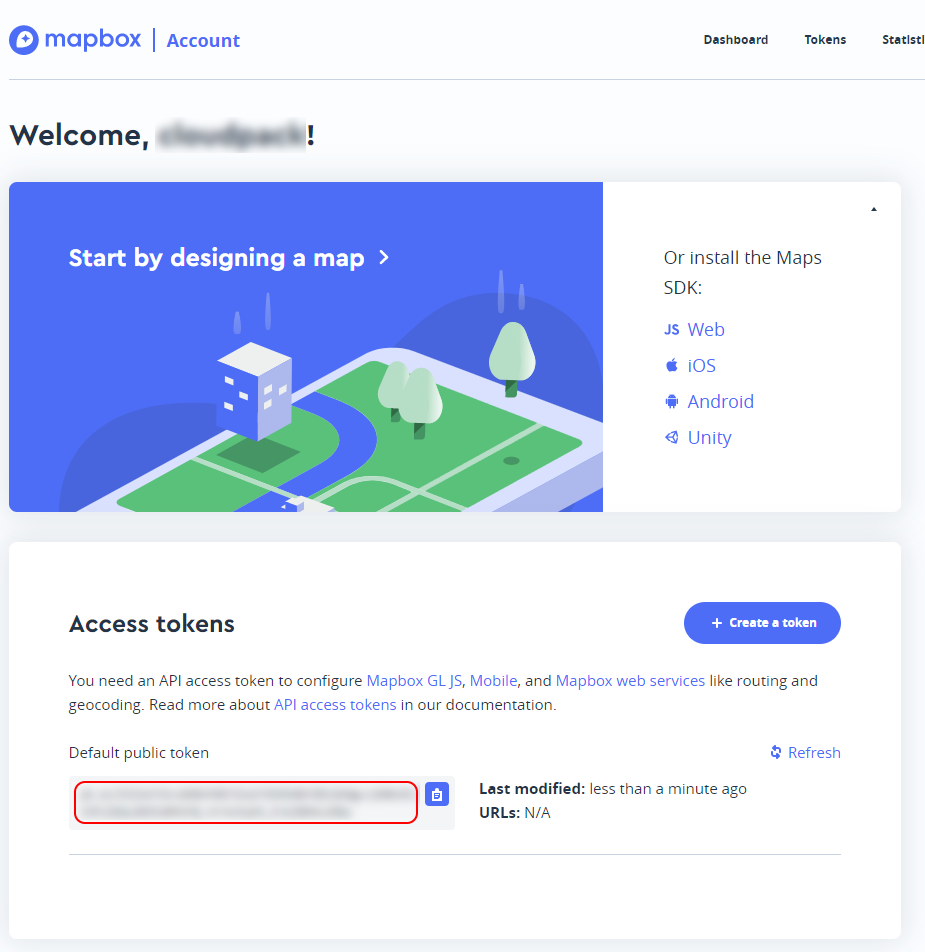
MapBox
- Signup at MapBox
- Go to https://account.mapbox.com/ and login
- The API Key is displayed
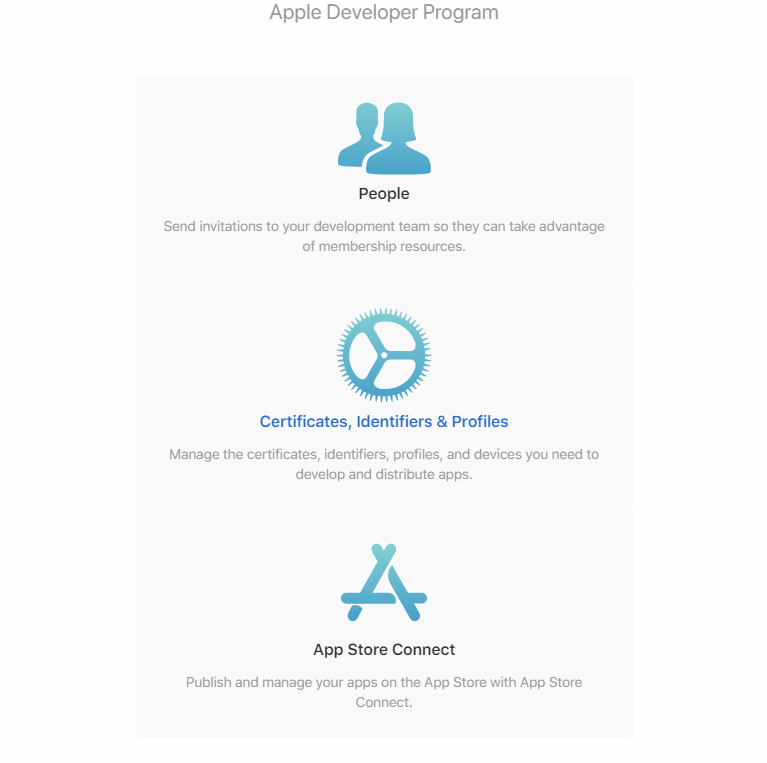
Apple MapKit JS
- Go to https://developer.apple.com/ and singup or login
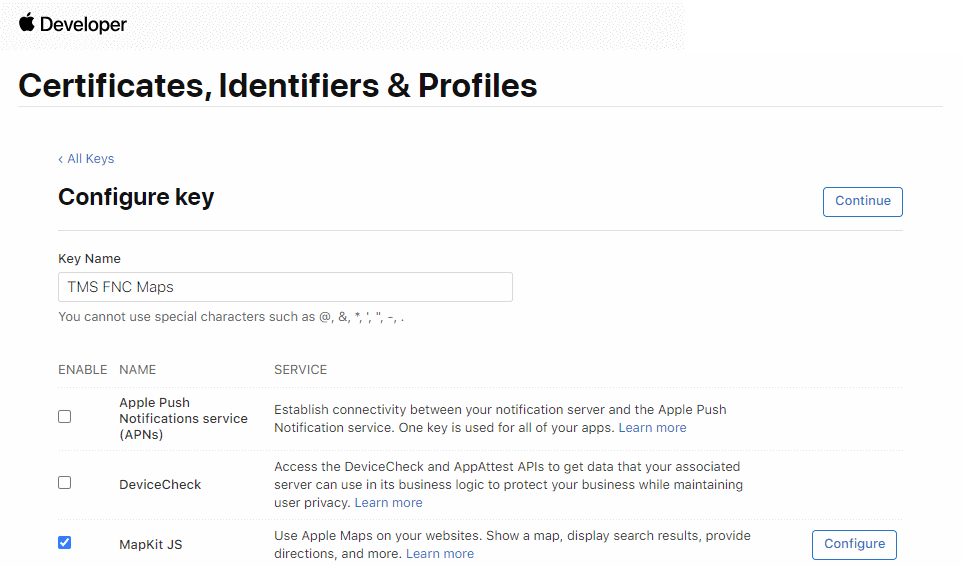
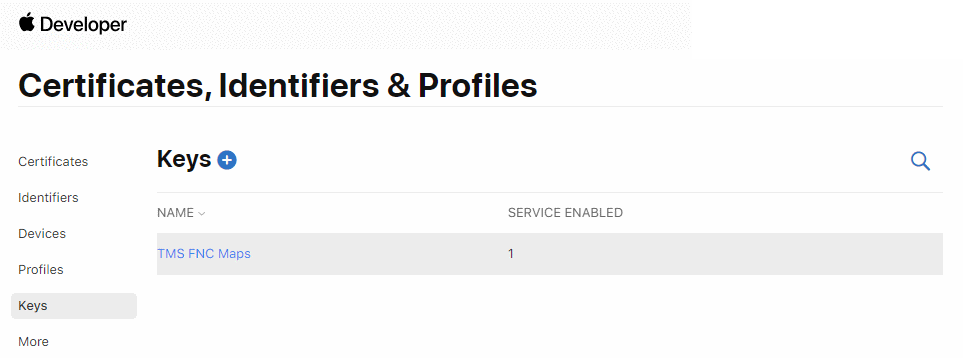
- Go to "Certificates, Identifiers & Profiles"
- Go to "Keys" and create a new Key for MapKit
- The Key is displayed. For detailed information see https://developer.apple.com/documentation/mapkitjs/creating_a_maps_identifier_and_a_private_key
- Use the Key to create a Token. For detailed information on how to create a token see https://developer.apple.com/documentation/mapkitjs/creating_and_using_tokens_with_mapkit_js
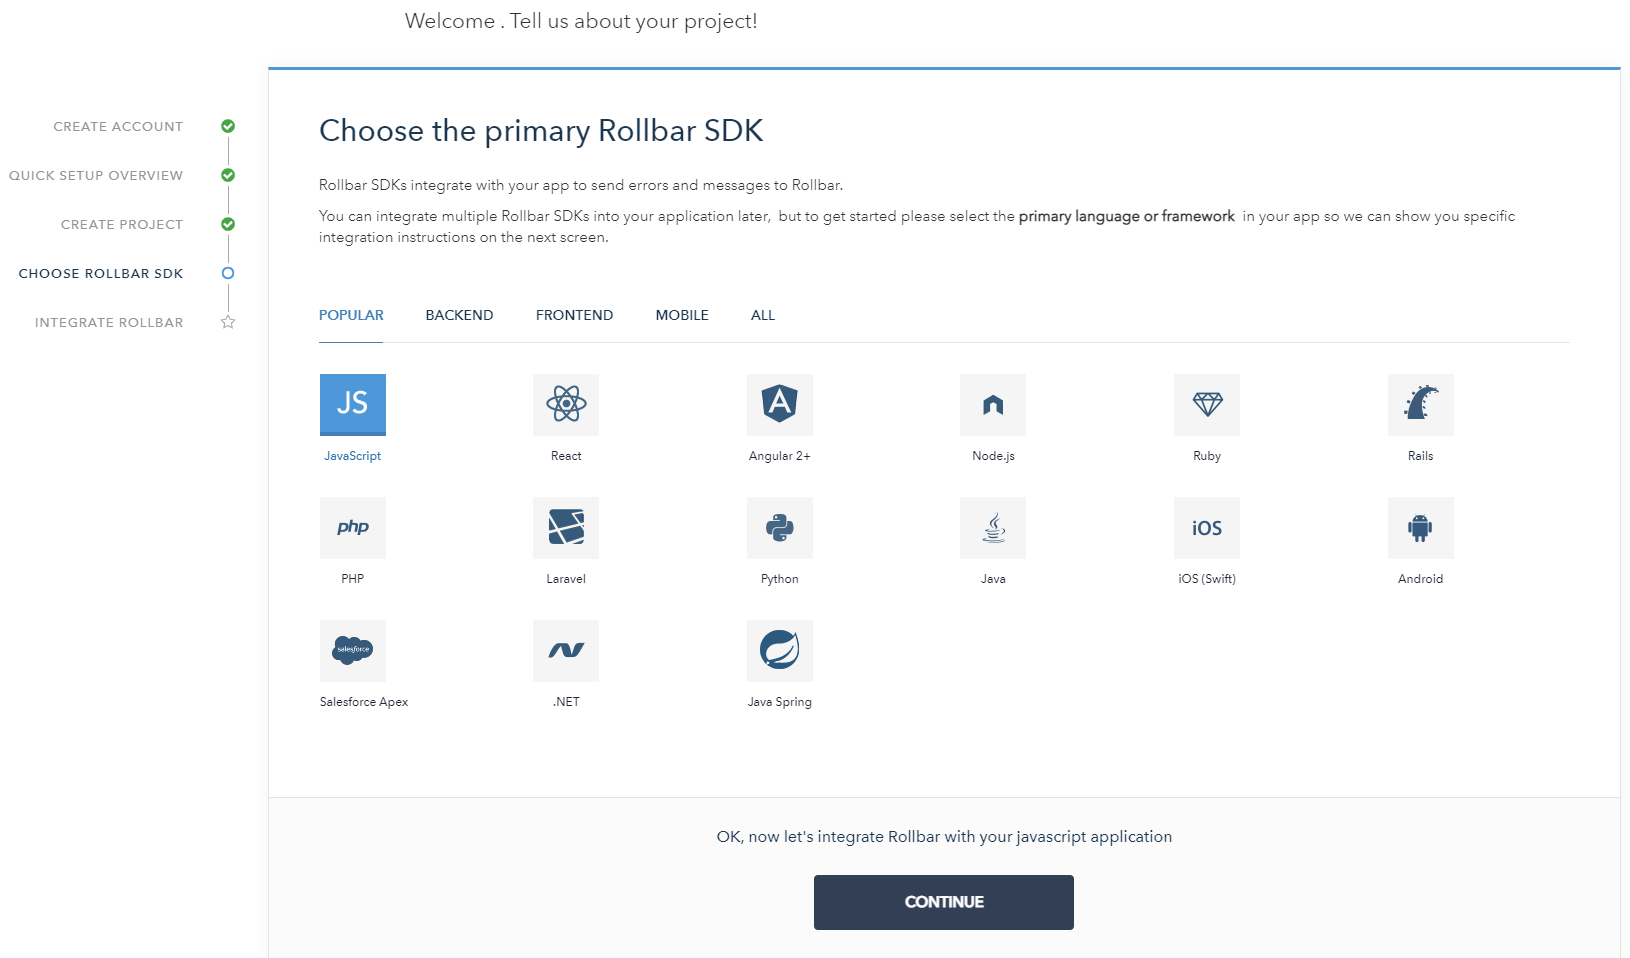
Rollbar
- Go to https://rollbar.com/signup/ and create your account.
- Go over the steps to create a project.
- You will be asked for what platform you want to use this. And you can chose what you want as this is just to help you with documentation. So you can skip the integration page.
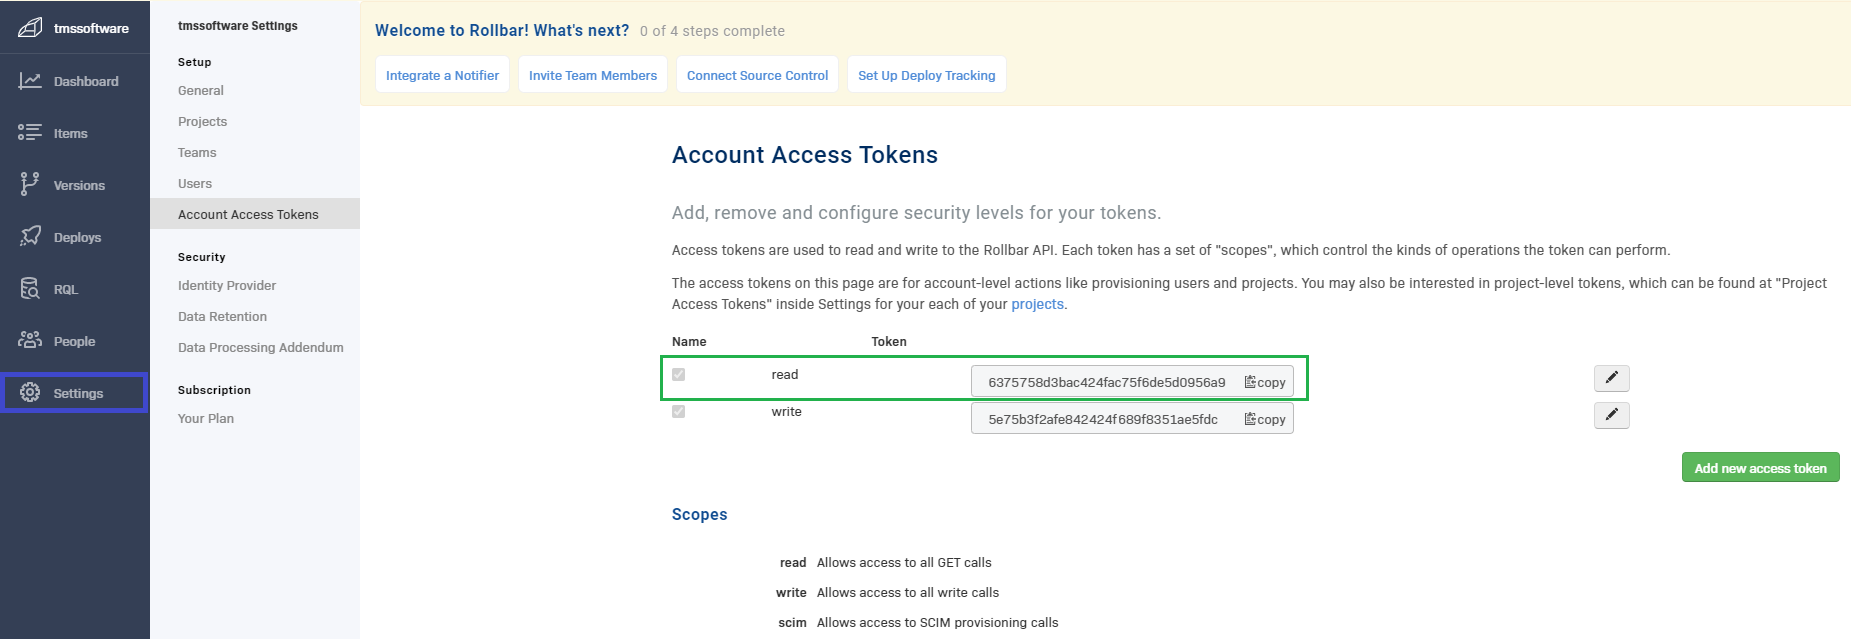
- After you've set up your account, you can find your access token in "Settings".
- You will need the read token for the TTMSFNCClourRollbar or TTMSFNCCloudLogger component.
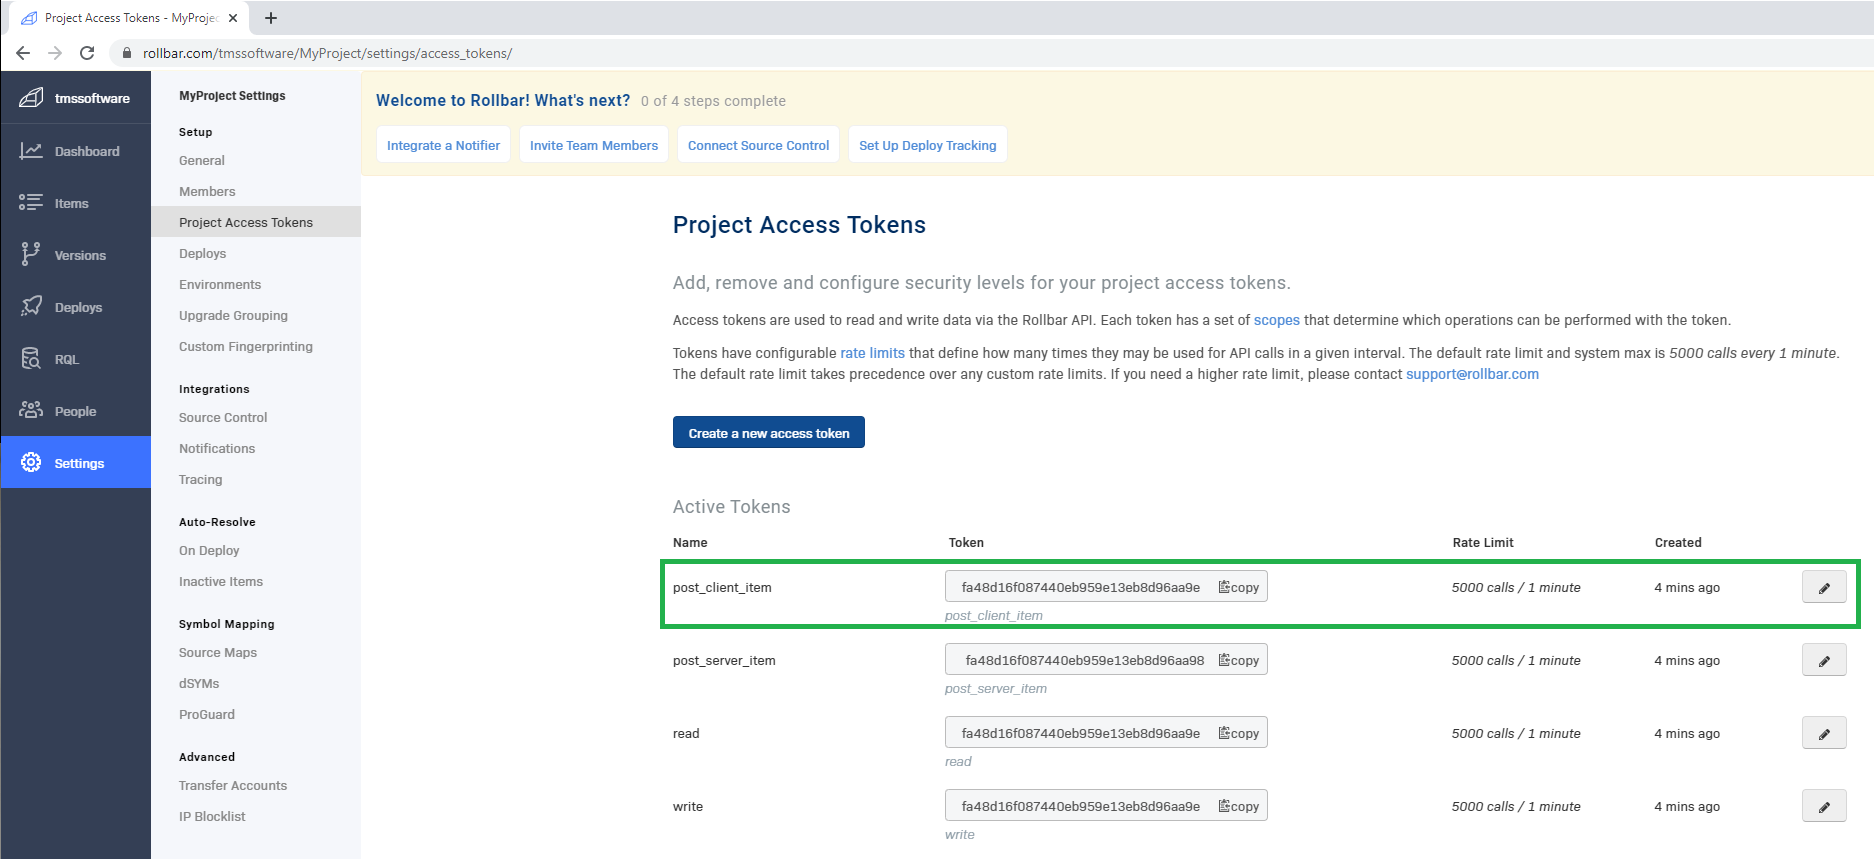
- If you want the use the ability to log messages and exceptions, You will need to make a project token available with the "post_client_item" scope.
- You can find this in Settings > Projects and then select your project.
- There you have the tab "Project Access Tokens".
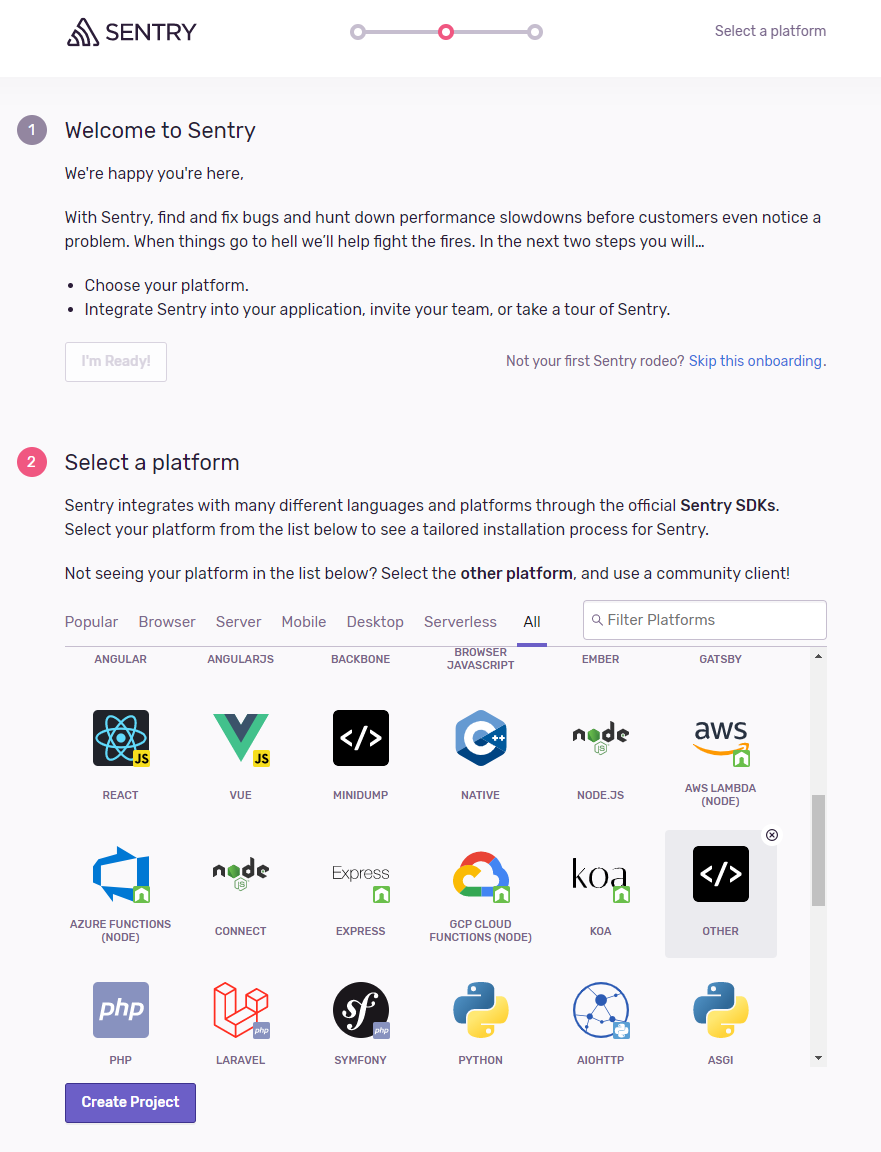
Sentry
- Go to https://sentry.io/signup/ and create your account.
- Then you will get to a screen where you need to select the platform you are using, you can select "Other".
- Now you can login to the sentry website and create a token.
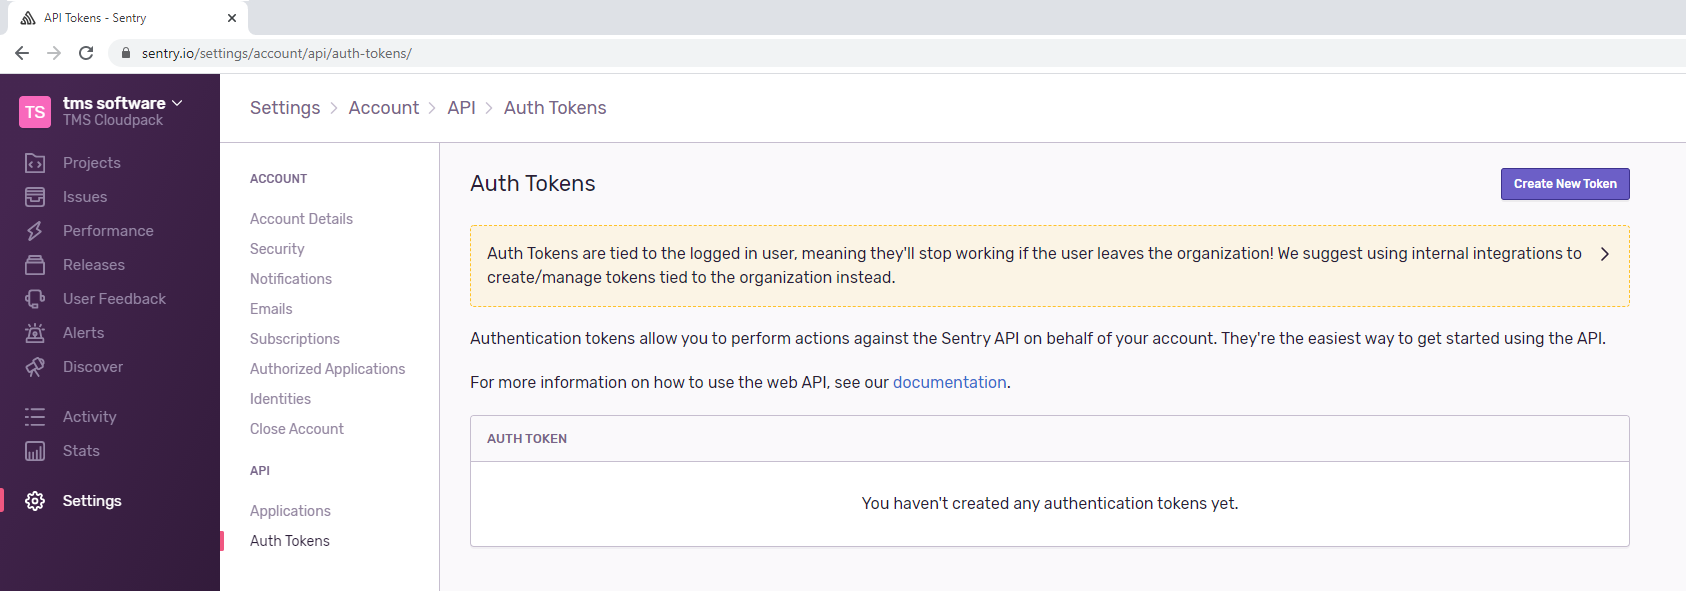
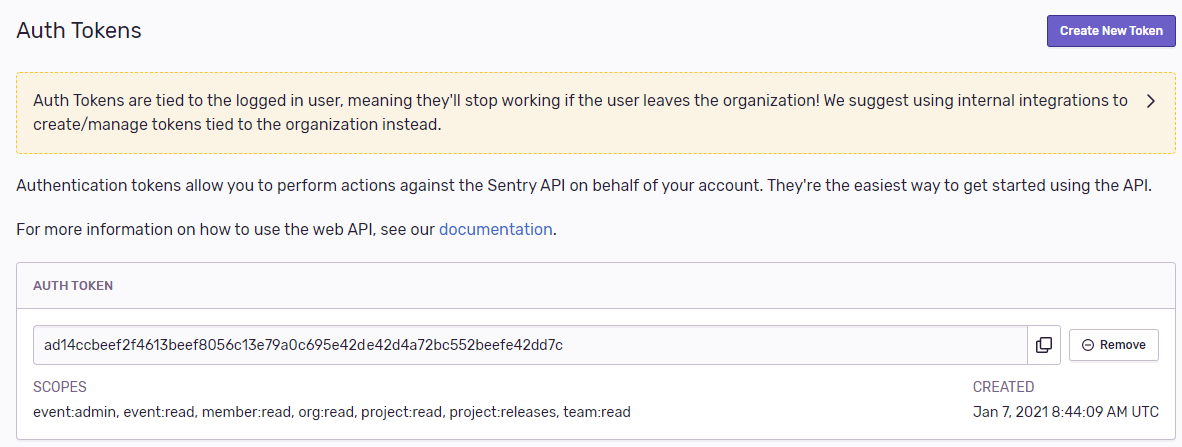
- Click on "create New Token", you can select the scopes that you want. The following are filled in by default.

- When you select "Create Token" an Authentication token will be available.
- In case you want to work with TMS WEB Core, it is best to create an internal integration to avoid CORS issues. Go to Settings > Developer Settings and "New Internal Integration".
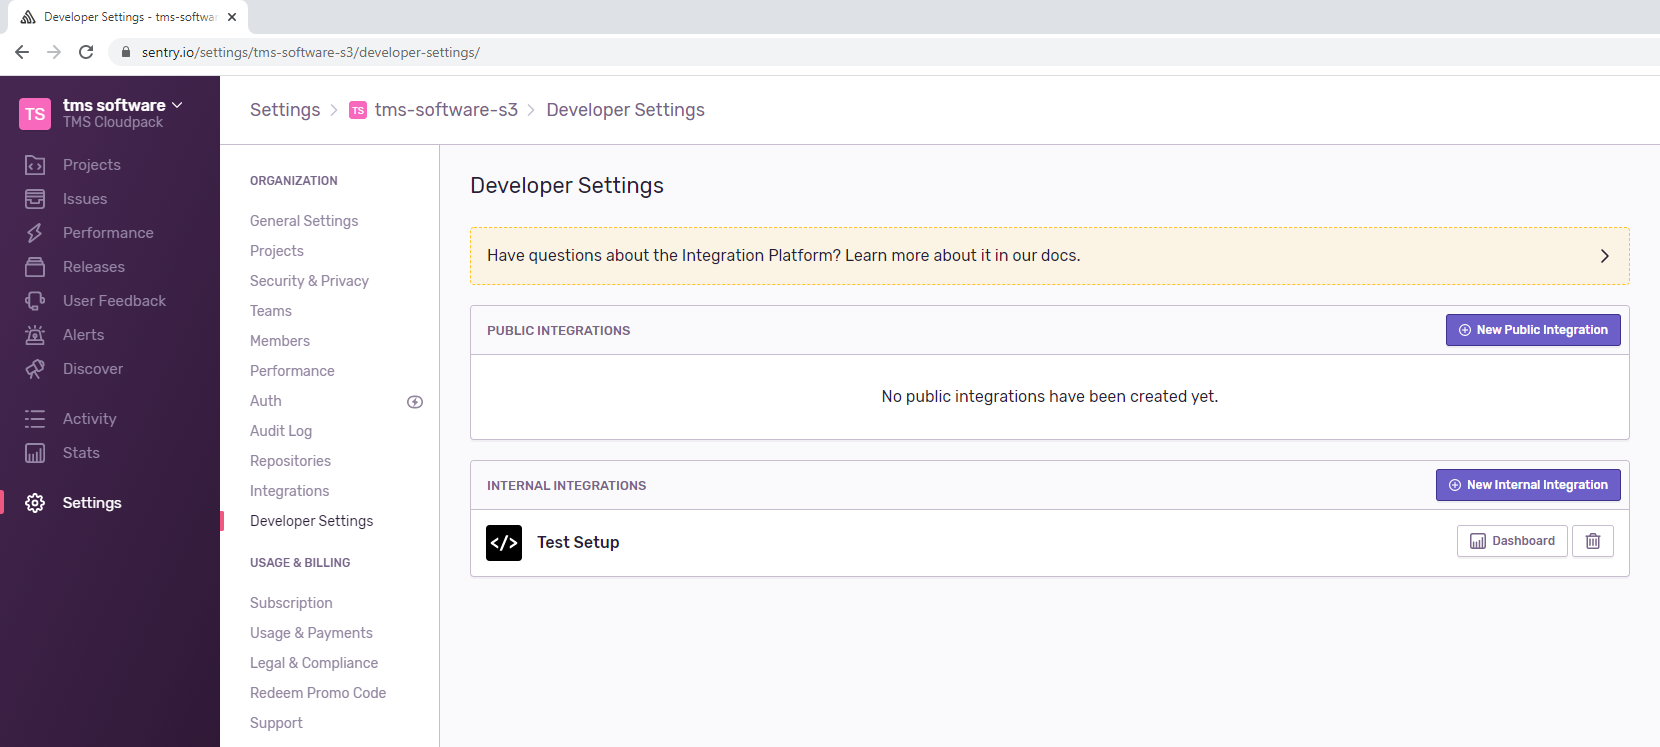
- You can fill in the Authorized domains and create a "New Token".


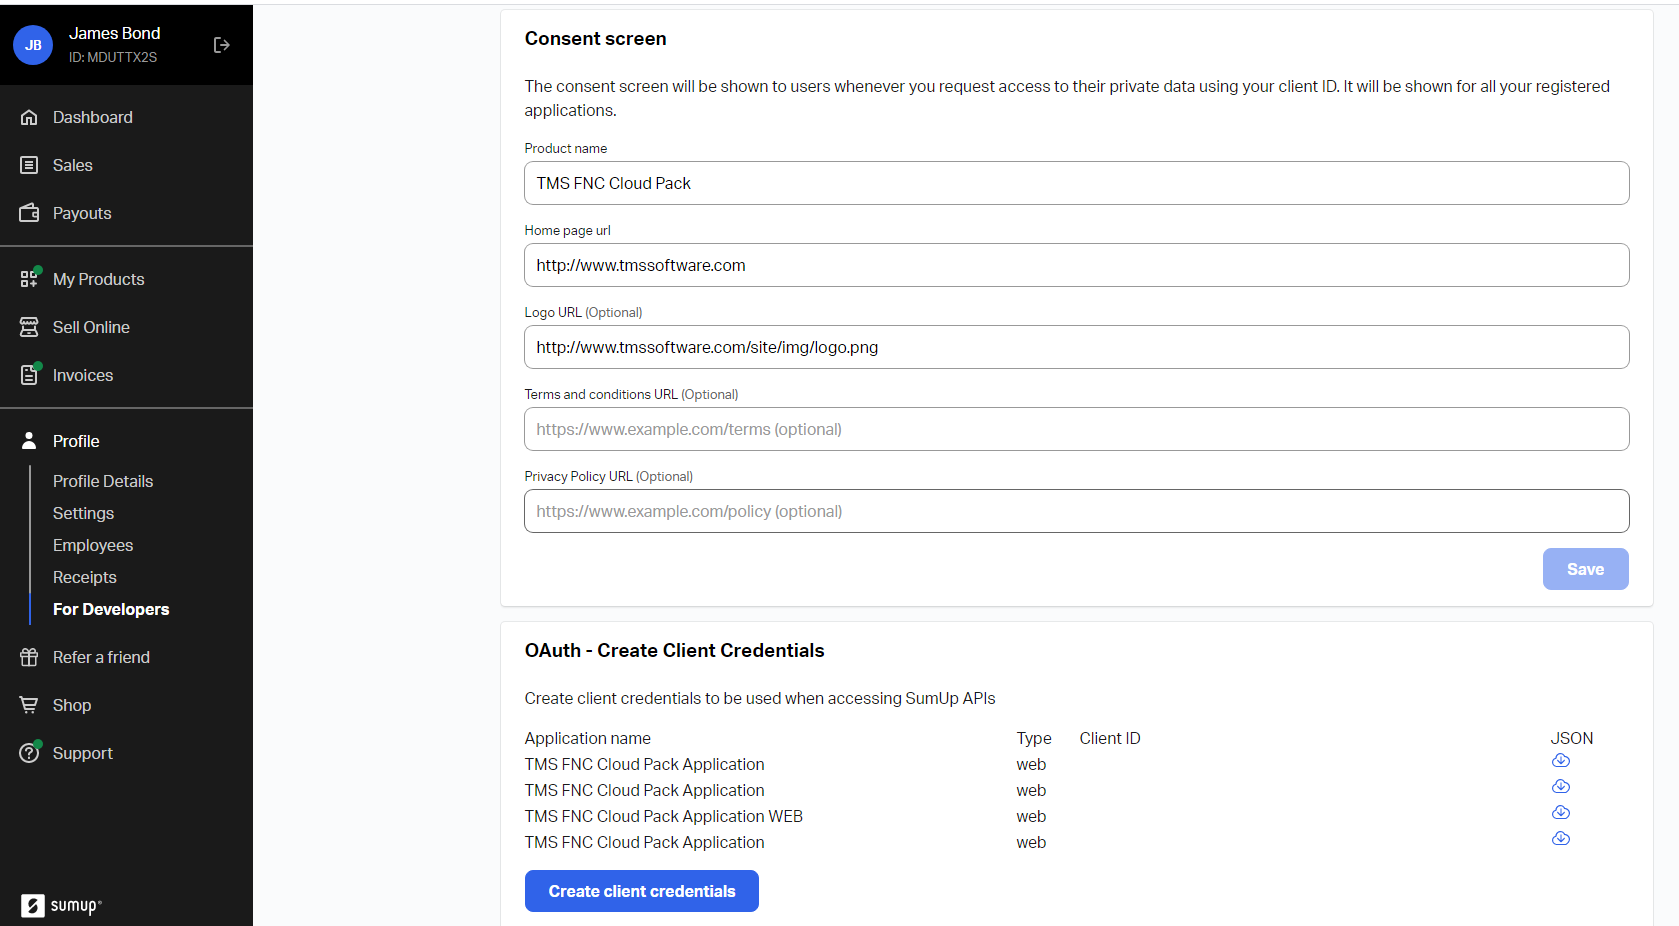
Sumup
- https://me.sumup.com/login
- https://me.sumup.com/nl-nl/developers
- Create Client Credentials
- Fill In Consent Screen
Abstract API
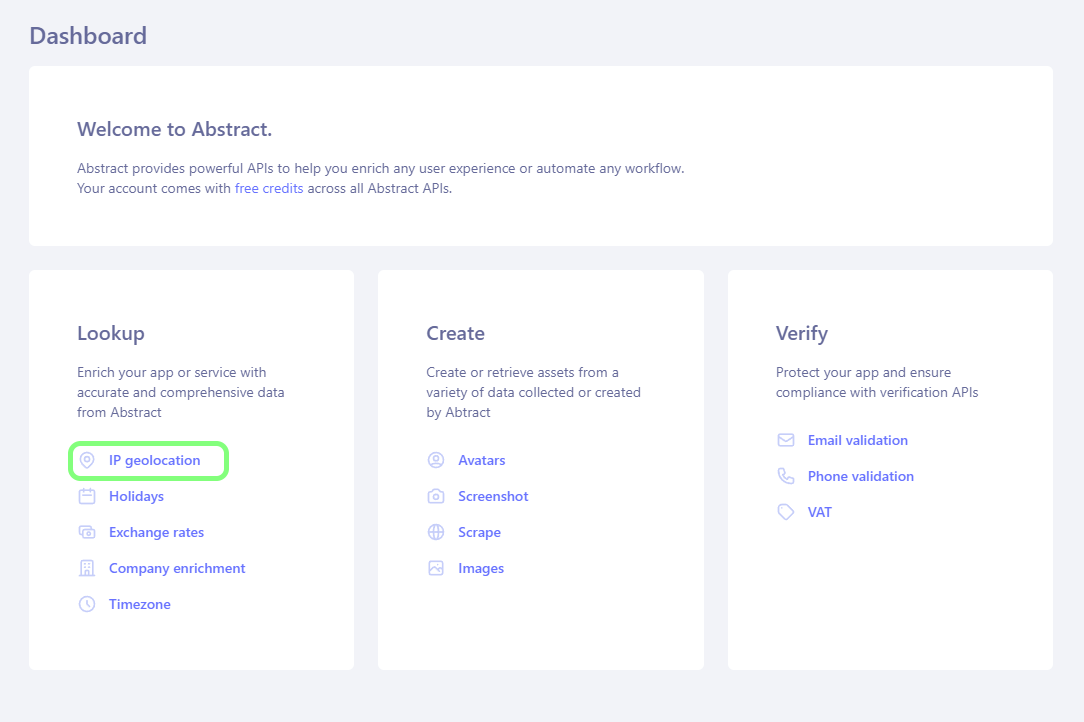
- Sign up or Login via the website: https://www.abstractapi.com/
- After a login, you will get redirected to the dashboard page.
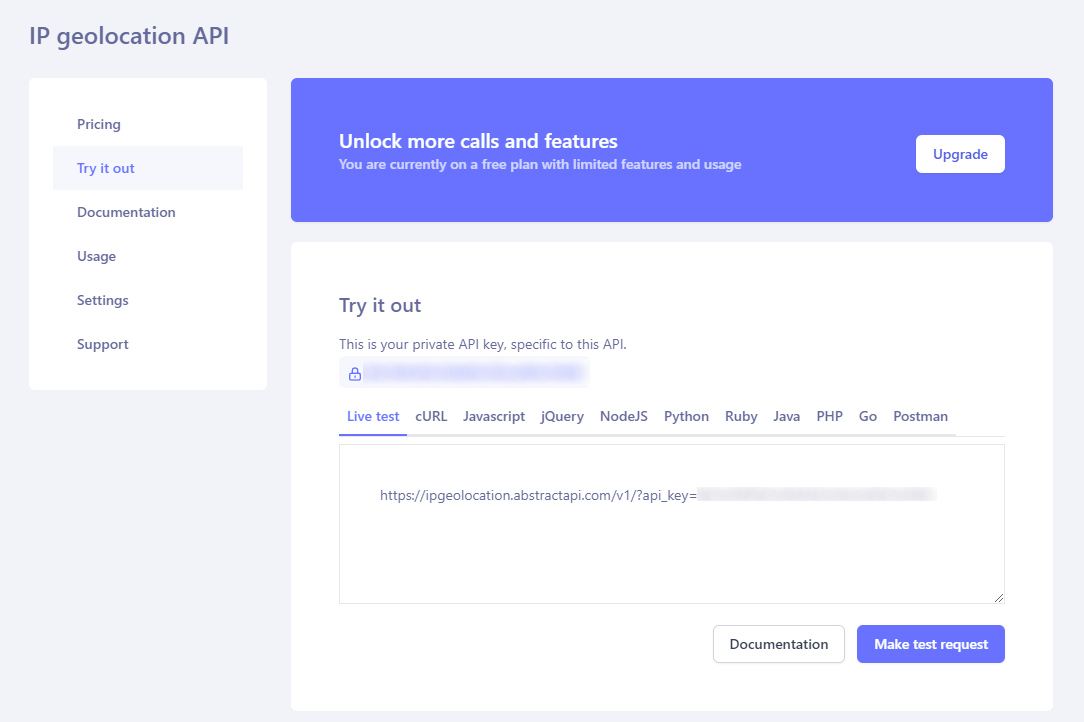
- When you select IP geolocation, you will see your API key.
IP Data
- Sign up or login via the website: https://ipdata.co/
- On the dashboard page you will find the API key:
IPStack
- Sign up or login via the website: https://ipstack.com/
- On the dashboard page you will find the API key:
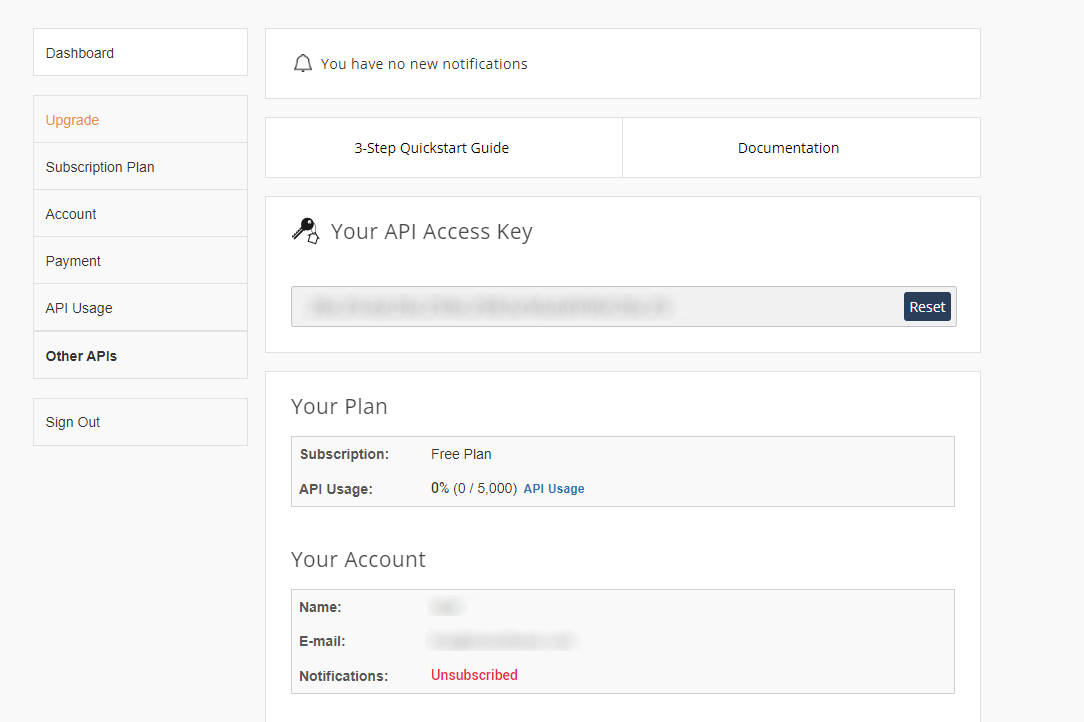
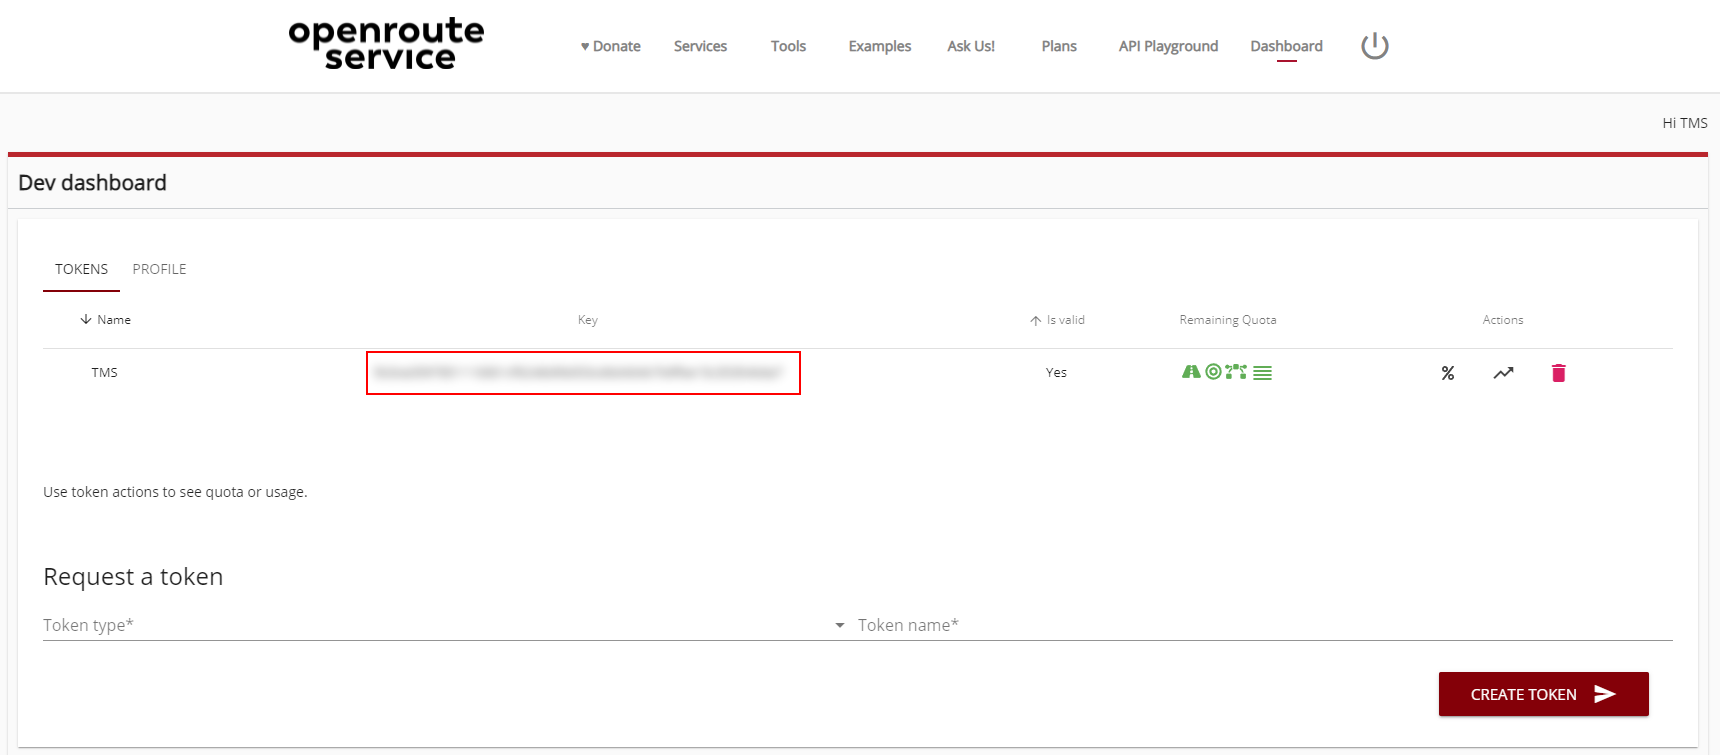
OpenRouteService
- Sign up or login via the website: https://openrouteservice.org/
- On the dashboard page you will find the API key:
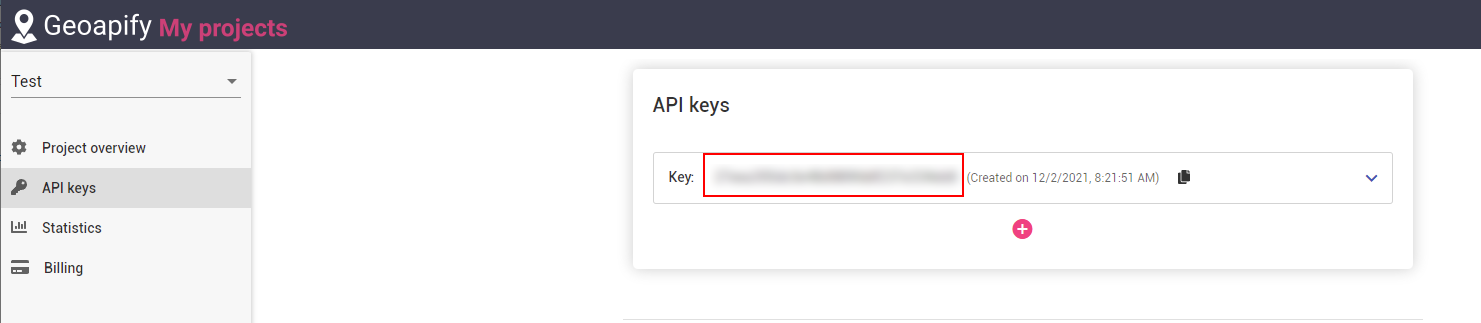
GeoApify
- Sign up or login via the website: https://www.geoapify.com/
- Add a new project
SendGrid
- Go to https://sendgrid.com/ and log in
- Click on Settings > API Keys
- Click the "CREATE" button to retrieve your API Key

MailChimp
MailChimp Transactional
- Go to https://mailchimp.com/ and log in
- Click on Transaction email in Automations Menu
- Click on Launch App
- Click on Settings > SMTP & API Info
- Click on New API Key

MailChimp Marketing
- Go to https://mailchimp.com/ and log in
- Click in the left bottom corner on the icon and go to account & billing
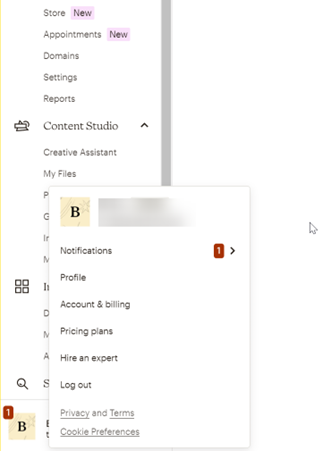
- Go to extras > API Keys
- Click on Create A Key to retrieve the API Key

DeepL
- Go to https://www.deepl.com/, create a Pro account and log in
- Generate an API Key
- Go to https://developers.facebook.com/ and click on log in
- Click on my Apps in the upper right corner
- Select the wanted app. If there are no apps:
- Click on Create App
- Select Company
- Insert a display name
- Select a Business Account (optional)
- Add WhatsApp to your products, Click on Set Up
- If Business account has not been selected or created, create a new one.
- You have now access to your temporary access tokens and a test number to start experimenting with the WhatsApp API.

- Add a phone number by clicking on select a recipient phone number > manage phone list
- After the last step of the first use setup, click on Add phone number
- Go through the full setup of adding a phone number
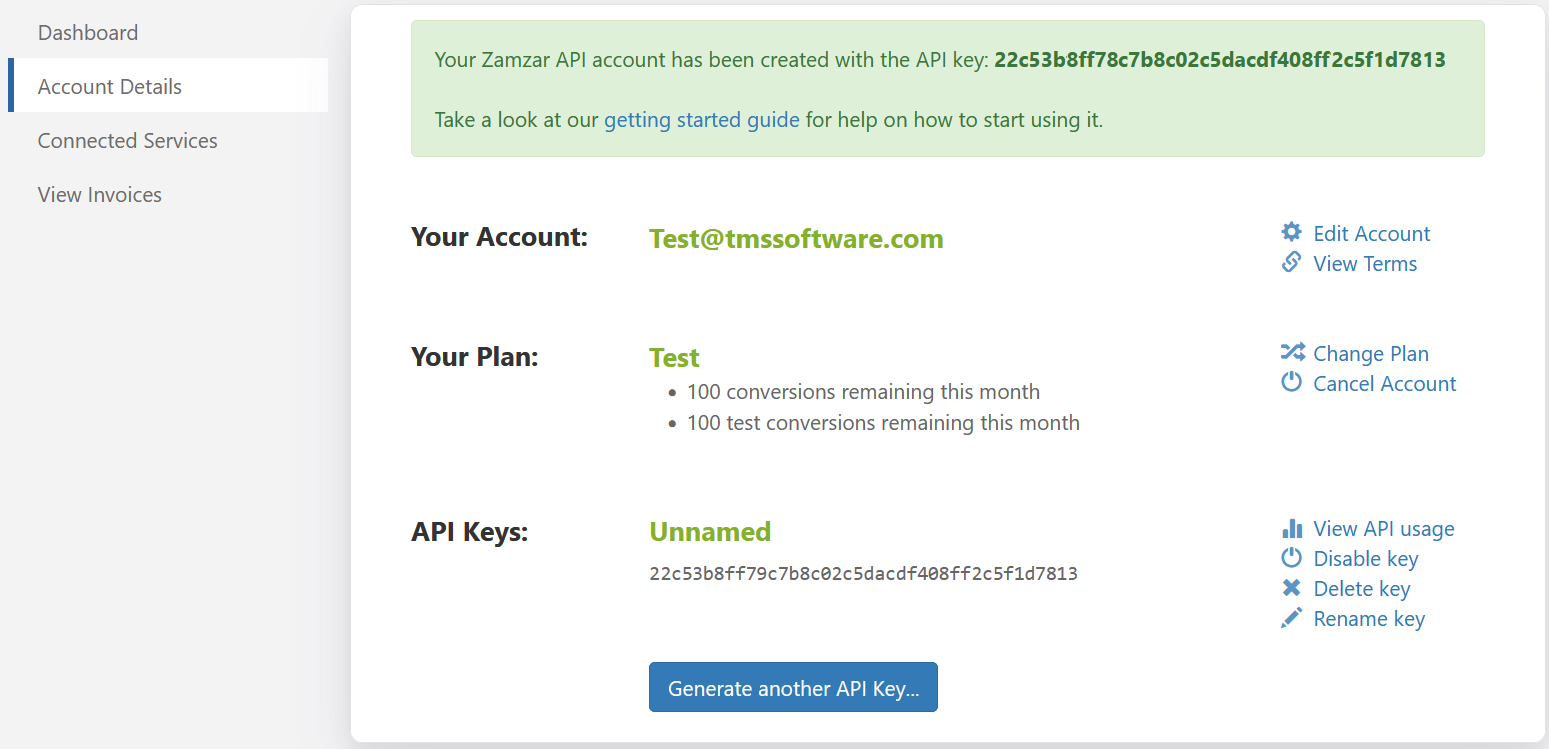
Zamzar
Go to https://developers.zamzar.com/ and sign-up to create an account.You will immediately retrieve an api key.
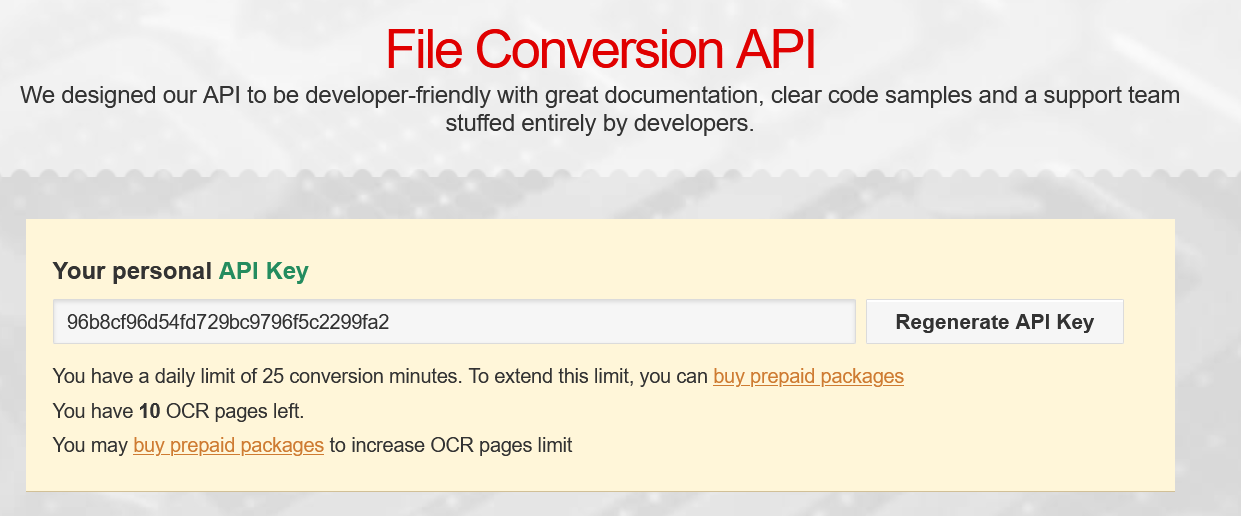
ConvertIO
Go to https://developers.convertio.co/ and sign-up to create an account.You will immediately receive an api key.
×
![]()