private
{ Private declarations }
FDragArea: Boolean;
FDragDownPos, FDragMovePos: TPointF;
....
procedure TForm1.FormCreate(Sender: TObject);
begin
TMSFMXChart1.InteractionOptions.ScaleMode := smNone;
end;
procedure TForm1.TMSFMXChart1AfterDrawChart(Sender: TObject; ACanvas: TCanvas; ARect: TRectF);
begin
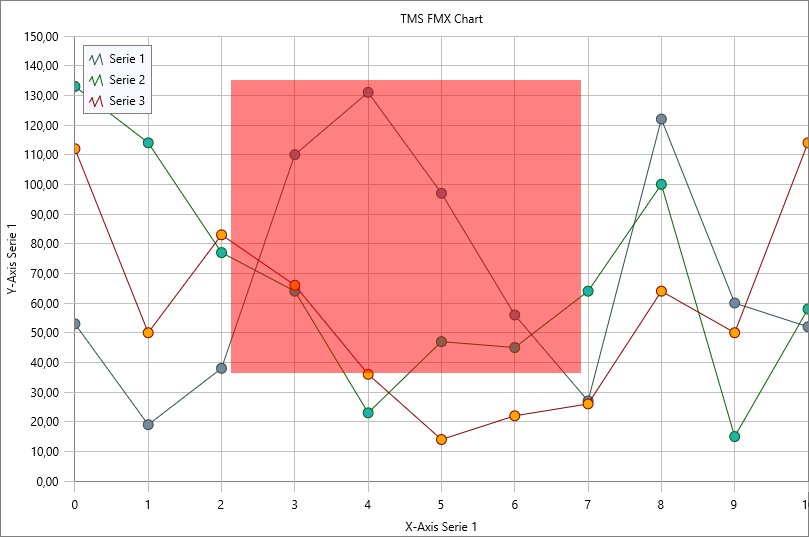
if FDragArea then
begin
ACanvas.Fill.Color := claRed;
ACanvas.FillRect(RectF(FDragDownPos.X, FDragDownPos.Y, FDragMovePos.X, FDragMovePos.Y), 0, 0, AllCorners, 0.5);
end;
end;
procedure TForm1.TMSFMXChart1MouseDown(Sender: TObject; Button: TMouseButton; Shift: TShiftState; X, Y: Single);
begin
FDragArea := (ssCtrl in Shift);
FDragDownPos := PointF(X, Y);
end;
procedure TForm1.TMSFMXChart1MouseMove(Sender: TObject; Shift: TShiftState; X, Y: Single);
begin
if FDragArea then
begin
FDragMovePos := PointF(X, Y);
TMSFMXChart1.Repaint;
end;
end;
procedure TForm1.TMSFMXChart1MouseUp(Sender: TObject; Button: TMouseButton; Shift: TShiftState; X, Y: Single);
var
I: Integer;
begin
if FDragArea then
begin
for I := 0 to TMSFMXChart1.Series.Count - 1 do
begin
TMSFMXChart1.Series[I].AutoXRange := arDisabled;
TMSFMXChart1.Series[I].AutoYRange := arDisabled;
TMSFMXChart1.Series[I].MinX := TMSFMXChart1.Series[I].XToValue(FDragDownPos.X);
TMSFMXChart1.Series[I].MaxX := TMSFMXChart1.Series[I].XToValue(X);
TMSFMXChart1.Series[I].MinY := TMSFMXChart1.Series[I].YToValue(Y);
TMSFMXChart1.Series[I].MaxY := TMSFMXChart1.Series[I].YToValue(FDragDownPos.Y);
end;
FDragArea := False;
end;
end;