Blog
All Blog Posts | Next Post | Previous Post

 TMS FNC Planner Editing
Bookmarks:
Thursday, November 12, 2020
Intro
Since the first release, TMS FNC UI Pack has been constantly evolving. Version 3.2 added a lot of great new functionality and new components (https://tmssoftware.com/site/blog.asp?post=695). Today, we wanted to focus on a component that has been there since v1.0: TTMSFNCPlanner.The TTMSFNCPlanner is a scheduling component with various built-in time-axis options, i.e. a day, week, month, period, half-day period, timeline as well as custom time-axis mode where you can fully control the duration of each timeslot. The TTMSFNCPlanner supports single and multi resource views and can have the time-axis in horizontal or vertical orientation. Even when targeting mobile devices, the TTMSFNCPlanner will automatically use a touch-friendly approach. Today's blog post focuses on a feature that is essential for an application that uses the maximum potential TTMSFNCPlanner has to offer: editing.
Editing
Editing is divided into 3 parts:- Inplace editing
- Dialog editing
- Custom editing
Inplace editing
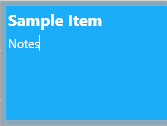
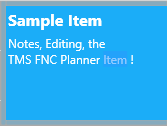
Inplace editing is enabled by default. Clicking in the planner item notes area will start the inplace editor. The default inplace editor is a TMemo, but can be configured to whatever inplace editor you want to use, with the OnGetInplaceEditor event. See the topic "Custom editing" below for an example. After the editor is started, text can be entered, and committed via the F2 key, or by clicking on another part of the planner. Cancelling is done via the Escape key.
Changing the behavior of inplace editing can be done via one of the various properties under Interaction.
Dialog editing
Dialog editing can be enabled by changing the property Interaction.UpdateMode to pumDialog. When doing the same kind of interaction (selecting the item, clicking on the notes area), the dialog will be shown which can fully edit the item. Whereas inplace editing can only edit the notes, the dialog can edit title, notes, start & end time of the item.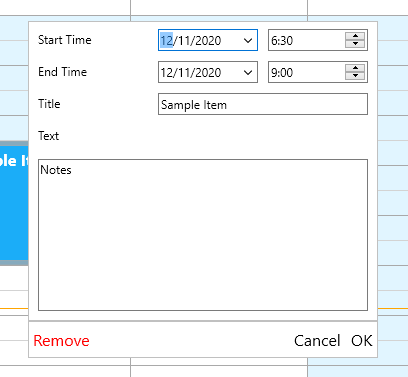
There is also support for a built-in recurrency editor dialog, which offers the same basic features as the default dialog, and extends this with recurrency options. This is typically used in combination with a dataset (see planner database demo included in the distribution). To use this dialog editor, you can drop an instance of TTMSFNCPlannerItemEditorRecurrency on the form, assign it to the ItemEditor property and click on the item to show the editor, as you would normally do after setting Interaction.UpdateMode to pumDialog.

Custom editing
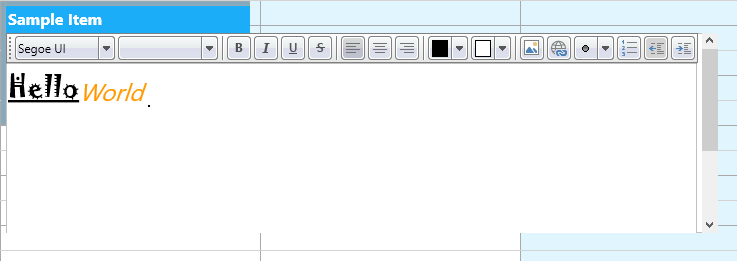
For both of the above editing types, customization is possible. Let's start with inplace editing. We want to create a custom editor that uses a TTMSFNCRichEditor and a TTMSFNCRichEditorFormatToolBar. We start by implementing a custom class wrapper that creates and holds a reference to a set of richeditor related classes for importing and exporting HTML as well as a toolbar and the richeditor itself. The planner item supports HTML and we need a way to convert the HTML coming from the item to the rich editor and vice versa.
type
  TCustomInplaceEditor = class(TTMSFNCCustomControl)
  private
    FHTMLImport: TTMSFNCRichEditorHTMLIO;
    FRichEditor: TTMSFNCRichEditor;
    FRichEditorToolBar: TTMSFNCRichEditorFormatToolBar;
    FScrollBox: TScrollBox;
  public
    constructor Create(AOwner: TComponent); override;
  end;

implementation

{ TCustomInplaceEditor }

constructor TCustomInplaceEditor.Create(AOwner: TComponent);
begin
  inherited;
  FScrollBox := TScrollBox.Create(Self);
  FScrollBox.Parent := Self;
  FScrollBox.Align := TAlignLayout.Client;

  FRichEditor := TTMSFNCRichEditor.Create(FScrollbox);
  FRichEditor.Parent := FScrollbox;

  FRichEditorToolBar := TTMSFNCRichEditorFormatToolBar.Create(FScrollbox);
  FRichEditorToolBar.RichEditor := FRichEditor;
  FRichEditorToolBar.Parent := FScrollbox;

  FRichEditor.Position.Y := FRichEditorToolBar.Height;

  FRichEditor.Width := FRichEditorToolBar.Width;

  FHTMLImport := TTMSFNCRichEditorHTMLIO.Create(Self);
  FHTMLImport.RichEditor := FRichEditor;
end;
To show the new inplace editor, implement the OnGetInplaceEditor event and return the TCustomInplaceEditor class. When clicking on the item, the TCustomInplaceEditor instance will be created and shown.
procedure TForm1.TMSFNCPlanner1GetInplaceEditor(Sender: TObject; AStartTime,
  AEndTime: TDateTime; APosition: Integer; AItem: TTMSFNCPlannerItem;
  var AInplaceEditorClass: TTMSFNCPlannerInplaceEditorClass);
begin
  AInplaceEditorClass := TCustomInplaceEditor;
end;
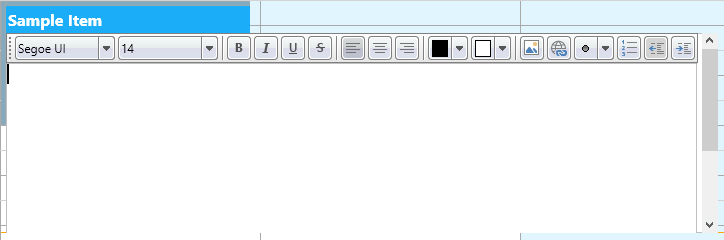
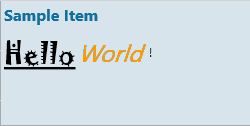
As you can see, the TTMSFNCRichEditor does not show the text that was originally visible in the item. We need to import the TTMSFNCPlanner item text as HTML. As the TCustomInplaceEditor is actually too big, we also set the size here so there is enough space available to edit the text and get access to the TTMSFNCRichEditorFormatToolbar.
procedure TForm1.TMSFNCPlanner1AfterOpenInplaceEditor(Sender: TObject;
  AStartTime, AEndTime: TDateTime; APosition: Integer;
  AItem: TTMSFNCPlannerItem; AInplaceEditor: TControl;
  AInplaceEditorRect: TRectF);
var
  c: TCustomInplaceEditor;
begin
  c := (AInplaceEditor as TCustomInplaceEditor);
  c.SetBounds(c.Left, c.Top, c.FRichEditorToolBar.Width + 20, 200);
  c.FHTMLImport.InsertHTML(AItem.Text);
end;
To update the item, after editing the text we'll need another event: OnBeforeUpdateItem. This event is called after closing the editor. Here we need to convert the text from the TTMSFNCRichEditor to HTML, to import back into the item.
procedure TForm1.TMSFNCPlanner1BeforeUpdateItem(Sender: TObject; AStartTime,
  AEndTime: TDateTime; APosition: Integer; AItem: TTMSFNCPlannerItem;
  var ATitle, AText: string; var ACanUpdate: Boolean);
var
  c: TCustomInplaceEditor;
  sl: TStringList;
begin
  c := (TMSFNCPlanner1.GetInplaceEditor as TCustomInplaceEditor);
  sl := TStringList.Create;
  try
    sl.Text := c.FRichEditor.ContentAsPlainHTML;
    AText := sl.Text;
  finally
    sl.Free;
  end;
end;
As with inplace editors, dialogs can also be fully customized. If the default supported dialogs are not sufficient, you can use a set of events to show a custom dialog. In this sample, the TTMSFNCPlanner shows an overview of cardiologists and patients that need to have surgery. A cardiologist can click on a planner item, and edit it to confirm the patient is successfully operated. To start, we have created a custom dialog.
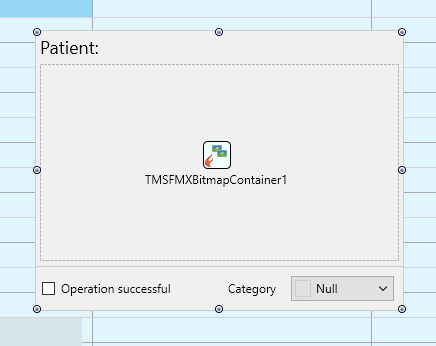
This dialog is going to be shown instead of the default dialog when editing an item. We are also going to dynamically edit the item based on dialog and vice versa. In this code snippet we are going to hide the remove button, as we don't want users to remove the scheduled patient we are going to edit.
procedure TForm1.TMSFNCPlanner1AfterOpenUpdateDialog(Sender: TObject;
  AStartTime, AEndTime: TDateTime; APosition: Integer;
  AItem: TTMSFNCPlannerItem);
begin
  TMSFNCPlanner1.GetEditingDialog(AItem.Index).ButtonRemove.Visible := False;
end;
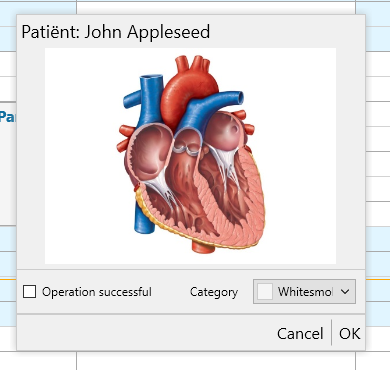
The next step is to link the item to the custom dialog. This makes sure that the properties that are available at item level are displayed in the custom dialog.
function FindChild(AContainer: TControl; AName: String): TControl;
var
  I: Integer;
begin
  Result := nil;
  for I := 0 to AContainer.ControlsCount - 1 do
  begin
    if AContainer.Controls[I].Name = AName then
    begin
      Result := AContainer.Controls[I];
      Break;
    end;
    Result := FindChild(AContainer.Controls[I], AName);
  end;
end;

procedure TForm1.TMSFNCPlanner1ItemToCustomContentPanel(Sender: TObject;
  AItem: TTMSFNCPlannerItem; AContentPanel: TControl);
var
  l: TLabel;
  c: TCheckBox;
  img: TImage;
  b: TColorComboBox;
begin
  l := FindChild(AContentPanel, 'lblPatient') as TLabel;
  l.Text := 'Patiënt: ' + AItem.Title;
  c := FindChild(AContentPanel, 'chkOperation') as TCheckBox;
  c.IsChecked := AItem.DataBoolean;
  img := FindChild(AContentPanel, 'imgPatient') as TImage;
  img.Bitmap.Assign(TMSFMXBitmapContainer1.FindBitmap(AItem.DataString));
  b := FindChild(AContentPanel, 'cboCategory') as TColorComboBox;
  b.Color := AItem.Color;
end;
procedure TForm1.TMSFNCPlanner1CustomContentPanelToItem(Sender: TObject;
  AContentPanel: TControl; AItem: TTMSFNCPlannerItem);
var
  c: TCheckBox;
  b: TColorComboBox;
begin
  c := FindChild(AContentPanel, 'chkOperation') as TCheckBox;
  b := FindChild(AContentPanel, 'cboCategory') as TColorComboBox;
  AItem.BeginUpdate;
  AItem.Color := b.Color;
  AItem.DataBoolean := c.IsChecked;
  AItem.EndUpdate;
end;
Last but not least, we need to make sure the planner picks up the dialog when clicking on the item.
procedure TForm1.TMSFNCPlanner1GetCustomContentPanel(Sender: TObject;
  AItem: TTMSFNCPlannerItem; var AContentPanel: TControl);
begin
  if Assigned(AItem) and (AItem.Resource = 1) then
    AContentPanel := Panel1;
end;
We hope this blog post gives you an insight on what is available specifically for editing planner items. There is much more to discover, so check out the demos and documentation.
Pieter Scheldeman
Bookmarks:

This blog post has received 3 comments.
2. Tuesday, May 11, 2021 at 5:55:56 AM
Likewise,any progress on demo source code that can be compiled and tested specifically on a mobile.
There is a exe demo, but it does not seem to be tailored for mobile, nor can I find the source code
Hoban Peter
 3. Tuesday, May 11, 2021 at 5:09:11 PM
Hi,
3. Tuesday, May 11, 2021 at 5:09:11 PM
Hi,The demos can be compiled for a mobile platform. Unfortunately, due to the vast majority of platforms, operating systems and different configurations for each RAD Studio we haven''t created multiple demos that target all of the above. There is simply a technical issue providing a demo that works on all of these combinations. We''ll see if we can create a demo specifically for mobile.
Pieter Scheldeman
All Blog Posts | Next Post | Previous Post
Mark Bracey